Table of Contents
Advertisement
Quick Links
Instructions
SZX2-ILLTQ/ILLTS
Quad Position / Single Position
LED Transmitted Light Illumination Base
Notes
Optical Microscope Accessory
This instruction manual is for the Olympus LED Transmitted Light Illumination Base.
To ensure the safety, obtain optimum performance and to familiarize yourself fully with the use of
this product, we recommend that you study this manual thoroughly before operating this product,
and always keep this manual at hand when operating this product.
Retain this instruction manual in an easily accessible place near the work desk for future reference.
For details of products explained in this instruction manual, see page 8.
Advertisement
Table of Contents

Related Manuals for Evident Olympus SZX2-ILLTQ


Summary of Contents for Evident Olympus SZX2-ILLTQ
- Page 1 Instructions SZX2-ILLTQ/ILLTS Quad Position / Single Position LED Transmitted Light Illumination Base Notes Optical Microscope Accessory This instruction manual is for the Olympus LED Transmitted Light Illumination Base. To ensure the safety, obtain optimum performance and to familiarize yourself fully with the use of this product, we recommend that you study this manual thoroughly before operating this product, and always keep this manual at hand when operating this product.
- Page 2 This product is applied with the requirements of standard IEC/EN61326-1 concerning electromagnetic compatibility. - Immunity Applied to industrial and basic environment requirements. NOTE: This product has been tested and found to comply with the limits for a Class A digital device, pursuant to Part 15 of the FCC Rules.
-
Page 3: Table Of Contents
SZX2-ILLTQ/ILLTS Contents Concept of this instruction manual ..................... 1 Product Concept ............................2 Safety precautions ............................3 Handling precautions..........................6 Maintenance and storage ........................7 1 Combination of the base and the stage ................8 2 Nomenclature of main operating units ................9 3 Operating procedures of each portion ................11 Turning ON the main switch and adjusting the brightness .............. -
Page 5: Concept Of This Instruction Manual
SZX2-ILLTQ/ILLTS Concept of this instruction manual This instruction manual describes only the contents related to Quad Position/Single Position LED Transmitted Light Illumination Base. When using this product, read all the instruction manuals supplied with the products (optional) you purchased together with this manual. -
Page 6: Product Concept
Product Concept Product outline This product is a LED transmitted light illumination base used with SZX16, SZX10, SZX7, SZ61, SZ51 or MVX10 system. SZX2-ILLTQ (Quad position LED transmitted light illumination base) has four illumination cartridge mounts. SZX2-ILLTS (Single position LED transmitted light illumination base) has a single illumination cartridge mount. Intended use This product is intended to used in combination as a system, refer to the instruction manual for the system product to be combined. -
Page 7: Safety Precautions
SZX2-ILLTQ/ILLTS Safety precautions If the product is used in a manner not specified by this manual, the safety of the user may be imperiled. In addition, the product may also be damaged. Always use the product according to this instruction manual. Prevention of infection ·... - Page 8 Prevention of electric shock · Never disassemble each part of this product. WARNING It could cause electric shock or failure of the product. · Do not touch the product with wet hands. In particular, if you touch the main switch of the power unit or the power cord with wet hands, electric shock, ignition or failure of the product may be caused.
- Page 9 SZX2-ILLTQ/ILLTS Safety warning symbols The following symbols are placed on the product. Study the meaning of the symbols and always use the product in the safest possible manner. Symbol Meaning Indicates a non-specific general hazard. Follow the description given after this symbol or in the instruction manual.
-
Page 10: Handling Precautions
Handling precautions General · This product is a precision instrument. Handle it with care and avoid subjecting it to a sudden or severe NOTE impact. · Never disassemble each part of this product. Otherwise, it could cause unexpected accidents or failure of the product. -
Page 11: Maintenance And Storage
SZX2-ILLTQ/ILLTS Maintenance and storage Cleaning of each unit Do not leave stains or fingerprints on the lenses and filters. If they get dirty, blow away dust with a commercially available blower and gently wipe the lens or filter with a piece of cleaning paper (or clean gauze). -
Page 12: Combination Of The Base And The Stage
Combination of the base and the stage Stage U-SRP U-SRG2 BH2-SH (Rotational stage) (Rotational stage) (Horizontal knob stage) SZH-SC SZH-SG (Cup stage) (Gliding stage) SZX-STAD1 SZH-STAD1 (BX stage adapter type 1) (Stage adapter type 1) SZX2-STADM (STAD mount for ILLT Illumination cartridge SZX2-CBF... -
Page 13: Nomenclature Of Main Operating Units
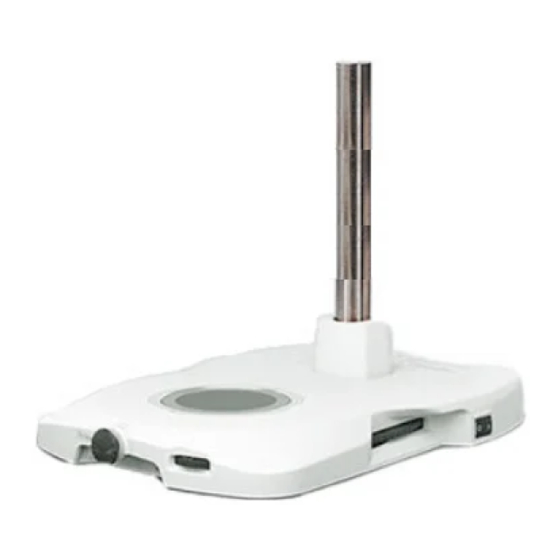
SZX2-ILLTQ/ILLTS Nomenclature of main operating units This section describes the nomenclature of main operating portions that composes the product. If the assembly is not completed yet, see “6 Assembly” (P.19) first. Quad position LED transmitted light illumination base SZX2-ILLTQ Column Reserve screw holes (2 pcs.) Diameter M6, depth 10 mm Reserve screw holes (4 pcs.) - Page 14 Single position LED transmitted light illumination base SZX2-ILLTS Column Reserve screw holes (2 pcs.) Diameter M6, depth 10 mm Reserve screw holes (4 pcs.) Diameter M4, depth 5 mm Main switch (P.11) (ON) / (OFF) Oblique illumination control knob (P.11) Brightness control knob (P.11) Stage glass (with frame)
-
Page 15: Operating Procedures Of Each Portion
SZX2-ILLTQ/ILLTS Operating procedures of each portion This section describes the basic operating procedure of each portion. Turning ON the main switch and adjusting the brightness Set the main switch A to (ON). Rotating the brightness control knob B in the direction of the arrow increases the brightness of the illumination light Changing the illumination You can select the best illumination method by changing the illumination cartridge according to the sample. -
Page 16: Adjusting For Polarization Observation
Adjusting for polarization observation The transmitted simple polarization observation is available by combining SZX2-AN (Analyzer). You can check the transmitted polarization properties (birefringence, polarization property) easily. Engage SZX2-CPO (polarization plate cartridge) in the light path. Rotate the analyzer rotation collar A to move the field of view to the position where it is completely dark (crossed nicols). -
Page 17: List Of Objectives Applicable To Each Illumination Cartridges
SZX2-ILLTQ/ILLTS List of objectives applicable to each illumination cartridges Combination where the insufficient illumination field occurs and zoom magnification SZX16 (Research high-class stereo microscope) Objective SDFPLFL SDFPLAPO SDFPLAPO 0.3X 0.5XPF 0.8X Illumination cartridge SZX2-CBFL less than 1.25X less than 0.8X —... - Page 18 Combination where the vignetting occurs in the field of view and zoom magnification SZX16 (Research high-class stereo microscope) Objective SDFPLAPO SDFPLAPO 1.6XPF 2XPFC Illumination cartridge SZX2-CBFL less than 1.25X less than 1.6X SZX2-CBF less than 1.25X less than 2X SZX2-CBFH less than 1.25X less than 2X SZX2-COB...
-
Page 19: Troubleshooting
SZX2-ILLTQ/ILLTS Troubleshooting This section describes the possible problems of this product and their remedies. If problems occur, please review the following list and take remedial action as needed. If you cannot solve the problem after checking the entire list, please contact Olympus for assistance. Problem Cause Remedy... -
Page 20: Specifications
Specifications This section describes detail specifications, such as shape, functions and performances, etc. of this product. Item Specifications Product name SZX2-ILLTQ SZX2-ILLTS SZX16 / SZX10 / SZX7 / SZ61 / SZ51 series Applicable microscope MVX10 series White light LED (built-in) Transmitted light illumination Lifetime of LED: Approx. - Page 21 SZX2-ILLTQ/ILLTS SZX2-ILLTSA (High stability adapter for ILLT) [Optional] Item Specifications Applicable base SZX2-ILLTQ or SZX2-ILLTS Applicable screw: Provided hexagon socket screw (M4) (4 pcs.) Attaching to the base (Applicable tool: Provided Allen wrench (for M4 screw)) Absolving the vibration with rubber leg Anti-vibration method Temperature applicable to anti-vibration effect with rubber leg: 15 to 40 °C This adapter can be fixed to the surface plate or the anti-vibration table equipped with screw...
- Page 22 SZX2-STADM (STAD mount for ILLT) [Optional] Item Specifications SZH-SG SZH-SC Usable stage U-SRG2 (SZX-STAD1 is necessary separately) U-SRP (SZX-STAD1 is necessary separately) BH2-SH (SZH-STAD1 is necessary separately) Attaching to SZX2-ILLTQ/ILLTS Available screw: Provided hexagon socket screw (M4) (2 pcs.) Dimension Ø125 x 19 (H) mm Weight Approx.
-
Page 23: Assembly
SZX2-ILLTQ/ILLTS Assembly This section describes the procedure to assemble each product. Attaching the column Loosen the clamping screws A (2 pcs.) of the column mount sufficiently using the provided Allen wrench. Insert the column B into the mount hole completely to the end with the Allen screwdriver storage hole C facing up. -
Page 24: Attaching The Illumination Cartridge (Optional)
When using a long AC adapter cord: Insert the binder (large or small) I provided with the base to the hole H (right or left) on the back of the base. Bundle the AC adapter cord and secure them with the binder I . Do not secure the power cord with the binder I . -
Page 25: Attaching The Photo Sheet Filter (Commercially Available)
SZX2-ILLTQ/ILLTS Return the stage glass to the original position, and attach it securely with the screwdriver B for stage glass frame. You can place the screwdriver for stage glass frame on the dent C on the back of the column. When removing the illumination cartridge, pull the illumination cartridge up and remove it. -
Page 26: Attaching The Focusing Unit (Optional)
Attaching the focusing unit (Optional) For details, refer to the instruction manual of the microscope frame.. Insert SZX2-FOFH (Coarse/fine focusing assembly for NOTE heavy load) or SZX2-RFA16 (Fluorescence focusing module) into the column by aligning the edge A of the focusing unit with the edge B of the base. -
Page 27: Attaching Szx2-Illtsa (High Stability Adapter For Illt) (Optional)
SZX2-ILLTQ/ILLTS Attaching SZX2-ILLTSA (High stability adapter for ILLT) (Optional) · You can stabilize the base and reduce the vibration by attaching SZX2-ILLTSA (High stability adapter for ILLT). · This adapter is effective for using the fluorescence observation system of SZX series or MVX10. If you use MVX10 for observation, be sure to attach SZX2-ILLTSA (High stability adapter for ILLT). - Page 28 When attaching the base to the anti-vibration table · As the rubber legs are not used, the anti-vibration effect with the rubber leg is lost. · Use the tools shown in the table below. Tool Description Allen wrench (for M4 screw) Provided with SZX2-ILLTSA Hexagon socket screw (M4) Provided with SZX2-ILLTSA...
- Page 29 SZX2-ILLTQ/ILLTS Remove the rubber legs attached to SZX2-ILLTSA (High stability adapter for ILLT) (right and left) using the Allen wrench. Securing the screws (4 pcs.) to the screw holes (4 positions) at the back of the base using the Allen wrench, attach SZX2-ILLTSA (High stability adapter for ILLT) to the base.
-
Page 30: Attaching The Stage (Optional)
Attaching the stage (Optional) Attaching SZX2-STADM (STAD mount for ILLT) Use the tools shown in the table below. Tool Description Driver for stage glass frame Provided with the base Allen wrench (for M4 screw) Provided with SZX2-STADM Hexagon socket screw (M4) Provided with SZX2-STADM ·... - Page 31 SZX2-ILLTQ/ILLTS Attaching SZX-STAD1 (BX stage adapter type 1) Use the tools shown in the table below. Tool Description Allen wrench (for M4 screw) Provided with SZX-STAD1 Hexagon socket screw (M4) Provided with SZX-STAD1 Place the notch D on the back side of the base, and secure the screws (2 pcs.) using the Allen wrench to attach SZX-STAD1 E to SZX2-STADM C .
- Page 32 Attaching SZH-SG (Gliding stage) or SZH-SC (Cup stage) Place SZH-SG D or SZH-SC E on SZX2-STADM C .
- Page 33 SZX2-ILLTQ/ILLTS Proper selection of the power supply cord If no power supply cord is provided, please select the proper power supply cord for the equipment by referring to “Specifications” and “Certified Cord” below: Caution : In case you use a non-approved power supply cord for Olympus products, Olympus can no longer warrant the electrical safety of the equipment.
- Page 34 Table 2 HAR flexible cord Approval organizations and cordage harmonization marking methods Alternative marking utilizing Printed or embossed black-red-yellow thread (Length of harmonization marking (May be color section in mm) Approval organization located on jacket or insulation of internal wiring) Black Yellow Comite Electrotechnique Belge...
- Page 36 This product is manufactured by EVIDENT CORPORATION effective as of Apr. 1, 2022. Please contact our "Service Center" through the following website for any inquiries or issues related to this product. EVIDENT CORPORATION 6666 Inatomi, Tatsuno-machi, Kamiina-gun, Nagano 399-0495, Japan...
Need help?
Do you have a question about the Olympus SZX2-ILLTQ and is the answer not in the manual?
Questions and answers