Table of Contents
Advertisement
Quick Links
Advertisement
Table of Contents

Subscribe to Our Youtube Channel
Related Manuals for Woodward SEG PCM1 Series


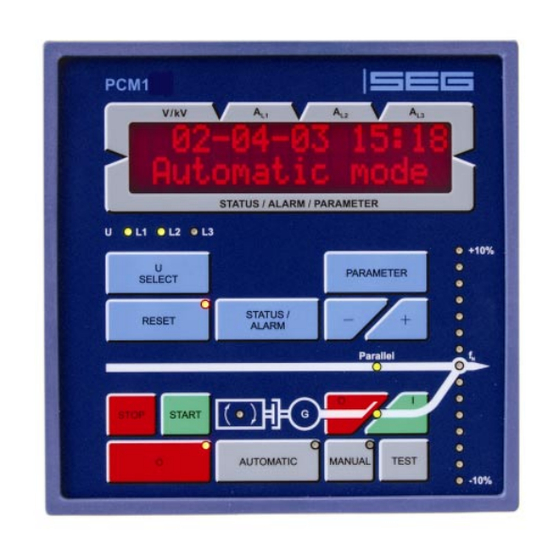
Summary of Contents for Woodward SEG PCM1 Series
- Page 1 PCM1x Packages (Pxx) Genset Control Installation Softwareversion 4.3...
-
Page 2: Table Of Contents
Contents General Information......................5 Linked Documents ........................5 Electrostatic Discharge Awareness ..................6 Housing ..........................7 Dimensions ..........................7 Panel Cut-Out ..........................8 Side view........................... 9 Installation ..........................10 Wiring Diagrams - Overview...................11 PCM1-G-..-P01 Package ......................12 PCM1-M-..-P01 Package ......................13 Connectors - Details......................14 Power Supply.......................... - Page 3 Illustrations and Tables Illustrations Figure 3-1: Housing - Dimensions ........................7 Figure 3-2: Housing - Panel-board cut-out......................8 Figure 3-3: Side view – without clamps ......................9 Figure 3-4: Side view – with clamps .......................9 Figure 4-1: Wiring diagram PCM1-G-..-P01 Package..................12 Figure 4-2: Wiring diagram PCM1-M-..-P01 Package ..................13 Figure 5-1: Power supply..........................14 Figure 5-2: Measuring inputs - Voltage –...
- Page 4 WARNING Read this entire manual and all other publications pertaining to the work to be performed before installing, operating, or servicing this equipment. Practice all plant and safety instructions and precautions. Failure to follow instructions can cause personal injury and/or property damage. The engine, turbine, or other type of prime mover should be equipped with an overspeed (overtemperature, or over- pressure, where applicable) shutdown unit(s), that operates totally independently of the prime mover control unit(s) to protect against runaway or damage to the engine, turbine, or other type of prime mover with possible personal injury...
-
Page 5: General Information
General Information Linked Documents Type English German PCM1x Packages (Pxx) this manual ! PCM1x Packages (Pxx) - Installation 37275 GR37275 PCM1x Packages (Pxx) - Configuration 37276 GR37276 PCM1x Packages (Pxx) - Function/Operation 37274 GR37274 Table 1-1: Manual - Overview Intended Use The control must only be operated according to the guidelines described in this manual. The prerequisite for a proper and safe operation of the product is correct transportation, storage, and installation as well as careful operation and maintenance. -
Page 6: Electrostatic Discharge Awareness
Electrostatic Discharge Awareness All electronic equipment is static-sensitive, some components more than others. To protect these components from static damage, you must take special precautions to minimize or eliminate electrostatic discharges. Follow these precautions when working with or near the control. Before doing maintenance on the electronic control, discharge the static electricity on your body to ground by touching and holding a grounded metal object (pipes, cabinets, equipment, etc.). -
Page 7: Housing
Housing Dimensions 32,0 mm 12,0 mm Parameterizing plug 8,0 mm 136,0 mm 111,0 mm PCMx 2002-08-06 PCx Abmessungen SEG pcmxseg-3202-ab.skf Figure 3-1: Housing - Dimensions TD_PCM1x_Packages_Installation_09.04_GB... -
Page 8: Panel Cut-Out
Panel Cut-Out h' h H Figure 3-2: Housing - Panel-board cut-out Measure Description Tolerance Height Total 144 mm Panel cut-out 138 mm + 1.0 mm Housing dimension 136 mm Width Total 144 mm Panel cut-out 138 mm + 1.0 mm Housing dimension 136 mm Depth... -
Page 9: Side View
Side view Cabinet Cabinet Front frame Front frame Housing Housing Mounting cones Mounting cones Mounting clamp Figure 3-3: Side view – without clamps Figure 3-4: Side view – with clamps TD_PCM1x_Packages_Installation_09.04_GB... -
Page 10: Installation
Installation For installation into a panel door please proceed as follows: Panel cut-out Cut out the panel according to the dimensions in Figure 3-1. Insert control into cut-out Move housing into panel Insert the control into the panel cut-out. Verify that the control fits correctly in the cut-out. -
Page 11: Wiring Diagrams - Overview
Wiring Diagrams - Overview WARNING A circuit breaker must be provided near to the control and in a position easily accessible to the operator. This must also bear a sign identifying it as an isolating switch for the control. NOTE Connected inductances (e. -
Page 12: Pcm1-G
PCM1-G-..-P01 Package Analog input 4 [T4] Pt100 Analog output 0/4-20 mA Analog input 3 [T3] 0/4-20 mA RS232 interface Engine level Analog input 2 [T2] 0/4-20 mA CAN-L Analog input 1 [T1] CAN-H 0/4-20 mA CAN bus interface Guidance level Termination Pickup switching/inductive... -
Page 13: Pcm1-M
PCM1-M-..-P01 Package Analog input 4 [T4] Analog output Pt100 0/4-20 mA Analog input 3 [T3] 0/4-20 mA RS232 interface Engine level Analog input 2 [T2] 0/4-20 mA CAN-L Analog input 1 [T1] CAN-H 0/4-20 mA CAN bus interface Guidance level Termination Pickup switching/inductive... -
Page 14: Connectors - Details
Connectors - Details Power Supply 9.5..32 Vdc D1 = P600M C1 = 47.000 uF / 40 V for 12 V DC systems 0 Vdc Power supply 9.5..32 Vdc 9.5..32 V DC (in normal operation) (min. 12 V DC to start) Figure 5-1: Power supply Terminal Description... -
Page 15: Figure 5-3: Measuring Inputs - Voltage - Busbar
Busbar/Remanence Asynchronous Remanence voltage Synchronous Busbar voltage Figure 5-3: Measuring inputs - Voltage – Busbar Terminal Measure- Description ment Synchronous generators (standard) 400 Vac or Busbar voltage L1 2.5 mm² ../120 Vac Busbar voltage L2 2.5 mm² Induction (asynchronous) generators (special option) Remanence voltage L1 2.5 mm²... -
Page 16: Current
5.2.2 Current WARNING Before disconnecting the secondary terminals of the transformer or the connections of the transformer at the control, make sure that the transformer is short-circuited. NOTE Current transducers are generally to be earthed secondarily and on one side. Generator Detail: Connection of the transducers... -
Page 17: Figure 5-6: Measuring Inputs - Current - Mains - Via Transformer
Mains (Mains Current Measuring Via Transformer) s1 (k) Mains current ../1A or ../5 A s2 (l) Figure 5-6: Measuring inputs - Current - Mains – via transformer Terminal Measure- Description ment Transformer Mains current L1, transformer terminal s2 (l) 2.5 mm² ../1A o. -
Page 18: Discrete Inputs
Discrete Inputs CAUTION Please note that the maximum voltages which may be applied at the discrete inputs are defined as follows. Voltages higher than those specified destroy the hardware! Maximum input range: 4-40 Vdc. 5.3.1 Control Inputs +/-4..40 Vdc Signal device Discrete input Reply Discrete input... -
Page 19: Alarm Inputs
5.3.2 Alarm Inputs The discrete inputs can be connected in positive or negative logic: • positive logic The discrete input is wired to 4-40dc. • negative logic The discrete input is wired to GND. Positive Logic +/-4..40 V DC Signal device Digital input Figure 5-9: Discrete inputs –... -
Page 20: Figure 5-10: Discrete Inputs - Alarm Inputs - Negative Logic (Example)
Negative Logic +/-4..40 Vdc Discrete input Signal device Figure 5-10: Discrete inputs – Alarm inputs - negative logic (Example) Associated Terminal Description Common (according to DIN 40 719 Part 3, 5.8.3) Discrete input [D01] - Alarm input 2.5 mm² - in Sprinkler operation: EMERGENCY STOP Discrete input [D02] 2.5 mm²... -
Page 21: Operation Mode Selection Via Di (Package P01, From V4.3010)
5.3.3 Operation Mode Selection Via DI (Package P01, from V4.3010) This package enables to select the operation mode using the terminals 127 and 128 externally from 4.3010. The discrete inputs can be connected using positive or negative logic as described above. Terminal Associated Description... -
Page 22: Analog Inputs (Packages P01)
Analog Inputs (Packages P01) Analog input 0/4..20 mA Analog input Pt100 Analog input VDO 0..180/380 Ohm Figure 5-11: Analog inputs - Package P01 Terminal Description (according to DIN 40 719 Part 3, 5.8.3) Analog input 1 [T1] 1.5 mm² 0/4-20 mA, configurable function: - Alarm input or - Set value input or - Actual value input... -
Page 23: Pick-Up
Pick-Up sw./ind. 24 V Pickup switching/inductive < 1.0 V Figure 5-12: Pickup Terminal Description switching/inductive 2.5 mm² Pickup 2.5 mm² GND 2.5 mm² Table 5-13: Pickup - terminal assignment Specification of the input circuit for inductive speed sensors Ambient temperature: 25 °C Signal shape Sinusoidal Minimum input voltage in the range of 200-10,000 Hz... -
Page 24: Relay Outputs
Relay Outputs 5.6.1 Controller Outputs max. 250 V AC Command: close GCB Command: close MCB Command: open MCB Enable GCB Figure 5-14: Relay outputs – Controller outputs – CB activation Description Make cont. 14/15 Command: close GCB 2.5 mm² 16/17 [PCM1-M] Command: close MCB 2.5 mm²... -
Page 25: Analog Outputs (Package P01)
Analog Outputs (Package P01) Analog output Figure 5-16: Analog outputs Description Analog output [A1] - 0/4-20 mA 1.5 mm² Analog output [A2] - 0/4-20 mA 1.5 mm² Table 5-17: Analog outputs - terminal assignment Controller Outputs 5.8.1 Multi Functional Controller Outputs (Package P01) The multi functional controller outputs can changed by configuration and an external jumper. -
Page 26: Figure 5-17: Three-Position Controller - External Rc Wiring For Relay Manager
Wiring Of Controller - Setting: THREE-POSITION (Three-position controller) 100 Ohms max. 250 Vac 3,3nF/1000V Relay output Figure 5-17: Three-position controller – external RC wiring for relay manager Terminal Description Speed / Frequency / Real power 2.5 mm² higher (RM: "+" = 114, "-" = 115) or 2.5 mm²... -
Page 27: Figure 5-18: Analog Controller Output N/F/P - Wiring And External Jumper Setting
- Setting: ANALOG or PWM (Analog controller) - Frequency-/Power controller Speed / power controller Speed / power controller Speed / power controller Figure 5-18: Analog controller output n/f/P – Wiring and external jumper setting Type Terminal Description 2.5 mm² 2.5 mm² Current 2.5 mm²... -
Page 28: Interface
Interface 5.9.1 Interface Wiring Figure 5-20: Interface – Terminals Wiring Description Whether the terminals are designated X or Y depends on the configuration of the system. Please refer to the wiring diagram (A = X/Y, B = X/Y, etc.) A (X1) B (X2) C (X3) D (X4) -
Page 29: Loop The Can Bus
5.9.3 Loop The CAN Bus NOTE Please note that the CAN bus must be terminated with an impedance which corresponds to the wave impedance of the cable (e.g. 120 Ohm). The Engine CAN bus is terminated between CAN-H and CAN-L. X1 X2 X3 Abschluß- Abschluß-... -
Page 30: Technical Data
Technical Data Name plate ------------------------------------------------------------------------------------------------------------------------------------------------------------------ 1 S/N serial number (numeric) 2 S/N manufactured date (YYMM) 3 S/N serial number (as Barcode) 4 P/N item number 5 REV item number revision 6 P/N+REV item number + revision (Barcode) 7 Type description 8 Type description (as Barcode) 9 Details... - Page 31 Discrete inputs -------------------------------------------------------------------------------------------------------------------------------------- galvanically isolated Input range (U ) ..........Rated voltage 12/24 Vdc (6-32 Vdc) Cont, digital input Input resistance..................approx. 6.8 kΩ Relay outputs --------------------------------------------------------------------------------------------------------------------------------------------------------- potential free Contact material ....................AgCdO General purpose (GP) (U Cont, relay output AC .........2.00 Aac@250 Vac DC ...........2.00 Adc@24 Vdc 0.36 Adc@125 Vdc...
- Page 32 Interface ----------------------------------------------------------------------------------------------------------------------------------------------------------------------------------------------- Service interface Version......................RS232 Signal level......................5 V Level conversion and insulation by using FL-CABLE-RS232 CAN bus interface isolated Insulation voltage ..................1,500 Vdc Version......................CAN bus Internal line termination................Not available Battery (Packages P01) ----------------------------------------------------------------------------------------------------------------------------------------------------------------- Type........................NiCd Durability (at operation without power supply)..........approx. 5 years Battery field replacement ................not possible Housing ------------------------------------------------------------------------------------------------------------------------------------------------------------------------------------------------- Type..................APRANORM DIN 43 700...
-
Page 33: Accuracy
Accuracy Measuring values Display and ranges Accuracy Notes Frequency Generator 15.0-85.0 Hz Busbar 15.0-85.0 Hz Mains 40.0-85.0 Hz Voltage Generator 0-400 V Transformer ratio adjustable 0-400 V Busbar 0-400 V Transformer ratio adjustable Mains 0-400 V Transformer ratio adjustable 0-400 V Current Generator 0-9,999 A... - Page 34 Woodward SEG GmbH & Co. KG Krefelder Weg 47 ⋅ D – 47906 Kempen (Germany) Postfach 10 07 55 (P.O.Box) ⋅ D – 47884 Kempen (Germany) Phone: +49 (0) 21 52 145 1 Internet Homepage http://www.woodward-seg.com Documentation http://doc.seg-pp.com Sales Phone: +49 (0) 21 52 145 635 ⋅ Telefax: +49 (0) 21 52 145 354 e-mail: kemp.electronics@woodward.com...
Need help?
Do you have a question about the SEG PCM1 Series and is the answer not in the manual?
Questions and answers