Porsche Mobile Charger Connect Driver Manual
Hide thumbs
Also See for Mobile Charger Connect:
- User manual ,
- Driver manual (1111 pages) ,
- Operating manual (521 pages)
Table of Contents
Advertisement
Quick Links
Advertisement
Table of Contents

Related Manuals for Porsche Mobile Charger Connect


Summary of Contents for Porsche Mobile Charger Connect
- Page 1 Porsche Mobile Charger Connect Good to know – Driver’s Manual...
- Page 2 Because of different legal requirements in individual countries, the equipment in your vehicle may vary 70435 Stuttgart Germany from what is described in this manual. If your Porsche Germany is fitted with any equipment not described in this Driver’s Manual...
- Page 3 About this Driver's Manual 1. If an instruction comprises several steps, these are numbered. Warnings and symbols 2. Instructions that you must follow on the cen- Various types of warnings and symbols are used in tral display. this Driver's Manual. g Notice on where you can find further important Serious injury or death DANGER...
-
Page 4: Table Of Contents
Table of contents Using the web application..... . . 26 Charging dock........33 To the Driver's Manual Malfunctions. -
Page 5: To The Driver's Manual
Operate the charger within a temperature ded, particularly the warnings and to your Porsche ID account, which is available from range from -30 °C to+50 °C. safety instructions. the Porsche Connect distributor in selected markets. -
Page 6: Security
Protect electrical sockets and plug connections ance with the relevant standards and regulations. sions, fires or burns. against moisture, water and other liquids. Porsche recommends that you use a certified Only use accessories, e.g. power supply and ve- Porsche service partner. Flammable or explosive... -
Page 7: Proper Use
Porsche recom- priate for your installation. Porsche recommends mends that you use a certified Porsche service that you use a certified Porsche service partner . partner . – On delivery, the charging current is automatically –... -
Page 8: Scope Of Supply
If you lose the access data that is valid upon delivery of your device, e.g. the preset PIN and the initial Personal Identification password, please contact your Porsche partner . number − Have the serial number of the charger ready. - Page 9 In the Web Application: Settings e Maintenance – e Information Porsche ID When the charger is paired to your Porsche ID , infor- mation about the charger and the charging processes can be displayed in My Porsche and in the Porsche Connect App .
-
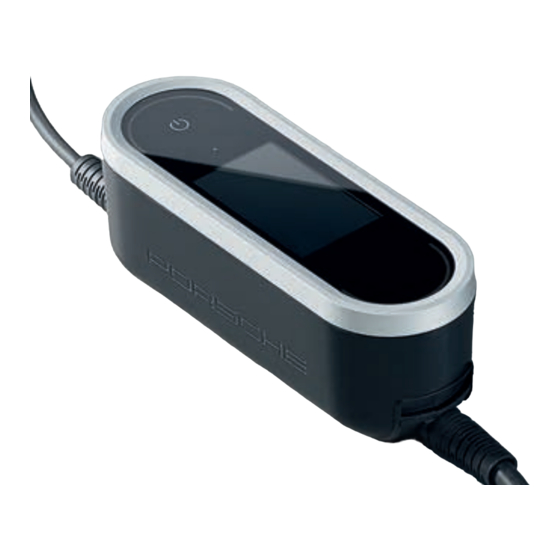
Page 10: Overview
Overview Overview Charger control unit Display panel displays and controls Connections on the control unit Fig. 3: Control unit Fig. 4: Charger display Power button Status bar Fig. 2: Connections on the control unit Status LEDs Information area Supply cable Display Menu bar Vehicle cable The charger can be switched on and off using the A brightness sensor controls the brightness of the... - Page 11 Overview Skip Symbol Meaning Symbol Meaning WiFi connection availa- Display information about the current charging process Server connection available Display charging history Downloading software Configuring settings Connection to PLC net- A software update is work available available. Hotspot activated Control options A charging profile is ac- tivated in the vehicle.
-
Page 12: Selecting The Installation Location
Selecting the installation location Selecting the installation lo- – Do not install the basic wall mount or charging dock in stables, livestock buildings or places cation where ammonia gases occur. Electric shock, fire – Install the basic wall mount or charging dock on DANGER a smooth surface. -
Page 13: Tools Required
Tools required Tools required – Spirit level – Power or hammer drill – Screwdriver... -
Page 14: Installing
Installing Installing Installing the connector fastener Installing the wall mount Installing the basic wall mount Fig. 8: Drilling dimensions Fig. 7: Distance between wall mount and connector fastener 1. Remove the connector fastener 1 (Fig. 8) from the cover 2 (Fig. 8). When installing the connector fastener, ensure a dis- 2. -
Page 15: Installation Without Spacer
Installing Attaching the control unit to the wall Installation without spacer mount Fig. 11: Screwing charging dock to assembly plate 4. Screw the charging dock to the assembly plate. Fig. 10: Drilling dimensions Installation with spacer Fig. 9: Attaching the control unit 1. Mark the drill holes on the wall. 1. - Page 16 Installing 1. Mark the drill holes on the wall. 2. Drill the mounting holes and insert wall plugs. 3. Screw the assembly plate and spacer to the wall. Fig. 13: Screwing charging dock to assembly plate 4. Screw the charging dock to the assembly plate.
-
Page 17: Set Up
When driving abroad, always carry the appropriate supply cable with you for use in the country you are visiting. 1. Time of printing. Further information is available from your Porsche partner or your local electricity supplier. - Page 18 WCZ8 20 A NEMA 6-50 CEE 7/5; CEE 7/7 Type E/type F (Safety plug) IEC 60309-2 BS 1363 CEE 230 V/16 A Type G 1. Time of printing. Further information is available from your Porsche partner or your local electricity supplier.
- Page 19 Set up NEMA 6-50/NEMA 14-50 (additional infor- Requirements for power socket mation) Unsuitable mains sockets DANGER AS 3112 Information Type I An unsuitable mains socket can cause a short circuit, Scope electric shock, explosion, fire, or burns. This usage recommendation applies only to regions Only use only a type of mains socket that is with NEMA 6-50/NEMA 14-50 standard.
- Page 20 The cable must have a 50-amp fuse. Only use copper cables with a minimum cross- section of 8 AWG, or preferably 6 AWG. 1. Time of printing. Further information is available from your Porsche partner or your local electricity supplier.
-
Page 21: Initial Operation And Configuration
Set up Initial operation and configuration Disconnecting cables Securing cables Start-up Configure the following settings before starting to use the charger for the first time. Information − Options marked Skip can be skipped. A setting is not configured in this case. −... - Page 22 2. Start the connection process on the PLC modem. manually. cesses can be displayed in My Porsche and in the Confirm by pressing OK on the charger. Once the download is complete, the installation Porsche Connect app.
-
Page 23: Starting With The Web Application
– Access data for your user profile (to link it with g Refer to the Porsche Mobile Charger Connect Oper- charger. Use Plus and Minus to do this. your Porsche ID) g Refer to chapter "Charging current limiting" on ating Manual for details about setting up the charger. - Page 24 Set up Charge status The colour used on the dashboard indicates the charge status of the charger: – Red: Error message – Blue: Charging paused – Green: Vehicle is charging – White: No vehicle connected to charger Fig. 17: Dashboard of the web application Current charging process Shows information on the current charging proc- ess, such as the start time and duration of charg-...
-
Page 25: Operating
Do not open the charger housing. Refer to chapter "Malfunctions" on page 35. NOTICE Damage to the charger 1. Time of printing: Further information is available from your Porsche partner. - Page 26 − An overtemperature switch-off feature prevents on delivery when domestic electrical outlets are used. information is available from your Porsche partner. overheating while charging. If the charger is connected to an energy manager, the charging current is limited in line with the val-...
-
Page 27: Logging Into The Web Application
Mobile Charger Connect . With consent, a one- play. Plug & Charge time pairing of the vehicle with the Mobile Charger... -
Page 28: Using The Web Application
Your device and the charger are located in the using a Web Application designed specifically for g For information on the web application, see the same WiFi network. each charger. manual at https://www.porsche.com/international/ 1. Open your browser. aboutporsche/e-performance/help-and-contact/ Information 2. In the browser address bar: Enter the IP address −... - Page 29 Operating – the hotspot and then access the Web Application Consumption Information of the charger. In the Web Application, you can inte- – Cost (if an energy manager is connected) If your device is in a home network, it can no lon- grate the charger in the home network at any time.
- Page 30 Operating 1. Select Configure hotspot. Managing WiFi networks Information 2. In Settings, enter the network name and security If your device is in a home network, it can no lon- Option Explanation code of the hotspot. ger access the Web Application via the hotspot IP Other network For information on establishing a hotspot con- address (192.168.0.1), but only via the automatically...
- Page 31 1. In the web application of the charger, navigate to EEBus device" in the web application instructions for Connections e Energy manager. a. Select option Establish connection with the Porsche Home Energy Manager. PLC security code. The security code is dis- �� The connected energy manager is shown played.
- Page 32 System Information The guest user will not be able to configure the charger. To transfer data to your Porsche ID account, the de- Demo mode vice must be connected to the Internet. Controlling energy consumption This setting is only visible to the Customer service user.
- Page 33 Operating Enter date and time Ground monitoring Display Explanation Electric shock, short cir- DANGER Field Explanation cuit, fire, explosion Mains phases Number of phases in the supply cable. Date and time When there is a net- Use of the charger without active ground monitoring work connection, the can cause electric shocks, short circuits, fire, explo- Cable type...
- Page 34 Internet connection. version number, serial number and host name. The password protects your data and must be Your Porsche service partner will need this data in Update automatically entered when you import or restore the backup. the event of an error message.
-
Page 35: Charging Dock
Operating Charging dock Attaching the control unit to the charg- Resetting to factory settings ing dock and removing it from the If you activate this function, all personal data and charging dock configurations, e.g. charging history and network set- tings, are deleted. Moreover, all passwords will be NOTICE reset to the initial passwords indicated in the letter containing your access data. - Page 36 Operating 3. Guide the vehicle cable through the opening A (Fig. 19) and wrap any excess cable around the charging dock. 4. Insert the supply cable into the electrical socket. 5. Close the door of the charging dock. Removing the control unit from the charg- ing dock Fig. 20: Attaching the control unit 1.
-
Page 37: Malfunctions
Remedy qualified electrician. Porsche recommends that you use a certified Porsche service partner. In the event of faults or malfunctions, the charger shows a corresponding message on the display. The The following overview contains recommendations status LEDs and the Power button light up red. - Page 38 Malfunctions Situation Recommended action The charging current is too low (message on display). The home network is overloaded. Switch off other higher electrical loads. The mains voltage is too high (message on display). Have the domestic installation checked by a qualified electrician. The charger is not within the permitted temperature range (message on display).
-
Page 39: Transport
Transport Transport Unsecured load WARNING An unsecured, incorrectly secured or incorrectly posi- tioned charger can slip out of place and endanger the vehicle occupants during braking, acceleration, direction changes or in accidents. Never transport the charger unsecured. Always transport the charger in the luggage compartment, never in the passenger compart- ment (e.g. -
Page 40: Cleaning And Maintenance
Cleaning and maintenance Cleaning and maintenance Check the charger for damage and soiling at regular intervals and clean it if necessary. Electric shock, fire DANGER Risk of serious or fatal injury due to fire or electric shock. Never immerse the charger or plugs in water or spray them directly with water (e.g. -
Page 41: Disposal
Electrical/electronic devices must be handed in at a collection point or waste management facility. Do not throw electrical/electronic devices in with household waste. Dispose of electrical/electronic devices in ac- cordance with the applicable environmental pro- tection regulations. If you have questions about disposal, contact a Porsche partner. -
Page 42: Technical Data
Technical Data Technical Data Electrical data 9Y0.971.675... MCC72E2 A MCC11E3 A MCC22E3 A Power 7.2 kW 11 kW 22 kW Rated current 16 A, 2-phase 16 A, 3-phase 32 A, 3-phase 32 A, 1-phase Mains voltage 100 – 240 V/400 V 100 –... - Page 43 Technical Data Mechanical data for basic wall mount 9Y0.971.675... MCC72E2 A MCC11E3 A MCC22E3 A Basic wall mount dimensions 385 mm x 135 mm x 65 mm (length x width x height) Weight of basic wall mount approx. 0.45 kg Cable guide dimensions 127 mm x 115 mm x 139 mm (length x width x height) Weight of cable guide...
-
Page 44: Identification Plate
Telephone: +971 4 305 8555 frastructure (e.g.. VDE 0702), please re- fer to https://www.porsche.com/international/ac- cessoriesandservice/porscheservice/vehicleinforma- tion/documents/or contact a Porsche partner. Declaration of conformity Fig. 22: Identification plate (example) The charger has a radio system. Product name... - Page 45 Technical Data Great Britain Singapore 069046 Porsche Cars Great Britain Ltd. Baixo Road Calcot, Reading, Berkshire RG31 7SE United Kingdom Russland Porsche Russia Ленинградское шоссе дом 71A, строение 10 125445, Москва, Россия Telephone: +7-495-580-9911 Singapur: Porsche Singapore Porsche Asia Pacific Pte Ltd...
-
Page 46: Index
Index Index Charging times....... . . 24 Establishing network connections Hotspot. - Page 47 Porsche ID........7...
Need help?
Do you have a question about the Mobile Charger Connect and is the answer not in the manual?
Questions and answers