
Subscribe to Our Youtube Channel
Related Manuals for Polar Electro GL180-A


Summary of Contents for Polar Electro GL180-A
- Page 1 Cabinet Refrigerator/ Freezer Instruction manual Model: GL180-A / GL181-A GL180-A_GL181-A_A5_v1_20220412.indb 1 GL180-A_GL181-A_A5_v1_20220412.indb 1 2022/4/12 10:24 2022/4/12 10:24...
-
Page 2: Safety Instructions
Telephone Helpline: 1300225960 Safety Instructions • Position on a flat, stable surface. • A service agent/qualified technician should carry out installation and any repairs if required. Do not remove any components or service panels on this product. • Consult Local and National Standards to comply with the following: - Health and Safety at Work Legislation - Fire Precautions... -
Page 3: Caution Risk Of Fire
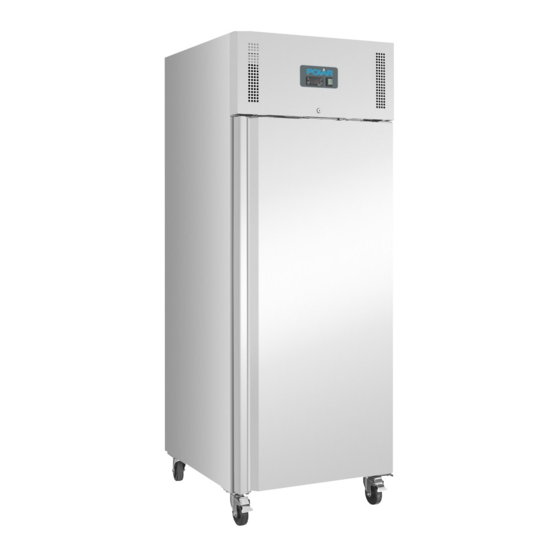
Product Description GL180-A - Single Door Bakery Fridge GL181-A - Single Door Bakery Freezer Introduction Please take a few moments to carefully read through this manual. Correct maintenance and operation of this machine will provide the best possible performance from your POLAR product. -
Page 4: Installation
Telephone Helpline: 1300225960 Pack Contents Reversing the door The following is included: Depending on the location of the appliance, it may be necessary to change the direction the door • POLAR Refrigerator or Freezer opens by changing the side of the door handle. •... -
Page 5: Lock/Unlock The Doors
Telephone Helpline: 1300225960 Lock/Unlock the Doors Turn On A lock is fitted to the doors to ensure foodstuffs 1. Ensure the power switch is set to [O] and turn are kept secure within your POLAR appliance. on at the socket. Use the keys provided to lock/unlock the doors. -
Page 6: Cleaning, Care And Maintenance
Telephone Helpline: 1300225960 Cleaning, Care & Maintenance Defrost appliance at least every 3 months, more often if required. Switch off and disconnect from the power supply before cleaning. • Clean the interior of the appliance as often as possible. • Do not use abrasive cleaning agents. -
Page 7: Troubleshooting
Capacity Dimensions Weight Model Voltage Power Current Refrigerant Range (litres) H x W x D mm (kg) GL180-A 220-240V~ 330W 2.0A 2°C ~ 8°C R290 95g 2010 x 740 x 990 50Hz GL181-A 700W 4.9A -22°C ~ -18°C R290 90g 2010 x 740 x 990 GL180-A_GL181-A_A5_v1_20220412.indb 7... -
Page 8: Electrical Wiring
Telephone Helpline: 1300225960 Electrical Wiring The plug is to be connected to a suitable mains socket. This appliance is wired as follows: • Live wire (coloured brown) to terminal marked L • Neutral wire (coloured blue) to terminal marked N •... - Page 9 The door originally opens from the left side. To reverse the door: 1. Remove the 2 screws fixing the control panel, then open the panel. 2. Remove the right upper hinge and left upper hinge. (Tool: socket spanner) 3. Remove the spring hinge on the right top. 4.
- Page 10 5. Reverse the door. Install the previously removed spring hinge on the left top and auxiliary hinge on the left bottom. 6. Remove the castor support board, right front castor, and left front castor consecutively. Then install back the right castor. (Tool: socket spanner) 7.
-
Page 11: Declaration Of Conformity
DocuSign Envelope ID: 4C65E7CB-4A12-4559-810F-D939EAAAF261 DECLARATION OF CONFORMITY • Conformiteitsverklaring • Déclaration de conformité • Konformitätserklärung • Dichiarazione di conformità • • Declaración de conformidad Equipment Type • Uitrustingstype • Type d'équipement • Gerätetyp Model • Modèle • Modell • Modello •... - Page 12 http://www.polar-refrigerator.com/ GL180-A_GL181-A_A5_v1_20220412 GL180-A_GL181-A_A5_v1_20220412.indb 12 GL180-A_GL181-A_A5_v1_20220412.indb 12 2022/4/12 10:24 2022/4/12 10:24...
Need help?
Do you have a question about the GL180-A and is the answer not in the manual?
Questions and answers