
Related Manuals for Pop-A-Shot PASPUG22


Summary of Contents for Pop-A-Shot PASPUG22
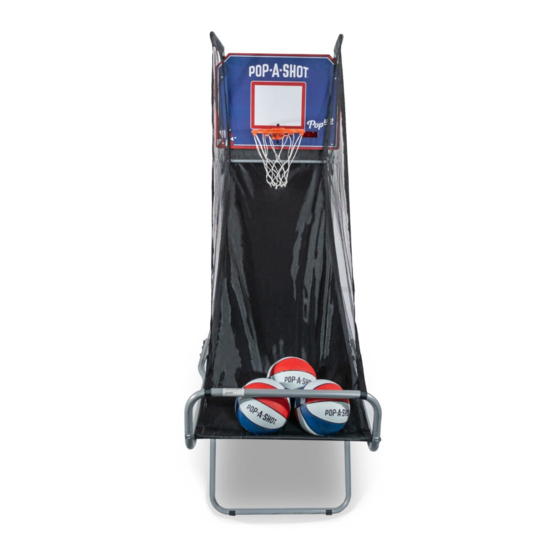
- Page 1 POP-UP A S S E M B L Y I N S T R U C T I O N S Model: PASPUG22 REV 6/17/22 support@popashot.net www.popashot.net...
- Page 2 Warranty As described in and as limited by this Warranty, Pop-A-Shot Enterprise, LLC (the “Company”) warrants this product to be free from defects in workmanship and materials for a period of 90 days from the date of original purchase. The term defects shall mean any imperfections that impair the use of the product.
-
Page 3: During Assembly
• We recommend working on a soft, non-marring surface such as carpet or the cardboard box your game came in. • Like most things in life, putting together a Pop-A-Shot is better with a friend. If you can’t find someone to help the entire time, we’ll point out those steps when two people are especially helpful. - Page 4 POP-UP PARTS Base Frame Backboard Brace Instruction Part ID# Part Name Part # Part Image Step Used In Part Quantity PUG001 PUG002 STEPS 1 & 5 STEPS 3, 4 & 9 Rear Cross Tube Rear Brace Arm Top Tube Left & Right Left &...
-
Page 5: Included Tools
POP-UP HARDWARE & ACCESSORIES Long Bolt Short Bolt Washer PUG025 PUG026 PUG029 STEPS 2, 3, & 5 STEP 7 STEPS 2, 3, 5, 7, 9, 10 & 11 Small Screw Backboard Brace Pin PUG030 PUG019 PUG020 STEPS 2, 3, 5, 7, 9, 10 & 11 STEP 8 STEP 3 Wrench... - Page 6 STEP 1 ID# Name Qty. Base Frame Unfold the legs of the (#1) Base Frame and fully extend them until the frame can stand on its own. The legs that bow inward should be in the front. FRONT ID# Name Qty.
- Page 7 ID# Name Qty. STEP 3 Backboard Brace Note: Spring Lock Rear Brace Arm should face rear on Left & Right (#2) Backboard Brace. Rear Cross Tube Long Bolt Washer Backboard Brace Pin Secure the (#2) Backboard Brace to the (#3) Rear Brace Arm through the (#5) Rear Cross Tube.
- Page 8 STEP 5 ID# Name Qty. Base Frame Front Arm Tube Left & Right Long Bolt Washer Attach the (#6) Front Arm Tube to the front of the (#1) Base Frame using a (#15) Long Bolt, one (#17) Wash- er on each side & (#18) Nut. Both tubes should narrow toward the center of the game when attached prop-...
- Page 9 STEP 7 Attach the (#8) Rim to the (#10) Note: If the net Backboard using a (#16) Short Bolt, is not attached ID# Name Qty. properly, scoring one (#17) Washer on each side & can be affected. (#18) Nut. After installing the (#8) Rim, attach the (#9) Net, making sure the longer strands are on top.
- Page 10 STEP 9 ID# Name Qty. Attach the (#10) Backboard to the (#2) Backboard Braces Backboard Brace using a (#28) Extra Long Bolt, one (#17) Washer on each Backboard side & (#18) Nut. Do not secure the bottom two bolts Extra Long Bolt because they will be used to attach the (#11) Ball Return Washer...
- Page 11 STEP 11 HOW TO PLAY • Flip switch to “ON” on the bottom ID# Name Qty. rear of the scoreboard. • Baskets are 2 points until final 0:10 Ball Return Ramp when they are 3 points. • Bonus: 0:15 extra at 30 points Front Cross Tube READY •...
- Page 12 HOW TO FOLD UP STEP 3 (Continued) STEP 4 Remove the lock- ing pins from the backboard brace and then fold the backboard down toward the center of the game. Push in the spring locks on the rear of the top tubes and turn each toward the inside of the game.
Need help?
Do you have a question about the PASPUG22 and is the answer not in the manual?
Questions and answers