Advertisement
Quick Links
Advertisement

Related Manuals for Pop-A-Shot PRO Ι SINGLE


Summary of Contents for Pop-A-Shot PRO Ι SINGLE
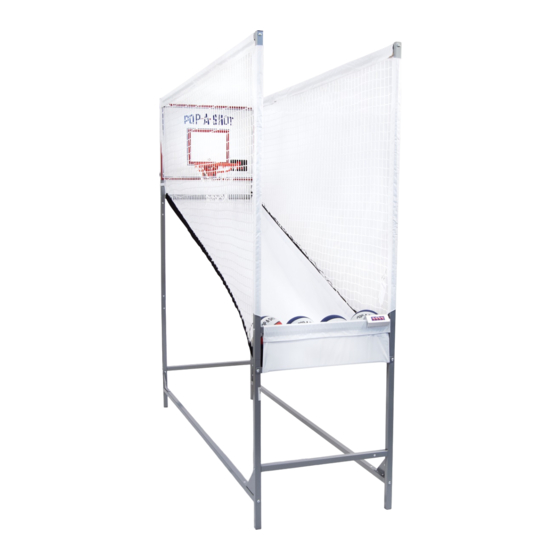
- Page 1 PRO Ι SINGLE SKU# PASPRO19-01 WWW.POP-A-SHOT.NET...
-
Page 2: Parts List
AC Adapter Ball Return Ramp Control Panel Balls Short Screw Long Screw Washer Pump Rim Bolt Rim Washer Rim Nut Scoring Bolt Parts #17, #18 and #21 are in brown box Screws WWW.POP-A-SHOT.NET Pop-A-Shot Pro I Single Page 2/14 SKU# PASPRO19-01... -
Page 3: Frame Assembly
POP-A-SHOT PRO SINGLE ® FRAME ASSEMBLY WWW.POP-A-SHOT.NET Pop-A-Shot Pro I Single Page 3/14 SKU# PASPRO19-01... - Page 4 Connect the other end of the Rear Vertical Tube, Middle (#2) to the Rear Vertical Tube, Bottom (#3) and tighten with a Short Screw (#23) and Washer (#25). Repeat with the other 1, 2 and 3 tubes. Fig 2A WWW.POP-A-SHOT.NET Pop-A-Shot Pro I Single Page 4/14 SKU# PASPRO19-01...
- Page 5 Connect the Lower Side Tube, Rear (#10) to the STEP 4 Lower Side Tube, Front (#11) and tighten with a Short Screw (#23) and Washer (#25). Repeat with the other 10 and 11 tubes. WWW.POP-A-SHOT.NET Pop-A-Shot Pro I Single Page 5/14 SKU# PASPRO19-01...
- Page 6 Attach an Upper Side Tube, Front (#9) to a STEP 6 Front Vertical Tube, Top (#4) using a Long Screw (#24) and Washer (#25). Repeat with the other 9 and 4 tubes. Opposite side view Pop-A-Shot Pro I Single WWW.POP-A-SHOT.NET Page 6/14 SKU# PASPRO19-01...
- Page 7 Attach a Lower Side Tube, Rear (#10) to a STEP 8 Rear Vertical Tube, Bottom (#3) using a Long Screw (#24) and Washer (#25). Repeat with the other 10 and 3 tubes. Pop-A-Shot Pro I Single WWW.POP-A-SHOT.NET Page 7/14 SKU# PASPRO19-01...
- Page 8 Attach a Horizontal Tube (#7) to both Rear Vertical Tubes, STEP 10 Bottom (#3) using Long Screws (#24) and Washers (#25). Attach another Horizontal Tube (#7) to both Rear Vertical Tubes, Top (#1) using Long Screws (#24) and Washers (#25). Pop-A-Shot Pro I Single WWW.POP-A-SHOT.NET Page 8/14 SKU# PASPRO19-01...
- Page 9 Attach the Rim (#16) to the Backboard (#14) using a Rim Bolt (#27) and a Rim Washer (#28) on the front and a Rim Washer (#28) and Rim Nut (#29) on the back. WWW.POP-A-SHOT.NET Pop-A-Shot Pro I Single Page 9/14 SKU# PASPRO19-01...
- Page 10 (Fig 10B) and screwed all the way into the Backboard (Fig 10C). AC Adapter Fig 10C Put 4 AA Batteries into Scoring Unit (#18) and/or plug in AC Adapter (#19) to Scoring Unit (#18). WWW.POP-A-SHOT.NET Pop-A-Shot Pro I Single Page 10/14 SKU# PASPRO19-01...
- Page 11 Tip: If you can, grab a helper for this part. STEP 14 Attach the Backboard (#14) to the Rear Vertical Tubes, Top (#1) using Long Screws (#24) and Washers (#25). WWW.POP-A-SHOT.NET Pop-A-Shot Pro I Single Page 11/14 SKU# PASPRO19-01...
- Page 12 Pull the ramp under the Horizontal Tube (#7) under the Backboard and attach the tabs to the Bolts of the Backboard. Connect the Velcro straps around the Rear Vertical Tubes, Middle (#5)) WWW.POP-A-SHOT.NET Pop-A-Shot Pro I Single Page 12/14 SKU# PASPRO19-01...
- Page 13 “Control Panel” in the Scoring Unit. Tip: You’ll find complete game directions and operations in this booklet. The “Cheat Sheet” is intended as a quick handy reference guide Fig 17a WWW.POP-A-SHOT.NET Pop-A-Shot Pro I Single Page 13/14 SKU# PASPRO19-01...
-
Page 14: Troubleshooting
If the sensors are misaligned or angled at all, they will not correctly read the shots (Step 13). • Check the connection between the sensors and the scoreboard (Step 13). Please visit www.pop-a-shot.net/support for more troubleshooting tips and hacks. WWW.POP-A-SHOT.NET...
Need help?
Do you have a question about the PRO Ι SINGLE and is the answer not in the manual?
Questions and answers