Table of Contents
Advertisement
Advertisement
Table of Contents

Subscribe to Our Youtube Channel
Related Manuals for BougeRV PWM NEGATIVE GROUND


Summary of Contents for BougeRV PWM NEGATIVE GROUND
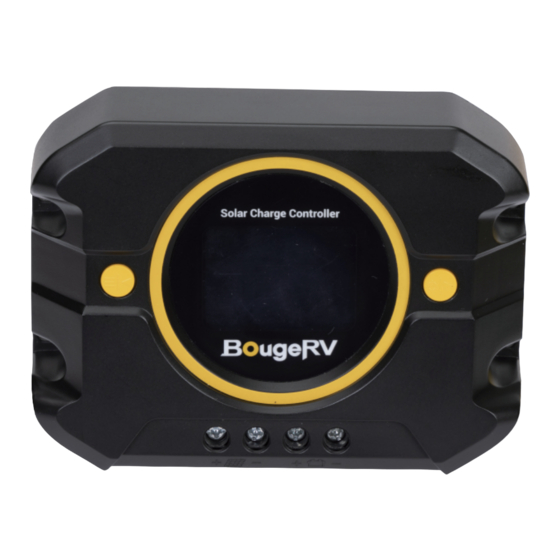
- Page 1 PWM NEGATIVE GROUND SOLAR CHARGE CONTROLLER www.bougerv.com...
-
Page 2: Table Of Contents
Content Safety Instructions Features Technical After Services Identification Of Parts LCD Display Interface Overview System Wiring Wiring Instructions Key Operation LCD Display Interface Error Code Base Specification Battery Charge Parameter Controller Dimension Lead-acid Battery Working Stage Lithium Battery Working Stage Frequently Asked Questions... -
Page 3: Safety Instructions
Safety Instructions Please follow the safety instructions for operation, the damage caused by not following the safety instructions shall be borne by the individual. Please save these instructions General Safety Information 1.Read all of the instructions and cautions in the manual before installation. -
Page 4: Features
Features 1. 1.57*1.18inch (40*30 mm) large backlit color screen (10A is black&white screen). 2. Easier to check the working status of the battery with the function of displaying the charging voltage and charging current alternately. 3. It is compatible with Li, SEL, FLD, AGM, GEL, LTO, and LFP batteries, and auto-voltage identification is available for lead-acid batteries. -
Page 5: Technical After Services
1-669-232-7427 Whataspp If you could provide the following relevant information to our email ( service@bougerv.com) before contacting us; we can provide you with technical support solutions faster. (1)The connection method of the solar panels (series/parallel, quantity, voltage, power). (2)The voltage and battery type of the battery. -
Page 6: Identification Of Parts
Identification Of Parts 4 5 6 7 LCD Backlit Display Screen Menu Button (switch menu/adjust parameters) Switch Button (control USB/adjust parameters) PV Positive Terminal PV Negative Terminal Battery Positive Terminal Battery Negative Terminal Installation Mounting Holes USB Output Port Heat Sink... -
Page 7: Lcd Display Interface Overview
LCD Display Interface Overview Display Section Status Charge And USB Status Parameter BAT Type Indicate And Warning Description Status Icon Indication Status Daylight Detected Day Night And Charge No Daylight Detected Indication Solar Charging Battery Battery Voltage is Hight Battery Battery Voltage is Middle Indication Battery Voltage is Low... -
Page 8: System Wiring
System Wiring ② ① 1. The positive and negative poles of the battery must be connected to the battery terminals of the controller first. 2. Finally, connect the positive and negative poles of the solar panel to the PV terminals of the controller. Note: Please strictly follow the above sequence for connection, otherwise the controller may be damaged. -
Page 9: Wiring Instructions
Wiring Instructions 1. Unscrew the screws. 2. Plug the cable into the correct (Counterclockwise) port. 3. Tighten the screws.(Clockwise) 4. Check the wiring condition Note: During the wiring process, the attached terminal block can be used for connection. After stripping the wire, put it into the terminal block and squeeze it with a crimping pliers. -
Page 10: Key Operation
Key Operation Function Key System Mode Operate Function Long Press Enter SET mode (exceed 2s) View Mode Short Press View Next Page Long Press (exceed 2s) View Mode Switch USB Short Press On/Off Long Press (exceed 2s) Set Mode Adjust Short Press parameter(Dec) Long Press... -
Page 11: Lcd Display Interface
LCD Display Interface Main Menu Interface The displayed value is the actual voltage of the battery. Automatic loop playback every 3s Battery charging voltage Battery charging current Menu 1:Battery type setting ① b01=Sealed Lead Acid battery (SEL) ② b02=Absorbed Glass Mat battery(AGM) ③... - Page 12 Menu 2:System voltage setting interface Long Press ①Automatically identify voltage (only applicable to the lead-acid battery); ②12V battery; ③24V battery Setting method: Same as above. Note: When the battery type is set to lead-acid battery b01-b04, the system automatically recognizes the battery voltage by default. When it is set to b05-b07, the system defaults to 12V, and the voltage needs to be adjusted manually) Menu 3:Lithium battery charging voltage setting...
- Page 13 Menu 4:Display the current controller temperature Long Press ①°F;②°C Setting method: Same as above. Note: The system defaults to °F. Menu 5:Display solar panel output voltage Note: The voltage value only can be read, but cannot be adjusted; this voltage is the output voltage of the solar panel. In PWM working mode, this voltage will be automatically adjusted to be the same as the battery charging voltage, and the open-circuit voltage of the solar panel will be displayed when not charging;...
-
Page 14: Error Code
Error Code Cause of failure Solution Error code Normal. Check if the system voltage is set correctly or turn off the Battery voltage is too low. load and continue charging until the battery voltage reaches the recovery voltage. Battery voltage has exceeded Check if the system voltage is the controller limit. -
Page 15: Base Specification
Base Specification Model P2410N P2420N P2430N System voltage: 12V/24V Rated charging current: Maximum PV input voltage: <55V 150W/12V 300W/12V 450W/12V Maximum input of PV system: 300W/24V 600W/24V 900W/24V Screen dimensions: 1.57*1.18inch (40*30 mm) Screen type: Black&White Color Color Backlight display time: 15s off without operation 8ma (12V), 12ma (24V) No-load loss:... -
Page 16: Battery Charge Parameter
Battery Charge Parameter Battery Types Boost Charge 14.2V*n 14.6V*n 14.6V*n 12.4V*n 13.4V*n 14.4V*n 14.4V*n Voltage Equalizing Charge 14.6V*n 14.4V*n 14.8V*n Voltage Floating Charge 13.8V*n Voltage Boost Charge 13.2V*n Return Voltage Boost Charge 2 hour 2 hour 2 hour 2 hour Time Equalization 2 hour... -
Page 17: Controller Dimension
Controller Dimension P2410N 4.72inch(120mm) 4.41inch (112mm) 0.07inch (2mm) •Product Dimension: 4.72*3.53*1.27 inch (120*89.7*32.5mm) •Installation Area Dimension: 4.41*1.36 inch (112*34.7mm) •Drill Hole Size : 0.12*0.07 inch (3.2*2mm) •Installation Hole size : 0.19*0.29 inch (5*7.5mm) - Page 18 P2420N 5.51inch (140mm) 5.11inch (130mm) 0.07inch (2mm) •Product Dimension : 5.51*3.74*1.27 inch (140*95*32.5mm) •Installation Area Dimension : 5.11*1.57 inch (130*40mm) •Drill Hole Size : 0.12*0.07 inch (3.2*2mm) •Installation Hole size : 0.19*0.29 inch (5*7.5mm)
- Page 19 P2430N 5.92inch (150.6mm) 5.59inch (142mm) 0.07inch (2mm) •Product Dimension: 5.92*3.95*1.92 inch (150.6*100.4*49mm) •Installation Area Dimension: 5.59*1.47 inch (142*37.5mm) •Drill Hole Size : 0.12*0.07 inch (3.2*2mm) •Installation Hole Size : 0.29*0.39 inch (7.5*10mm)...
-
Page 20: Lead-Acid Battery Working Stage
Lead-acid Battery Working Stage Bulk Charge: Constant current charging, providing the maximum current to the battery until the battery voltage reaches the constant voltage stage (boost charging voltage or equalize charging voltage). Boost Charge: Constant voltage charging, the battery is charged for 120 minutes at an elevated charging voltage. -
Page 21: Lithium Battery Working Stage
Equalization: Equalization charging raises the battery voltage to higher than the standard supplementary voltage to charge the battery. Certain types of lead-acid batteries benefit from regular equalization charging, which can agitate the electrolyte, balance the battery voltage, complete a chemical reaction, and prevent battery vulcanization. -
Page 22: Frequently Asked Questions
Frequently Asked Questions Q1: When I have some problems in the process of using the controller, what information can I provide to BougeRV to provide me with technical support faster and better? A1: Send the following information to the email: service@bougerv.com, ①The connection method of the solar panels (series/parallel, quantity,... - Page 23 ③The controller should be installed in a well-ventilated, non-humid environment. Q5: If you have any questions you can feel free to contact us: service@bougerv.com 1-669-232-7427 www.bougerv.com 1-669-232-7427...
- Page 24 Limitless Energy, Limitless Life. www.bougerv.com...
Need help?
Do you have a question about the PWM NEGATIVE GROUND and is the answer not in the manual?
Questions and answers