Table of Contents
Advertisement
Quick Links
Advertisement
Table of Contents

Related Manuals for Provision ISR I5PT-390IPX4


Summary of Contents for Provision ISR I5PT-390IPX4
- Page 2 Precautions: Please read this manual carefully before installing and operating the camera. Please refer to the technical specs to confirm you are using a suitable power supply. Do not use power supply with higher/lower rating than specified. Do not attempt to disassemble the camera; in order to prevent electric shock, do not remove any screws or covers.
-
Page 3: Product Overview
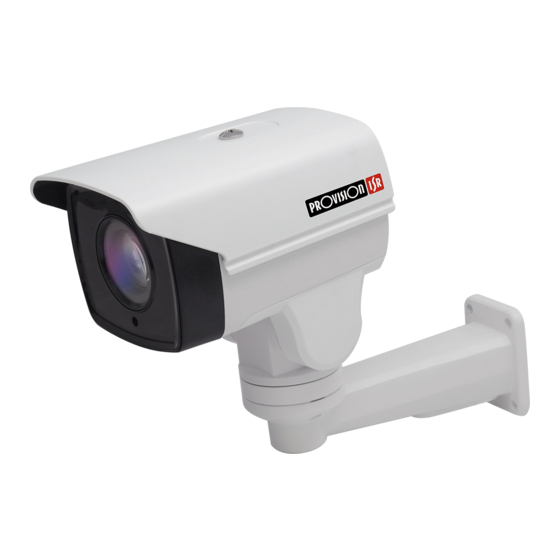
1. Product Overview 1.1 Features 1.1.1 Special Features: The camera is equipped with Pan/Tilt motors that allow movement range of ● PT Capabilities: pan and 80 tilt. ° ° ● Motorized Vari-Focal with auto-focus: The camera is equipped with x4/10 optical zoom lens and features accurate auto focus algorithm. -
Page 4: Technical Specs
1.2 Technical Specs: Specifications I5PT-390IPx4/x10 Effective Pixels 1080P(1920X1080) Electronic Shutter 1/25s ~ 1/30000s Video Day & Night Min. Illumination 0lux (IR ON) AWB, AGC Adjustable Camera Image Settings Selectable Exposure Modes Sharpness, Saturation, Brightness & Contrast Adjustable Image WDR Range... -
Page 5: Osd Menu Operation
1.4 OSD Menu operation ● Call up OSD menu Call Preset 95 to enter the main OSD menu; call Preset 96 to close the OSD menu or Select “Exit” ● Confirm The “Left "and “Right "button is controlled by PTZ can change the required item, and the changed item is the confirmed one without further confirmation. - Page 6 parameters of the user computer is in accordance with the one of the camera, they are in same segment, the IP address in the same LAN cannot be the same, otherwise, it will interfere with each other, causing the equipment couldn't operate normally. After setting IP address, you could test whether it has been connected between the computer and the camera by using the PING order from clicking the “start”-”run"...
- Page 7 If computer TCP/IP is in the same segment as the camera ● If network forbid ping order, please connect network administrator ●...
-
Page 8: Web Login
2.2 Web Login 2.2.1 Login Enter IP address (default: 192.168.0.99) to open the interface, dialog box as follows comes out: Picture 2.2.1-1 login interface ◆ user name:Admin ◆ password:Admin ◆ Port:Default 8000... - Page 9 2.2.2 Download playing component After you logged in, if the WEB browser indicates it is the first time of visiting or plug-in reminds you of the update of the new version. (See 2.2.2-1). Double-click this plug-in and it will remind you of the downloading process. Or you can double-click the icon at the top-right corner of the login interface.
- Page 10 Sheet 2.2.3-2 Preview screen information Sheet 2.2.3-3 PTZ control screen information In the preview screen, you can control the preview, video recording, snapshot, intercom and the on/off of the sound. The size of the image can be adjusted according to the needs of the user to set its original size;...
- Page 11 Operation methods for preset position 1. Enter the screen of setting preset position, and it will show the current preset position. 2. Setting preset position: select the number of preset position, and then operate the control panel of the camera, when the camera scene moves to the place you want to set, then click the “save "key to save this preset position.
- Page 12 Operation methods for IR LED Enter the IR LED setting screen, user can set the power of the low beam lights as 1~10 gear, the power of high beam lights, low beam lights compensation, enable illumination, IR status setting. See 2.2.3-6 Picture 2.2.3-6 IR LED Setting Screen Auto scanning setting Enter the auto scan screen, user can set scan speed, left boundary, right boundary, start...
- Page 13 2.2.4 Playback Click “playback” to enter the video searching playback screen. Playback screen can inquire, playback and download effective video saved in the SD card of the camera. Select the inquire type, start and end time, click the “search "key, and the eligible video files will be displayed in the right box.
- Page 14 Picture 2.2.5-1 log record screen 2.2.6 Parameter Configuration Click “configuration”, enter configuration interface. Configuration—local configuration as picture 2.2.6-1, each item instruction as picture 2.2.6-2 Picture 2.2.6-1...
- Page 15 2.2.6-2 configuration information SYSTEM → DEVICE INFORMATION In Device Information screen, users can set Device Name、 Model、 Serial No.、 Firmware Version、 Encoding Version、Number of Channels、 Number of HDDs、Number of Alarm input and output. See picture 2.2.6-3 Picture 2.2.6-3 device information...
- Page 16 System→Time settings In the Time Settings screen, time sync is operational. “Time Zone” shows the current IP camera’s time zone, and that can be set according to the actual situations. For “Time Sync”, set NTP server address、NTP port、Internal, the device will be time sync every once in a while according to the setup.
- Page 17 Picture 2.2.6-5 System maintenance interface Network →TCP/IP In “TCP/IP” screen, users can set “IPv4 Address”,“IPv4 Subnet Mask”,“IPv4 Default...
- Page 18 Gateway”,"IPv4 DNS Server""IPv4 mode". Ticking “auto", the device will obtain IP address automatically. After changing some parameters you can click to save the corresponding settings. See picture 2.2.6-6 Picture 2.2.6-6 TCP/IP interface System→port “Port” screen includes: “HTTP Port” (the default is 80) 、 “RTSP Port” ( the default is 554) 、 “HTTPS Port”(the default is 443).Through network access the device, users can set corresponding port as needed.
- Page 19 Enter DDNS setting screen,indicates enable DDNS function。DDS Type includes “Oray” or “Noip”。See picture 2.2.6-8 Oray need to fill Server address, default open, server address is DNS server address software operator, domain is the one which user apply for in software operator website, port can be set according to configuration, user name and password is which user registered.
- Page 20 Note:PPPoE configuration enable default gateway is invalid;Parameter in network settings is modified, need to reboot device. Network→FTP By setting FTP parameter, user could upload snapshot file to FTP server. See picture 2.2.6- Server address, port is the corresponding ones in FTP server. Directory structure could be set save path of file, “save in the root directory”, “save in the parent directory”, “save in the child directory”, choosing parent directory including “use device name", "use device number”...
- Page 21 Picture 2.2.6-10 FTP setting Network→UpnP UPnP enable,this function could make device automatically found in LAN. For a camera in internal network, UpnP function could make gateway or router auto port mapping, Camera could map monitored network port from the gateway or router to a internal network device, gateway or router network firewall module began to open this port to other computers on the Internet.
- Page 22 Network →Email server, SMTP port 、Tick start SSL Enter email setting, fill sender , sender address, SMTP or authentication, user name, password and password confirm, receiver, receiver address, see picture 2.2.6-12 Note:Sender/receiver name could not be in Chinese, QQ mailbox port number is 25, other mailbox is 465, at the same time enable SSL, and user name is same as sender’s name.
- Page 23 Sheet 2.2.6-16 Video configuration instruction Network →Port Mapping By starting port mapping to open port, see picture 2.2.6-13 Sheet 2.2.6-17 audio settings Picture 2.2.6-17 audio parameter instruction Network →WIFI Enable WIFI insert,set related parameter to finish WIFI insert, see picture 2.2.6-14...
- Page 24 Picture 2.2.6-14 WIFI settings Audio/Video→Video Enter video setting screen, user could set camera scream, resolution and bitrates type and other parameters. See picture 2.2.6-15, video settings detailed information, see picture 2.2.6-16. Picture 2.2.6-16 Video setting...
- Page 25 Audio/Video→Audio In audio configuration, “audio encoding" version is the only kind named “G.711U”.According to different model, hardware is different, “audio input" type: Line in and Mic in, if user use active pickup, choose Line in option, if for passive microphone, choose Mic in. “Input volume”is input source gain control value, the default value is 50, user could adjust 1-100 according to the actual volume needs After modifying related parameter, need to click [save] to save settings.
- Page 26 Picture 2.2.6-17 Audio setting Audio/Video→ROI Stream concentration makes the drawing region clearer, suitable for condition of the lack of stream Picture 2.2.6-18 ROI Image→Display Enter image configuration interface, see picture 2.2.6-19, image configuration illustration see sheet 2.2.6-20...
- Page 27 Picture 2.2.7-19 Display settings Sheet 2.2.6-20 Image parameter...
- Page 28 “Sharpness ": the higher, the image edge is clearer, while it could not be said the higher the sharpness, the better image quality, high sharpness can make the picture looks distorted. "Focus mode:" in "auto" mode, device automatic focus according to the monitoring scene changing.
- Page 29 “Default”: click default, all the parameter in this display setting box will come back to factory default value. Note: All the option in configuration of camera is all the model option, Real camera model only has part of option, please take reference for specific camera model. If you modify some parameter, please reboot camera.
- Page 30 shows the character, click “save”, then character will show in the image. Picture 2.2.6-22 Text Overlay Image →Privacy mask User enable privacy mask, then according to their needs to set it, at most 4 area settable. See picture 2.2.6-23 Picture 2.2.6-23 Privacy Mask Safety →...
- Page 31 Picture 2.2.6-24 Addition Picture 2.2.6-25 Modify user Security→RTSP Authentication The authentication is “disable” or “basic” as optional. “Disable”: close RTSP authentication. “Basic”: enable RTSP authentication and need to carry the authentication information when send RTSP require to the IP camera at the moment..
- Page 32 After modifying the parameters, click to “save” the settings. See Picture 2.2 Picture 2.2.6-26 RTSP Setting screen Security →Anonymous visit Anonymous visit could choose “enable” and”disable”, choosing enable will allow user anonymous login camera web interface. Enable anonymous visit function, open camera web interface visit interface, login window will come out “anonymous”option Tick “anonymous”, then click [login] button, user could login directly.
- Page 33 Picture 2.2.6-27 Anonymous visit Security→IP address filter User could tick “enable IP address filter” key to start the function. “IP address filter type ”include “black list”, “white list”, white list means the added IP address allow to visit the camera, black list means its forbidden User could click [Addition] to add new IP address, after addition, user could click [modify], [delete] and [clear] to operate IP address.
- Page 34 Picture 2.2.6-29 Motion Detection “Arming schedule” shows the arming time of the current motion detection. Click [edit] could edit the arming schedule, could set arming schedule for the whole week or some day in a week. User could set start time and end time specific for 4 periods per day, see picture 2.2.6-30...
- Page 35 Picture 2.2.6-30 Arming Schedule/Linkage Method After finishing parameter setting, click [confirm] key to save the settings. Event→Video Tampering Tick “enable video tampering" indicates start IP camera video tampering, see picture 2.2.6-31 Area Setting: default the whole screen Sensitivity: 0-100 settable After related parameter revised, need to click [save] to save related settings.
- Page 36 Picturer2.2.6-31 Video Tampering Event→Exception “Exception Type” includes ”HDD FULL ”,”HDD Error”, ”Network Disconnected”, ”IP address conflict” “Normal Linkage” includes “Notify surveillance Center”, “Capture” “Other Linkage” includes corresponding alarm output channel. After modifying related parameter, need to click [save] to save settings. Picture 2.2.6-32 Exception Storage→Record Schedule Tick “enable record schedule”, click “Editor"...
- Page 37 Record Type includes “Timing”, ”Motion Detection”, ”Alarm”, ”Motion Or Alarm”, ”Motion and Alarm”, ”Other”. Pre-record is the advanced record time before starting of record, 0-3sec (optional) and not limit. Post-record is the delayed time of record, 5sec-10min (optional) After modifying related parameter, need to click “confirm” to save settings Note: Overwrite is measured according to 2Mbps, the bigger scream you choose, the shorter, he pre-record time is.
- Page 38 Picture 2.2.6.-34 Edit Schedule Storage→Storage Management Storage management is used to view the status and the capacity of the storage medium, and carry out format operation on the storage medium. Tick the inserted TF card, click the "format", will make the TF card format. As picture 2.2.6-35 shows "HDD No."...
-
Page 39: Osd Menu Function
Storage→Capture Through parameter configuration setting capture parameter, capture way is only for timing snapshot. As picture 2.2.6-36 shows “Format" could support JPEG format snapshot, “Resolution" is present main stream’s resolution. “Quality" could choose High/Middle/Low “Interval" could set according to interval, unit: “millisecond”, ”second”, ”minute”, ”hour”, ”day”... - Page 40 MAIN MENU User could review camera system information according to their need, it include: device name, [INFORMATION] device model, serial number, device version, CAMERA control version, web page version, plug-in version, supply voltage. Method as follows: IMAGE Click up/down to “information”, click up/down MOTION to choose, click left/right enter information OSD to check...
- Page 41 3.2.1 LANGUAGE MAIN MENU User could set language by PTZ, device support Chinese/English. Default language is Chinese. User could set [INFORMATION] according to their requirement, method as follows: CAMERA Click up/down to “language”, click left/right key enter IMAGE setting mode, click left/right to choose language, click up/down to operate next item.
- Page 42 LANGUAGE LANGUAGE CHINESE] BACK EXIT...
- Page 43 3.2.2 IR LED MAIN MENU User could set IR LED working mode by camera PTZ setting function INFORMATION 1.Environment: CAMERA IMAGE Device could automatically adjust luminance according to surrounding environment. MOTION RESTART 2.Open mode: Auto:IR LED automatically open and close according to light and dark.
- Page 44 3.2.3 IDLE User could set idle by OSD menu, can set idle MAIN MENU action and time. INFORMATION 1. Action CAMERA Click up/down key to “action”, click left/right key enter setting mode, click left/right key to IMAGE choose idle action, action include: no action, MOTION preset 1, auto scan, auto cruse, pattern, click up/down key to operate next operation.
- Page 45 CAMERA LANGUAGE IR LED IDLE MASK ALARM PTZ DISPLAY IDLE ACTION DALAY 10MIN BACK...
- Page 46 3.2.4 MASK MAIN MENU Camera supports mask protection, at most support 4 mask area. INFORMATION CAMERA 1. Mask setting IMAGE Click up/down to choose mask setting, click left/right MOTION to enter, click focus far to confirm, when grey box comes out, grey box size is adjustable, click left or up RESTART to be smaller, click right/down to be bigger.
- Page 47 MASK [MASK No. ENABLE MAST SET BACK 3.2.5 ALARM MAIN MENU Camera supports 7 alarms in, 1 alarm out. Device receive the alarm signal which could trigger auto INFORMATION function (turn to preset, run pattern path, etc.), at the CAMERA same time device link to alarm output.
- Page 48 CAMERA LANGUAGE IR LED IDLE MASK ALARM PTZ DISPLAY ALARM INPUT MODE N/O ALARM MODE ACTION ALARM OUT RESET DELAY 30SEC BACK...
-
Page 49: Ptz Display
3.2.6 PTZ DISPLAY MAIN MENU Camera supports PTZ function, PTZ display includes on/off option. INFORMATION Method as follows: CAMERA Click up/down to choose, enter PTZ display, click IMAGE left/right to choose on/off, and then click up/down to confirm. MOTION RESTART CAMEAR LANGUAGE IR LED... - Page 50 PTZDISPLAY PTZ DISPLAY BACK EXIT 3.3.1 IMAGE MAIN MENU Camera supports image setting function, click up/down to choose image, click left/right to enter INFORMATION image adjustment option, method as follows: CAMERA IMAGE 1. Brightness MOTION Image overall brightness adjustment, 1-100 RESTART adjustable 2.
- Page 51 IMAGE [IMAGE ADJUSTMENT] EXPOSURE FOCUS WHITE BALANCE IMAGE ENHANCEMENT VIDEO ADJUSTMENT IMAGE [BRIGHTNESS CONTRAST SATURATION SHARPNESS...
- Page 52 3.3.2 EXPOSURE MAIN MENU Camera supports exposure function, exposure settings includes exposure mode, iris, shutter, INFORMATION gain, exposure bias, compensation level, gain limit. CAMERA IMAGE 1. Exposure Mode MOTION Auto/Manual/Iris priority/Shutter priority RESTART 2. Exposure Bias On/off 3. Compensation level 0-100(optional) IMAGE 4.
- Page 53 EXPOSURE [MODE AUTO] IRIS f2.0 SHUTTER 1/25 GAIN EXPOSURE BIAS LEVEL 3.3.3 FOCUS MAIN MENU Camera supports setting function, focus setting include focus mode and focus length, INFORMATION specific as follows: CAMERA IMAGE 1. Focus mode MOTION Auto/Manual/Semi-auto RESTART...
- Page 54 IMAGE [IMAGEADJUSTMENT] EXPOSURE FOCUS WHITE BALANCE IMAGE ENHANCEMENT VIDEO ADJUSTMENT FOCUS FOCUSMODE AUTO FOCUS DISTANCE 1.5M BACK EXIT...
- Page 55 3.3.4 WDR MAIN MENU Camera supports WDR function, WDR option includes on and off, WDR rank is 0-100 INFORMATION CAMERA IMAGE MOTION RESTART IMAGE IMAGE ADJUSTMENT EXPOSURE FOCUS WHITE BALANCE IMAGE ENHANCEMENT...
- Page 56 [WDR OFF] LEVEL BACK...
-
Page 57: White Balance
3.3.5 WHITE BALANCE MAIN MENU Camera support white balance function, white balance includes auto and manual, for manual, user INFORMATION could adjust R gain and B gain. CAMERA R gain rank: 0-100 IMAGE B gain rank: 0-100 MOTION RESTART IMAGE IMAGE ADJUSTMENT EXPOSURE FOCUS... -
Page 58: Image Enhancement
WHITE BALANCE WHITE BALANCE AUTO] R GAIN ——|——50 B GAIN ——|——50 BACK 3.3.6 IMAGE ENHANCEMENT MAIN MENU 1. Digital noise reduction INFORMATION 2D noise reduction:Rank 0-100 CAMERA 3D noise reduction:Rank 0-100 IMAGE MOTION Integration PTZ Camera support digital noise reduction RESTART function, it includes open and close. - Page 59 IMAGE IMAGE ADJUSTMENT EXPOSURE FOCUS WHITE BALANCE [IMAGE ENHANCEMENT] VIDEO ADJUSTMENT IMAGEENHANCEMEN [NOISE REDUCTION 2NDR ——|——50 3NDR ——|——50 BACK...
-
Page 60: Image Adjustment
3.3.7 IMAGE ADJUSTMENT MAIN MENU Through device image Adjustment menu, user could operate a serious setting to enhance image INFORMATION effect. Method is as follows: CAMERA IMAGE 1. Digital noise reduction MOTION Click up/down to digital noise reduction, click RESTART left /right to open or close digital noise reduction. - Page 61 VIDEO ADJUSTMENT [MIRROR OFF] BACK EXIT 3.3.8 DEFAULT MAIN MENU Through operating camera default setting menu, user could restore modified camera INFORMATION image parameter, method is as follows: CAMERA Click up/down to “default”, click left/right to setting interface. IMAGE 1. Confirm MOTION Click left/right, camera will restore all the RESTART...
- Page 62 IMAGE IMAGE ADJUSTMENT EXPOSURE FOCUS WHITE BALANCE IMAGE ENHANCEMENT VIDEO ADJUSTMENT DEFAULT RESTORE DEFAULT SETTINGS? CANCEL...
- Page 63 3.4.1 SCAN MAIN MENU Auto scan function is repeated movement; it supports 8 groups auto scan path. INFORMATION Setting method is as follows: CAMERA 1. Set scan number IMAGE Click up/down to scan number, click left/right to number setting model, MOTION ] click up/down for next step.
- Page 64 SCAN [SCAN No. SCAN SPEED LEFT LIMIT SET RIGHT LIMIT SET SCAN START BACK 3.4.2 SEQUENCE MAIN MENU Auto sequence means device auto switch at appointed preset spot, user could set INFORMATION time interval. Device support 8 groups sequence path, each path at most support CAMERA 32 preset.
- Page 65 MOTION SCAN SEQUENCE PATTERN BACK MOTION [SEQUENCE No. START PRESET STOP PRESET DURATION 5sec SEQUENCE START...
- Page 66 3.4.3 PATTERN MAIN MENU The pattern means camera could operate a series of motion, such as pan/tile INFORMATION rotating, zoom, etc. User could start pattern to playback all operation. The CAMERA camera supports 4 pattern tours and each IMAGE pattern cover at most 10 Minutes of 500 commands.
- Page 67 MOTION SCAN SEQUENCE PATTERN BACK EXIT PATTERN [PATTERN No. PATTERN SET PATTERN DELETE PATTERN START 3.5 RESTART MAIN MENU INFORMATION CAMERA IMAGE...
- Page 68 Camera allows user remote control restore itself by OSD menu, operation method: open OSD menu, click up/down to “restart”, click left /right key to enter restart confirmation menu, click up/down key to “ok”, click left/down key to restart. If click up/down key to “cancel”, click left/right to cancel restart, interface return previous OSD interface.
- Page 69 3.6 DEFAULT MAIN MENU Camera default function has restore and default, instruction as follows: INFORMATION CAMERA 1. Restore IMAGE Restore all configuration information to factory default setting. (Except MOTION gateway, IP, subnet mask, DNS server) RESTART DEFAULT 2. Default EXIT Restore all setting completely to factory default setting status.
- Page 70 DEFAULT SETTING RESTORE DEFAULT BACK EXIT RESTORE RESET SETTINGS, EXCEPT IP CANCEL...
- Page 71 4 APPENDIXES Lighting protection and Anti-surge This product uses the gas discharge tube of TVS diode and protection circuit, can effectively prevent the 3.0 kV following transient lightning and surge lamp all types of pulse signal to the damage of equipment. However, for outdoor installation according to the actual situation on the premise of guarantee the electrical safety to do the necessary protective measures: ●...
Need help?
Do you have a question about the I5PT-390IPX4 and is the answer not in the manual?
Questions and answers