Intermec 6220 User Manual
Hand-held computer
Hide thumbs
Also See for 6220:
- Supplementary manual (123 pages) ,
- Technical reference (73 pages) ,
- Technical reference (70 pages)

Related Manuals for Intermec 6220


Summary of Contents for Intermec 6220
- Page 1 6220 Hand-Held Computer USER’S GUIDE " " " " " " " " " " " " " " " " " " " " " " " " " " " " PN: 961-028-104 Revision D January 2000...
- Page 2 " NOTICE The information contained herein is proprietary and is provided solely for the purpose of allowing customers to operate and service Intermec manufactured equipment and is not to be released, reproduced, or used for any other purpose without written permission of Intermec.
-
Page 3: Table Of Contents
............6220 Hand-Held Computer User’s Guide CONTENTS "... - Page 4 Keyboard 6220 Hand-Held Computer User’s Guide .........
- Page 5 Option 5 NETWORK INTERFACE Option 5 PHONE NUMBER Option 9 ADVANCED UTILITIES 6220 Hand-Held Computer User’s Guide CONTENTS ..... .
- Page 6 Table 4-1 Basic Troubleshooting GLOSSARY INDEX 6220 Hand-Held Computer User’s Guide ........
-
Page 7: General Information
This user’s guide is divided into four sections and two ap- pendixes. Section 1 Contains general information about the components of your 6220 Hand-Held Computer. This includes telling you how the user guide is organized, a summary of the sections, and the specifications for your hand-held computer. Section 2... -
Page 8: Unpacking And Inspecting
Follow their instructions for filing a claim on the damaged items. Authorized repair of products is available only at Service Centers. Unauthorized repair voids any and all warranties. Contact your Sales Representative for additional instruc- tions. 6220 Hand-Held Computer User’s Guide SECTION 1... -
Page 9: Hand-Held Computer Description
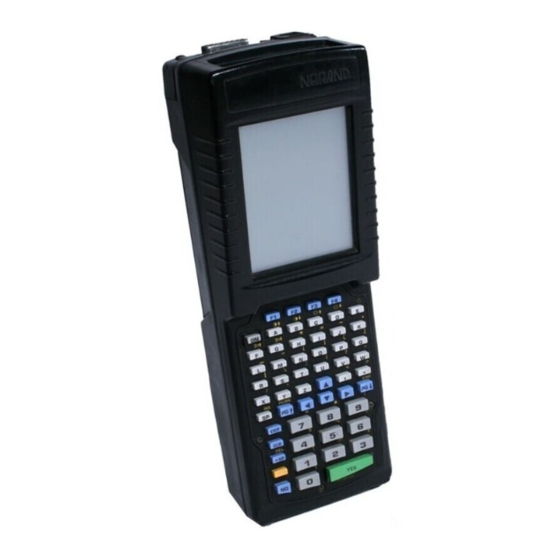
Figure 1-1 and Figure 1-2 on pages 1-3 and 1-4 show you the location of the key components for your hand-held com- puter. General Information 1. Display 2. Keyboard Figure 1-1 Hand-Held Computer Front View 6220 Hand-Held Computer User’s Guide... -
Page 10: Figure 1-2 Hand-Held Computer Back View
1. PC card and backup battery retaining door (top screws) 2. PC card and backup battery retaining door (bottom screws) 3. Main battery pack compartment latch knob 4. Handstrap Figure 1-2 Hand-Held Computer Back View 6220 Hand-Held Computer User’s Guide... -
Page 11: Figure 1-3 Hand-Held Computer Top View
SECTION 1 1. Phone jack (optional) 2. 15-pin female connector Figure 1-3 Hand-Held Computer Top View 1. 12-pin surface contact connector Figure 1-4 Hand-Held Computer Bottom View 6220 Hand-Held Computer User’s Guide General Information... -
Page 12: Hand-Held Computer Keyboard
8. Backspace key 9. Clear key 10. EXIT key 11. Page up key 12. ON key 13. Space key 6220 Hand-Held Computer User’s Guide SECTION 1 Key Descriptions (56 Key) 1. Function (F1- -F4) keys 2. Alphabetic keys 3. Window scrolling keys 4. -
Page 13: Figure 1-5 Hand-Held Computer With 30-Key Keyboard
SECTION 1 General Information Figure 1-5 Hand-Held Computer With 30-Key Keyboard 6220 Hand-Held Computer User’s Guide... -
Page 14: Figure 1-6 Hand-Held Computer With 56-Key Keyboard
General Information SECTION 1 Figure 1-6 Hand-Held Computer With 56-Key Keyboard 6220 Hand-Held Computer User’s Guide... -
Page 15: Key Descriptions
Use the period [.] key as a period or a decimal point. Clear Key Use the Clear key to delete data being entered. Page Up or Down Keys Use the Page Up or Down keys to step forward or backward in your program. General Information 6220 Hand-Held Computer User’s Guide... -
Page 16: Exit Key
Shift Key Using the yellow shift key, temporarily shifts the function of the keyboard. The shifted functions are yellow colored leg- ends above the normal single keystroke keys. 1-10 6220 Hand-Held Computer User’s Guide... -
Page 17: Arrow Keys
B CAUTION: Do not use an ink pen or anything else that is sharp on the touch screen. This will damage it. 6220 Hand-Held Computer User’s Guide 1-11... -
Page 18: Backlight And Display Contrast Adjustment
When your hand-held computer goes into shutdown mode because of low battery condition, the data is protected by the backup battery. Your hand-held computer will not ac- cept data or process transactions until you deal with the 1-12 6220 Hand-Held Computer User’s Guide... -
Page 19: Memory
BIOS and DOS firmware. Applications stored in flash ROM are copied into DRAM for execution. Flash does not require a battery in your hand-held computer to main- tain its contents. General Information 6220 Hand-Held Computer User’s Guide 1-13... - Page 20 Type III card, it only works in drive A (closest to display). However, you cannot use a Type III and a Type II card at the same time. Type III cards include some types of disk drives and radios. 1-14 6220 Hand-Held Computer User’s Guide...
-
Page 21: Reset Switch
The Reset switch access is located behind the 15-pin con- nector. To access use a straightened large paper clip, insert one end in the reset switch hole. General Information 1. Reset switch location Figure 1-7 Top End Reset Switch Access Point 6220 Hand-Held Computer User’s Guide 1-15... -
Page 22: Hand-Held Computer Specifications
Below 0_C: Communication: Interface: Protocol: 1-16 6220 Hand-Held Computer User’s Guide 9.5 inches (24.13 cm) long 3.25 inches (8.26 cm) wide 2.875 inches (7.30 cm) tall 4 to +140_F (--20 to +60_C) -22 to +158_F (--30 to +70_C ) excluding batteries -4 to + 140_ F (-20 to + 60_ C) with batteries 30 ounces (850.5 g) - Page 23 8 or 16 MB Type III, or both can use Type II cards AMD Elan SC400, 99 Mhz. VGA compatible LCD (standard) touch screen (optional) 160 (wide) by 200 (long) pixel portrait orientation 6220 Hand-Held Computer User’s Guide General Information 1-17...
- Page 24 General Information SECTION 1 1-18 6220 Hand-Held Computer User’s Guide...
-
Page 25: Hand-Held Computer Operation
" Connect to peripheral devices " Getting Started Unpack your 6220 Hand-Held Computer and inspect it for signs of physical damage that may have occurred in ship- ment or storage. Fully charge the batteries in your hand-held computer be- fore using them. Put the computer on a charging source for at least 10 hours to ensure that the backup battery and main battery pack are completely charged. - Page 26 Hand-Held Computer Operation SECTION 2 Depending on the method you are using, the result will be the same but the steps you go through may vary from the way this user’s guide presents the material. 6220 Hand-Held Computer User’s Guide...
-
Page 27: Installing The Backup Battery
3. Using a nonmetallic object (i.e. pen) push the connec- tor on the battery pack down into the socket. 4. Push the battery down into the compartment 5. Replace compartment door. Installing Back Up Battery Hand-Held Computer Operation Figure 2-1 6220 Hand-Held Computer User’s Guide... -
Page 28: Measuring Battery Pack Capacity
= LED off one LED = less than 25% capacity; two LEDs = 25- -50% capacity; three LEDs = 50- -75% capacity; four LEDs = more than 75% Main Battery Pack Capacity Contacts 6220 Hand-Held Computer User’s Guide Figure 2-2 SECTION 2... -
Page 29: Main Battery Installation
6. Fully charge your hand-held computer before using it. The initial charge should be at least 10 hours to en- sure that both the main and backup batteries are fully charged. Installing Main Battery Pack Hand-Held Computer Operation Figure 2-3 6220 Hand-Held Computer User’s Guide... -
Page 30: Charging Your Batteries
[ " NOTE: There are 5 steps for the backlight brightness and 51 steps for the screen contrast. 6220 Hand-Held Computer User’s Guide ] or the down [ ] keys. SECTION 2... -
Page 31: Adjusting The Screen Contrast
When a “boot” card is inserted, you must press the reset button to get your computer to recognize the card in the drive. To reset insert a straightened paper clip into the switch hole. Hand-Held Computer Operation ] or down [ ] contrast keys. 6220 Hand-Held Computer User’s Guide... -
Page 32: Removing Pc Cards
3. Bottom card slot (shown wiht Type ll PC card in slot) 4. Reset button Removing PC Cards To remove a PC Card from the holder simply pull out on the card. 6220 Hand-Held Computer User’s Guide Figure 2-4 Installing PC Cards SECTION 2... -
Page 33: Using Pc Cards To Load Your Programs
F4 while you reset your computer. You will then boot to drive D, Pen*Key Utilities can then be used to select a different boot drive if necessary. Hand-Held Computer Operation 6220 Hand-Held Computer User’s Guide... -
Page 34: Installing Modem Card
5. Connect the modem cable to the card and plug into the connector (see Figure 2-5). 6. Push the card holder back down into your computer and reattach the card door. Connector Cable 2-10 6220 Hand-Held Computer User’s Guide Figure 2-5 Installing Modem Card SECTION 2... -
Page 35: Downloading Programs Into Your Hand-Held Computer
2. Insert your computer into the dock or connect the mo- dem. The first screen you see will show you general information, program version, and copyright data. 3. Press the 4. This next screen will follow: Hand-Held Computer Operation [YES] key and continue. 6220 Hand-Held Computer User’s Guide 2-11... - Page 36 Use the arrow keys to highlight the desired selec- " tion 6. Press the At this point go to Appendix B for the Pen*Key Utilities Programs procedures. 2-12 6220 Hand-Held Computer User’s Guide ZZZZZZX xprotx xbpsx ZZZZZZZZZZZZZX [NO]QUIT key. [YES]...
-
Page 37: Routine Care And Maintenance
" " " Introduction Your 6220 Hand-Held Computer is designed to withstand normal use in harsh environments. Occasional maintenance is required to ensure trouble-free operation. The procedures in this section should help keep your hand-held computer in good working condition. -
Page 38: Handstrap Replacement
2. Position the Battery Compartment latch knob in the unlock position. 3. Lift the handstrap off and replace with a new one. 6220 Hand-Held Computer User’s Guide 1. Screws holding handstrap 2. Battery compartment latch knob Figure 3-1... -
Page 39: Cleaning Your Hand-Held Computer
It may also be necessary to lightly burnish them with a pencil eraser. Check the connectors on the docks or printers to ensure they are clean. Routine Care and Maintenance 6220 Hand-Held Computer User’s Guide... -
Page 40: Keyboard
Three screws secure the keyboard to the case. Unscrew those to remove the keyboard and do more cleaning if necessary. 1- -3. Screws holding keyboard Figure 3-2 Removing The Keyboard 6220 Hand-Held Computer User’s Guide... -
Page 41: Introduction
Ensure that electrical and mechanical connections are " secure and undamaged. Troubleshooting " " " " " " " " " " 6220 Hand-Held Computer User’s Guide Section 4 " " " " " " " "... -
Page 42: Table 4-1 Basic Troubleshooting
Batteries Will Not Charge Printer Not Ready Will Not Turn On When The ON Key Is Pressed 6220 Hand-Held Computer User’s Guide Table 4-1 Basic Troubleshooting Solution Recharge main Li Ion pack. Recharge main Li Ion pack. Charge immediately! Data loss is immi- nent. - Page 43 * Press the ON key. If your computer does not resume, the battery still is low. Recharge for at least 30 minutes or try another battery pack. 6220 Hand-Held Computer User’s Guide...
- Page 44 Not Suspend Hand-Held Computer Takes A Long Time To Boot Up After A Reset 6220 Hand-Held Computer User’s Guide Table 4-1 (continued) Basic Troubleshooting Solution * The unit will not turn off when it is connected to a charging device.
-
Page 45: Diagnostic
* The dock may not be properly connected to the host. Make sure there is a connection. TCOM errors may happen when telephone service is lost, or for reasons not related to the physical connection. 6220 Hand-Held Computer User’s Guide... -
Page 46: Repair Service
Be sure to carefully pack the unit and include a de- " scription of the problem and the measures you took to correct it. If possible, include any printout (if applica- ble) or write down displayed error messages to illus- trate the problem. 6220 Hand-Held Computer User’s Guide SECTION 4... -
Page 47: Pin Female D-Sub Connector
RS-232 Transmitted Data RS-232 Received Data RS-232 Clear To Send RS-232 Data Set Ready External Charge Voltage input Ground, Signal RS-232 Data Carrier Detect Switched 5.0 volt peripheral power 6220 Hand-Held Computer User’s Guide Appendix A " " " " " "... -
Page 48: Pin Surface Contact Connector
485+ & TPIP TPIN CHARGE_DOCK * Pin 6 and 7 are multiplexed. If the three wire COM2 is selected then the /signal applies. 6220 Hand-Held Computer User’s Guide Function Ground (rightmost side) Ethernet Output RS-485 I/O and Ethernet Output RS-232 Transmitted Data... -
Page 49: Pin Rj11 Connector
4-Pin RJ11 Connector Signal Not used RING Not used Function Modem TIP Modem RING 6220 Hand-Held Computer User’s Guide... - Page 50 Connector Pin-Outs APPENDIX A 6220 Hand-Held Computer User’s Guide...
-
Page 51: Entry Point
" " Utilities Program provides basic functions PEN*KEY UTILITIES PSROMOC Vx.xx COPYRIGHT 1994--1999 INTERMEC TECHNOLOGIES CORPORATION. ALL RIGHTS RESERVED [YES]CONTINUE 6220 Hand-Held Computer User’s Guide Appendix B " " " " " " " " Key Description B B - - 1 1... -
Page 52: Drop-Down Lists
Select one suboption each time. Press the [NO] key to exit a drop-down list. The following is an example of a drop-down list. B B - - 2 2 6220 Hand-Held Computer User’s Guide CHANGE UNIT ID UNIT ID 2233233... -
Page 53: Alphanumeric Fields
[NO] key to exit without saving the entries. PEN*KEY NETWORK PARAMETERS SERVER NAME I.U.N. INCORPORATED SERVER IP ADDRESS 123.123.123.123 CLIENT IP ADDRESS 123.123.123.123 ROUTER SUBNET MASK [NO]QUIT 6220 Hand-Held Computer User’s Guide Utilities Program B B - - 3 3... -
Page 54: Title Screen
Utilities Program Title Screen When you reboot or reset your computer, the Title Screen appears: Press the [YES] key to continue. B B - - 4 4 6220 Hand-Held Computer User’s Guide PEN*KEY UTILITIES PSROMOC Vx.xx COPYRIGHT 1994--1999 INTERMEC TECHNOLOGIES CORPORATION. -
Page 55: Language Selection
[YES] key to enter. Press the [NO] key to exit this menu. PEN*KEY PEN*KEY UTILITIES LANGUAGE SELECTION 1. ENGLISH [NO]QUIT 6220 Hand-Held Computer User’s Guide Utilities Program B B - - 5 5... -
Page 56: Communications Menu
If your computer does not support any of the features listed, the fol- lowing pop-up menu appears. Press the [YES] key to continue: The Communications Menu appears after the Title Screen: B B - - 6 6 6220 Hand-Held Computer User’s Guide COMMUNICATIONS FEATURE NOT SUPPORTED... -
Page 57: Option 1 Begin Comm Session
[NO] key is not processed until the next session is attempted. PEN*KEY Utilities Program ARE YOU SURE YOU WANT TO STOP COMMUNICATIONS NOW? [YES]STOP [NO]RESUME 6220 Hand-Held Computer User’s Guide B B - - 7 7... - Page 58 Session Status on page B-12 for meaning. Following a successful session, PEN*KEY Utilities executes the downloaded application. If the necessary program files are not found, this message window appears: B B - - 8 8 6220 Hand-Held Computer User’s Guide PEN*KEY UTILITIES COMMUNICATIONS COMM SETTINGS: NRINET...
- Page 59 PEN*KEY UTILITIES COMMUNICATIONS COMM SETTINGS: NRINET SERVER NAME CLIENT IP ADDRESS 0.0.0.0 ROUTER 0.0.0.0 SIGNING ON STATUS: LAST SESSION T803 INVALID HOST NAME OR IP ADDRESS [NO]STOP COMM 6220 Hand-Held Computer User’s Guide Utilities Program B B - - 9 9...
- Page 60 If the session is unsuccessful, LAST SESSION appears with the failure status, such as “T289.” B B - - 1 1 0 0 6220 Hand-Held Computer User’s Guide PEN*KEY UTILITIES COMMUNICATIONS COMM SETTINGS:...
- Page 61 If you select this option and Option 2. COMM SETTINGS is set to INTERSERVER, this Communication Status menu appears: Transfer: Press the [NO] key to exit this screen. B B - - 1 1 1 1 6220 Hand-Held Computer User’s Guide...
- Page 62 The following values indicate an error returned by MININET.EXE. 100 is added to the error returned by MININET.EXE to avoid conflict with other defined errors. B B - - 1 1 2 2 6220 Hand-Held Computer User’s Guide Illegal buffer length Invalid command Command timed out...
- Page 63 Command completed while cancel occurring Command not valid to cancel Unusual network condition Adapter malfunction Hayes response code, or code defined by program: No carrier Command not recognized 6220 Hand-Held Computer User’s Guide Utilities Program B B - - 1 1 3 3...
- Page 64 Utilities Program " NOTE: For response codes not listed above, if you purchased this modem from the Norand Mobile Systems Division of Intermec Technologies Corporation, contact our Customer Response Center at 1-800-755-5505 (U.S.A. or Canada) or 1-425-356-1799. If this modem is not from the Norand Mobile Systems Division, con- tact your modem supplier.
- Page 65 812 Timeout while receiving data. Connection to " remote machine dropped. Make sure the host is still running, and check all cables and network connections. PEN*KEY Utilities Program 6220 Hand-Held Computer User’s Guide B B - - 1 1 5 5...
- Page 66 962 Too many levels of symbolic links. " 963 File name is too long. " 964 Host is down. " 965 Host is unreachable. " 966 Directory not empty. " B B - - 1 1 6 6 6220 Hand-Held Computer User’s Guide APPENDIX B...
-
Page 67: Option 2 Comm Setting
Y or B keys to scroll through the list, then press the [YES] key to enter. PEN*KEY Utilities Program 1. NETWORK. . . 2. MODEM/DIRECT 3. ACCESSORY CARD 4. HANDHELD 5. REMOTE OPS 6. INTERSERVER 6220 Hand-Held Computer User’s Guide B B - - 1 1 7 7... - Page 68 Press the [NO] key to exit this drop-down list. The comput- er takes you to the Communications Menu. B B - - 1 1 8 8 6220 Hand-Held Computer User’s Guide 1. NETWORK. . . 1. NPCP RS485 2. NPCP RS232 3.
- Page 69 2. COMM SETTING MODEM/DIRECT 3. UNIT ID 4. MODEM PARAMETERS MODEM TYPE NM2400/NM2400A PROTOCOL BPS FMT 2400 8N1 AUTO ANSWER 5. PHONE NUMBER 9...131369282 9. ADVANCED UTILITIES 6220 Hand-Held Computer User’s Guide Utilities Program B B - - 1 1 9 9...
- Page 70 SETTING. Suboption 4 HANDHELD Suboption 5 REMOTE OPS These suboptions are not supported at this time. B B - - 2 2 0 0 6220 Hand-Held Computer User’s Guide PEN*KEY UTILITIES COMMUNICATIONS 1. BEGIN COMM SESSION 2. COMM SETTING ACCESSORY CARD 3.
-
Page 71: Option 3 Unit Id
COMM SETTINGS is set to one of these three NETWORK options: NRINET, TFTP, or NOVELL NETWARE. PEN*KEY Utilities Program CHANGE UNIT ID UNIT ID 2233233 WORKGROUP 6200IPL [F4]RESET FACTORY [NO]QUIT 6220 Hand-Held Computer User’s Guide B B - - 2 2 1 1... - Page 72 Press [YES] to save the entries and exit the Network Pa- rameters menu. Press the [NO] key to exit without saving the entries. B B - - 2 2 2 2 6220 Hand-Held Computer User’s Guide NETWORK PARAMETERS SERVER NAME SERVER IP ADDRESS...
-
Page 73: Option 4 Modem Parameters
2. ETHERNET II 3. 802.3 RAW 4. 802.2 W/ SNAP MODEM PARAMETERS 1. MODEM TYPE NM2400/NM2400A 2. PROTOCOL 3. BPS RATE 2400 4. DATA FORMAT 5. AUTO ANSWER [NO]DONE 6220 Hand-Held Computer User’s Guide B B - - 2 2 3 3... - Page 74 If you leave this menu blank, a string is not saved. b. Press the [YES] key to enter the string or press [NO] to exit this pop-up menu. B B - - 2 2 4 4 6220 Hand-Held Computer User’s Guide MODEM INIT STRING ATE0V0Q0&M0&S1&C1& D2&R/QX0L1...
- Page 75 PEN*KEY Utilities Program MODEM INIT STRING ATE0V0Q0&M0&S1&C1& D2&R/QX0L1 PLEASE WAIT . . . [F2]TEST STRING [YES]OK [NO]QUIT MODEM INIT STRING ATE0V0Q0&M0&S1&C1& D2&R/QX0L1 RESULT: [F2]TEST STRING [YES]OK [NO]QUIT 6220 Hand-Held Computer User’s Guide B B - - 2 2 5 5...
- Page 76 The computer returns to the Modem Parameters pop-up menu with the selected BPS rate assigned. Press the [NO] key to exit this drop-down list. B B - - 2 2 6 6 6220 Hand-Held Computer User’s Guide APPENDIX B 1. TTY 2. YMODEM...
-
Page 77: Option 5 Network Interface
B keys to scroll through the list, then press the [YES] key to enter. The computer returns to the Communications menu with the selected network interface assigned. PEN*KEY Utilities Program 1. 8N1 2. 7E1 1. ETHERNET 2. RS485 6220 Hand-Held Computer User’s Guide B B - - 2 2 7 7... -
Page 78: Option 5 Phone Number
Press the [YES] key to save the new phone number and re- turn to the Communications Settings menu. Press the [NO] key to exit this pop-up menu. B B - - 2 2 8 8 6220 Hand-Held Computer User’s Guide PHONE NUMBER 9...13193693282 [ . ]DIALING PAUSE... -
Page 79: Option 9 Advanced Utilities
MAT.COM program is in the PATH. PEN*KEY PEN*KEY UTILITIES ADVANCED UTILITIES 1. SET DATE/TIME 2. BATTERY STATUS 3. FORMAT RAM DRIVE 4. FORMAT RAM CARD 5. SET BOOT DRIVE 6220 Hand-Held Computer User’s Guide Utilities Program B B - - 2 2 9 9... - Page 80 Use this suboption to check battery status, and to condition these batteries. The Battery Status screen appears when you select this suboption: B B - - 3 3 0 0 6220 Hand-Held Computer User’s Guide SET DATE/TIME DATE: 01/20/80 TIME:...
- Page 81 LAST COND: " CAPACITY: " CHARGER: " To start a conditioning cycle for the 6220 Computer backup battery, press [F2] to access this menu: PEN*KEY Utilities Program Status of the main battery pack: Battery operating properly. Power running low, needs recharging.
- Page 82 " “DISCHARGING” Battery is discharging " “CHARGING” " “COMPLETE” " “FAILED” " B B - - 3 3 2 2 6220 Hand-Held Computer User’s Guide PEN*KEY UTILITIES BATTERY CONDITIONING BACKUP VOLTAGE 2.90 DISCHARGING 23:59 NO ERRORS System is initializing Battery is charging...
- Page 83 Conditioning is not allowed and is PEN*KEY Unknown error code meaning occurred. 6220 Hand-Held Computer User’s Guide Utilities Program B B - - 3 3 3 3...
- Page 84 If you select this suboption, the Format RAM Drive pop-up menu appears: FORMAT RAM DRIVE [YES]OK [NO]QUIT Enter the total MB and KB for the RAM drive. B B - - 3 3 4 4 6220 Hand-Held Computer User’s Guide...
- Page 85 Press the [YES] key to continue. Press the [NO] key to exit the menu. PEN*KEY Utilities Program FORMAT RAM DRIVE ALL DATA ON EXISTING RAM DRIVE WILL BE DESTROYED! OK TO CONTINUE? [YES]OK [NO]QUIT 6220 Hand-Held Computer User’s Guide B B - - 3 3 5 5...
- Page 86 A pop-up verification window appears: Press the [YES] key to continue. Press the [NO] key to exit the menu. B B - - 3 3 6 6 6220 Hand-Held Computer User’s Guide FORMAT RAM CARD ALL DATA ON RAM CARD...
- Page 87 The computer returns to the Advanced Utilities menu. Press the [NO] key to exit this pop-up menu. PEN*KEY Utilities Program SET BOOT DRIVE 3. C 4. D: 5. E: [NO]QUIT 6220 Hand-Held Computer User’s Guide B B - - 3 3 7 7...
- Page 88 PEN*KEY Utilities Program APPENDIX B B B - - 3 3 8 8 6220 Hand-Held Computer User’s Guide...
- Page 89 Download The transmission of data from a host computer to a mobile computer. " " " " " " " " " " 6220 Hand-Held Computer User’s Guide Glossary " " " " " " " " Glossary-1...
- Page 90 The Unix system that the COM4980 Package runs on. LAN (Local Area Network) A group of network devices in which each device can communicate through a wired or wireless link. The wired link may have several segments joined by repeaters and Glossary-2 6220 Hand-Held Computer User’s Guide...
- Page 91 PC-compatible computer. Multi-tasking A computer’s ability to run more than one application at the same time. Network A computer data communications system which interconnects computer systems at various sites. A network 6220 Hand-Held Computer User’s Guide GLOSSARY Glossary-3...
- Page 92 “On” or “Off” but it will suspend/resume operation. PC Card A device that fits in the card slots of an Intermec or other computer. In some PEN*KEY computers, the smaller type II card occupies one slot, while a type III card blocks the second slot.
- Page 93 A user can write some variables to ROM; such as software, boot segment, data segment, and baud rate. RS-232 C (Recommended Standard 232) An Electronic Industries Association standard interface between data terminal equipment (DTE) and data 6220 Hand-Held Computer User’s Guide GLOSSARY Glossary-5...
- Page 94 Because frames are transmitted twice, the amount of wireless traffic over the radio network doubles. In general, the throughput of a wireless access point has about half the effective bandwidth of a wired bridge, Glossary-6 6220 Hand-Held Computer User’s Guide...
- Page 95 Wireless Stations An inclusive term that refers to network terminals and computers equipped with wireless NICs. Network terminals include the INTERMEC RT1100 Radio Terminal, RT1700 Radio Terminal, and RT5900 Radio Terminal, and the TRAKKER ANTARES products. Wireless computers include the JANUS Terminal, PEN*KEY 6400 Computer, and PEN*KEY 6550 Computer.
- Page 96 GLOSSARY Glossary-8 6220 Hand-Held Computer User’s Guide...
- Page 97 15-pin female D-sub, A-1 4-pin RJ-11 connector, A-3 Contrast adjustment, 1-12 Diagnostic EEPROM, 4-5 See also troubleshooting Display options touch screen, 1-11 without touch screen, 1-11 Downloading programs, 2-11 6220 Hand-Held Computer User’s Guide INDEX " " " " " " "...
- Page 98 Page up, 1-9 PC memory card installing, 2-7 drive D, ROM, 2-9 removing, 2-8 drive E, 2-9 Index-2 6220 Hand-Held Computer User’s Guide type II, 1-14 Unpacking and inspecting, 1-2 type III, 1-14 Utilities program, B-1 communications menu, B-6 communications menu...
Need help?
Do you have a question about the 6220 and is the answer not in the manual?
Questions and answers