Table of Contents
Advertisement
Quick Links
Advertisement
Table of Contents

Summary of Contents for PhaseOne iXU-RS 1900
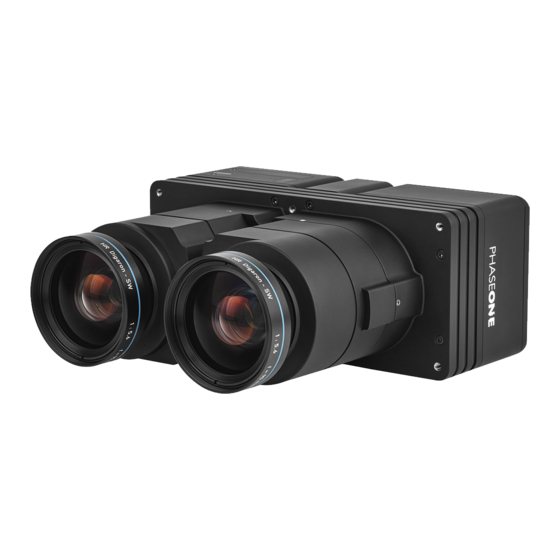
- Page 1 Phase One iXU-RS 1900 Aerial Camera System Installation Guide...
-
Page 2: Table Of Contents
Contents 1. What’s in the Box? ................... 5 Optional Accessories................5 2. Overview....................... 6 iXU-RS 1900 Camera System ............. 6 3. Preflight Planning ..................8 This guide is designed to assist you Exposure Sequence ................9 with the installation of your new Understanding the Exposure Sequence ........ -
Page 3: What's In The Box
1. What’s in the Box? • Phase One iXU-RS 1900 camera • Two Rodenstock RS-90mm Lenses • Two sets of 24 V DC power supply with international outlet adapters • Two iXU RA power cables, 2 m • iXU RA control cable, 2 m •... -
Page 4: Overview
2. Overview 3. Setup button 4. Navigation Button 5. Power terminal iXU-RS 1900 Camera System 6. Data terminal A 1. Pod mounting threaded holes (6) 7. Data terminal B 2. Lens secure cams (6) 8. USB 3.0 port screw 9. USB 3.0 port cover 10. -
Page 5: Preflight Planning
3. Preflight Planning Exposure Sequence To learn more about the capabilities of the iXU-RS 1900 camera, consult the http://industrial.phaseone.com/Aerial_Systems.aspx Trigger In website and the document files saved on the USB drive provided with the camera. System Ready Understanding the Exposure Sequence... -
Page 6: Wiring A Control Cable
Phase VIT-min=0.8 V) One GNSS User Guide* iXU-RS 1900 system Yellow RS232 TX iXU-RS 1900 system can VOH at RL=3 kΩ to GND +5.4 send specific information to external system VOL at RL=3 kΩ to GND –5.4... -
Page 7: Wiring A Control Cable For An Ixu-Rs1900
Wiring a Control Cable for an iXU-RS1900 Software Activation of Black Reference The Phase One iXU-RS 1900 camera can perform a black External devices are connected to the camera with an iXU reference sequence by using the iX Capture application, the RA control cable (supplied with the camera kit). -
Page 8: Wiring The Power Cable
Power Cable Plug Pinout Camera Power Socket Pinout Note: The iXU-RS 1900 camera must only be powered by a limited fused power source, up to 8 A single fault condition. La iXU-RS 1900 caméra doit être alimentée par une source d’alimentation protégée par un fusible, d’une capacité... -
Page 9: Electrical Interfaces
Electrical Interfaces Mid-exposure pulse There are four signals that are used to communicate with and control an iXU-RS 1900 camera: Trigger in Triggers the iXU-RS 1900 for new capture cycle Black Triggers the iXU-RS 1900 for a black reference reference sequence... -
Page 10: Connecting A Camera
Insert the iXU RA power cables to the power input of the two sensor modules of the iXU-RS 1900. Attach the iXU-RS 1900 camera to a pod using six M4 bolts. Connect the other end of both iXU RA power cables to the Note: Do not insert bolts deeper than 6 mm into the threaded aircraft’s power bus. -
Page 11: Connecting Control Cables To Devices
Connecting Control Cables to Devices 1. Insert the iXU RA control cable into data terminal A Depending on how you choose to configure your iXU-RS 1900, of the left iXU-RS 1900 camera body. the camera can be connected to the following: 2. -
Page 12: Connecting Cables For Multiple Camera Configuration
1. Insert an iXU RA control cable into data terminal A of the Note: for multiple cameras setup (including iXU-RS 1900 left sensor module, on an iXU-RS 1900 camera. camera) do not use trigger or black reference from iX Capture. -
Page 13: Connecting A Usb 3.0 Cable To An Onboard Computer
Connecting a USB 3.0 Cable to an 3. Insert the end of the USB 3.0 cable into the USB 3.0 port on the camera. Onboard Computer 4. Using a 2 mm hex key, tighten the screw on the USB 3.0 To connect a USB 3.0 cable to a computer: cable lock into the camera. -
Page 14: Connecting A Gnss/Imu
GNSS receiver and camera must match. Note: The GNSS receiver must use the same baud rate as the camera (9600, 19200, 57600 or 115200). A comprehensive guide to connecting Phase One aerial cameras with a GNSS receiver is available for download from http://industrial.phaseone.com/downloads-guides.aspx... -
Page 15: Firmware
To install the Phase One Firmware Updater Application, download it from the Downloads section of the industrial.phaseone.com website and do the following: 1. Open the zip file, extract and store the FWUpdater.msi. 2. Double-click FWUpdater.msi to start the Firmware Updater Setup Wizard. -
Page 16: Updating The Firmware
• Your computer has the Firmware Updater application installed and the computer is connected to the Internet. To update the iXU-RS 1900 firmware: 1. Connect the sensor modules to a computer with USB 3.0 cables. 4. If displayed, click the link to download the firmware. -
Page 17: Restoring The Firmware
Restoring the Firmware 6. After downloading the new firmware, the Release Notes button is no longer grayed out. In the event you need to restore the sensor module’s firmware to the factory version. (sensor module settings are not affected): 1. Go to Menu > Firmware. The Firmware screen appears. - Page 19 Visit the website for additional information industrial.phaseone.com © Phase One 2018 85047000 - iXU-RS 1900 Installation Guide 1.12...


Need help?
Do you have a question about the iXU-RS 1900 and is the answer not in the manual?
Questions and answers