Table of Contents
Advertisement
Quick Links
Advertisement
Table of Contents

Subscribe to Our Youtube Channel
Related Manuals for PhaseOne iXM-GS120


Summary of Contents for PhaseOne iXM-GS120
- Page 1 Operation Guide...
- Page 2 Operation Guide Legal Notice The company disclaims all liability and warranties in relation to this manual, including warranty of merchantability, fitness for particular purpose and accuracy, and may amend it without further notice. Trademarks All trademarks or registered trademarks are the property of their respective owners.
-
Page 3: Table Of Contents
Mounting a RS Lens ................................. 17 Dismounting a RS Lens ..............................18 Connecting the Camera ................................19 Attaching the Camera (iXM-GS120) to a Pod ........................19 Connecting a Control Cable ............................. 19 Connecting the Power Cable ............................19 Connecting a USB Cable ..............................20 Connecting Cables for Multiple Camera Configuration .................... - Page 4 Operation Guide Table of Contents 10.2 Setting HDMI Display ............................... 27 Miscellaneous Camera Settings ..............................28 11.1 Setting shutter, ISO and Aperture ............................ 28 11.2 Setting Camera Date & Time ............................28 11.3 Setting Image Orientation..............................28 11.4 Setting GPS Time Mode & Receiver ..........................28 11.5...
-
Page 5: Introduction
Operation Guide 1. Introduction 1 Introduction Scope This guide describes how to operate the iXM-GS120 as follows: • Section 2 - iXM-GS120 Overview • Section 3 - Camera Features • Section 4 - Cable Specifications • Section 5 - Unboxing the Camera •... -
Page 6: Ixm-Gs120 Overview
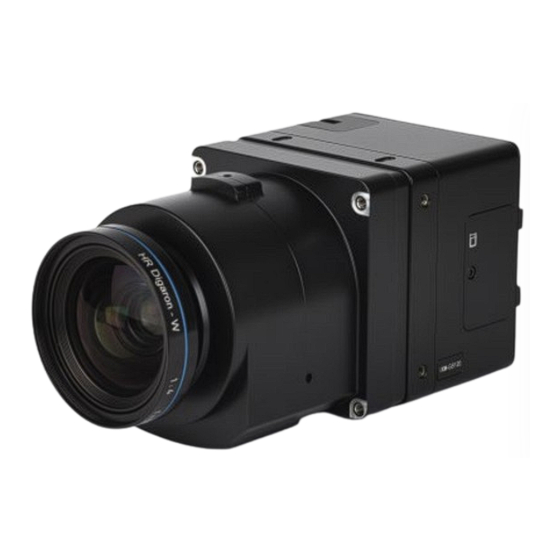
2. iXM-GS120 Overview 2 iXM-GS120 Overview The iXM-GS120 is a wide area high resolution camera with high sensitivity, low noise, and minimal integration time for diverse demanding applications. The iXM-GS120’s global shutter technology enables record-breaking short exposures without the need for a mechanical shutter. -
Page 7: Camera Features
Operation Guide 3. Camera Features 3 Camera Features Exposure Sequence The following figure and tables describe the signals and hardware pulses that control the exposure sequence. Exposure Sequence Exposure Sequence Signals Signal Description Trigger In The FMS signals the camera to capture an image. -
Page 8: Black Reference
Operation Guide 3. Camera Features Note in some cases, enabling low power mode (see Section 11.5 Setting When Low Power Mode) can cause slowness in capture rate when the image capture rate is slower than the low power mode timing. If, for example, the capture rate is scheduled at 15 seconds and the low power mode is set at 10 seconds, each capture will be delayed by up to 350mS. -
Page 9: Software Activation Of Black Reference
3.2.3 Software Activation of Black Reference The iXM-GS120 camera can perform a black reference sequence through iX Capture, the Phase One SDK, or the Flight Management System. The following table describes the black reference mode to use for your capture flow. -
Page 10: Electrical Interfaces
Operation Guide 3. Camera Features Electrical Interfaces The following figure shows the four signals that control the iXM-GS120 camera: Schematic Drawings Trigger in Triggers the iXM-GS120 camera for new capture cycle. Black reference Triggers the iXM-GS120 camera for a black reference... -
Page 11: Cable Specifications
Operation Guide 4. Cable Specifications 4 Cable Specifications Power Cable The power cable open end is connected to the aircraft’s power bus, and the LEMO connector end is connected to the camera right LEMO (power) port. Figure 1. Power Cable Plug Figure 2: Power Socket Pinouts 1. -
Page 12: Control Cable
Operation Guide 4. Cable Specifications Control Cable The control cable open end is connected to your system through nine (28 AWG) wires, and the LEMO connector end is connected to the camera center or left LEMO (data) port, depending on your system configuration. - Page 13 Operation Guide 4. Cable Specifications Parameter Voltage Color Name Description Direction Levels Notes (see next table) Signal the camera to Understanding Black Reference. wakeup from low power For low power mode control, see mode. Section 3.1 Exposure Sequence. Purple...
-
Page 14: Unboxing The Camera
Operation Guide 5. Unboxing the Camera 5 Unboxing the Camera Verify that all parts were supplied according to the specific packing list for your system. Page 14 of 32... -
Page 15: Preparing The Camera
Operation Guide 6. Preparing the Camera 6 Preparing the Camera Note • Before mounting or dismounting a lens, verify that the power cable is not attached to the camera. • Mount/dismount lenses only in a clean environment. • Place a soft cloth on the table to avoid scratching the camera. - Page 16 Operation Guide 6. Preparing the Camera 4. With the openings touching, lower the lens contacts to the camera contacts. 5. Hold the lens with both hands and press it firmly down onto the camera, so that the O-Ring seal is pressed inside.
-
Page 17: Dismounting A Rsm Lens
Operation Guide 6. Preparing the Camera Dismounting a RSM Lens To dismount a lens from an iXM: 1. Use a 2 mm hex key to unscrew the four screws on the iXM camera. 2. Hold the lens and gently pull up at an angle. -
Page 18: Dismounting A Rs Lens
Operation Guide 6. Preparing the Camera Dismounting a RS Lens To dismount the lens from an iXM-RS: 1. Use a 2 mm hex key to unscrew the three lens screws. Note The screws remain attached to the camera. 2. Pull the lens assembly away from the camera. -
Page 19: Connecting The Camera
1. Connect the power cable LEMO connector to camera power port. 2. Connect the other end of the power cable to the aircraft power bus. Caution The iXM-GS120 camera must be powered by a limited fused power source only, up to 2A single fault condition. Page 19 of 32... -
Page 20: Connecting A Usb Cable
4. Tighten both locking screws on the USB connector to secure it to the port using a torque of 25 cNm. Connecting Cables for Multiple Camera Configuration You can connect multiple iXM-GS120 cameras through a daisy-chain to capture images simultaneously. The first camera in the daisy-chain is triggered through the control cable. -
Page 21: Connecting The Hdmi Cable
Operation Guide 7. Connecting the Camera Connecting the HDMI Cable To connect an HDMI cable to an iXM-GS120 camera: 1. Using a 2 mm hex key, remove the screw securing the HDMI port cover. 2. Remove the cover and store it. -
Page 22: Configuring Auto-Exposure Mode
Operation Guide 8. Configuring Auto-Exposure Mode 8 Configuring Auto-Exposure Mode You can operate the camera in manual or auto-exposure mode. In auto-exposure mode, the camera controls the following parameters: • • aperture • shutter speed When auto-exposure mode is active, the camera reads the histogram of each image it captures and adjusts the exposure parameters for the next image. - Page 23 Operation Guide 8. Configuring Auto-Exposure Mode 5. Under AUTO EXPOSURE: a. Set the ISO, SHUTTER and APERTURE ranges. b. Click the arrows to set the auto-exposure priorities between ISO, SHUTTER and APERTURE: Page 23 of 32...
- Page 24 Operation Guide 8. Configuring Auto-Exposure Mode c. Click CAPTURE and click the EV + and – icons as required to adjust the Exposure Value. Note • For the first exposure, the camera uses the following AUTO EXPOSURE values: ...
-
Page 25: Storing Images
Operation Guide 9. Storing Images 9 Storing Images To save images on a PC, you can: • connect the camera with a USB 3.1 cable to a PC running iX Flight Pro, iX Capture, Phase One SDK or Capture One. -
Page 26: Formatting A Memory Card
Operation Guide 9. Storing Images 4. Place the memory card cover in position and secure the cover with the memory card slot cover screw. Tighten the screw to torque 15 cNm. To eject the memory card: Caution Before ejecting the memory card, to prevent data corruption, make sure the camera is in LOW POWER MODE as follows: 1. -
Page 27: Live Video Display
Operation LED. 10.1 Using Live View with iX Capture Live View enables you to view a live video feed from the iXM-GS120 camera and to capture images while viewing a subject of interest. -
Page 28: Miscellaneous Camera Settings
Operation Guide 11. Miscellaneous Camera Settings 11 Miscellaneous Camera Settings This section describes how to set common parameters using iX Capture. Note For more information about camera settings, see the iX Capture User Guide. 11.1 Setting shutter, ISO and Aperture To set shutter, ISO, and aperture values: 1. -
Page 29: Setting When Low Power Mode Is Activated
Operation Guide 11. Miscellaneous Camera Settings 11.5 Setting When Low Power Mode is Activated To set when Low Power Mode is activated: 1. Click SETTINGS. 2. Click the required camera tab. 3. Click SERVICE. 4. Set the required LOW POWER MODE. -
Page 30: Firmware
12. Firmware 12 Firmware 12.1 Installing the Firmware Updater To install the Phase One Firmware Updater: 1. Download the Firmware Updater from www.phaseone.com/download-categories/ixm-firmware/. 2. Open and extract the zip file. 3. Save the FWUpdater.msi file. 4. Double-click FWUpdater.msi. 5. When installation wizard completes, click Start > Phase One > Firmware Updater. -
Page 31: Checking Firmware Version
Operation Guide 12. Firmware Note When the update is successfully completed, the MAIN component is marked with a green check mark icon. 9. If the update fails, disconnect the USB 3.1 cable, reconnect it, and repeat the procedure described above. -
Page 32: Interpreting The Camera Leds
Operation Guide 13. Interpreting the Camera LEDs 13 Interpreting the Camera LEDs The camera back has three LEDs that indicate camera status as follows: Location in Green Blue Orange Figure Above Storage No storage Storage available - Storing Operation...
Need help?
Do you have a question about the iXM-GS120 and is the answer not in the manual?
Questions and answers