Table of Contents
Advertisement
Quick Links
Advertisement
Table of Contents

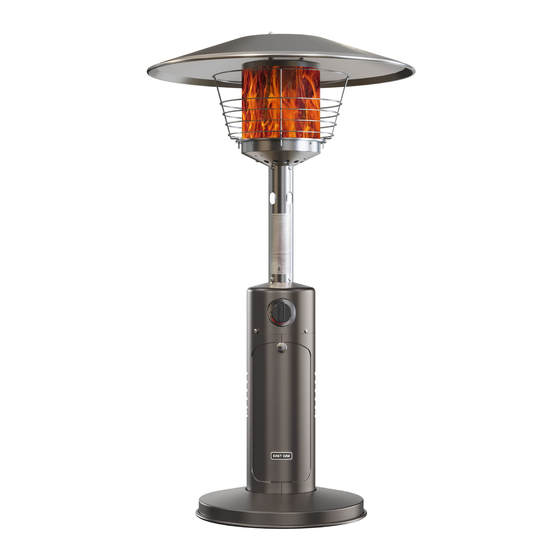
Summary of Contents for EAST OAK EO-PH001
-
Page 2: Safety Information
SAFETY INFORMATION Before you assemble or operate this unit, please carefully read this entire manual. Failure to do so WARNING • The installation of this unit must adhere to local codes or Propane Storage and Handling Code, CSA B149.2. • THIS UNIT IS INTENDED FOR OUTDOOR USE ONLY! This product shall be used outdoors, in a ventilated space and shall not be used in any enclosed area. - Page 3 damaged parts should this occur. • Do not disconnect any part while unit is in use. • Do not store a spare propane tank on or near this unit. • If the heating unit is indoors, detach the propane tank and leave outdoors. •...
- Page 4 SAFETY INFORMATION BE CAREFUL: WHEN CERTAIN M ATERIALS OR 48" ITEMS ARE STORED ABOVE, BESIDE OR UNDER THIS HEATER WHILE IN USE, THEY WILL BE SUBJECT TO RADIANT HEAT AND COULD BE 48" 48" SERIOUSLY DAMAGED. Combustible materials should not be within inches of the top of the unit, or within inches around the entire unit.
-
Page 5: Item Description
HARDWARE Item Description (packed with part I) M8 Flange Nut (2 pcs packed with part I) Bolt M8x16 M6 Flange Nut (pre-assembled on part C) Stainless Steel Bolt Bolt M6x30 Washer (packed with ground fixer) Post Bolt Screw M6x8 Cap Nut Wing Nut Wrench Anchoring Arm... - Page 6 CONTENTS Item Description Reflector Panel Center Reflector Burner Assembly Tank Housing Upper Post Lower Post Support Bracket Base Wheel Assembly Regulator | Page 6...
- Page 7 ASSEMBLY INSTRUCTIONS Step 1 Turn the base upside down, then attach wheel assembly (I) to base (H) using 2pcs M8 flange nuts (AA) and 2pcs bolts M8x16 (BB). Attach 3pcs anchoring arm (MM) to base (H) using 6pcs M6 nuts (OO) and 6pcs bolt M6x10 (NN). Be sure that the wheel assembly is parallel to the base.
- Page 8 ASSEMBLY INSTRUCTIONS Step 4 Load tank housing onto post, slide tank housing down. Step 5 Remove the 4 pcs preassembled stainless steel bolts (DD) from the burner assembly (C). Insert the regulator (J) from the top end of the upper post (E), then attach the burner assembly (C) to upper post (E) using the four bolts removed at the beginning of this step.
- Page 9 ASSEMBLY INSTRUCTIONS Step 7 WARNING: Remove protective cover before assembling. Note: If necessary for proper alignment of reflector sections,loosen each screw prior to further assembly and retighten after sections are aligned. Attach 3 pcs reflector panels (A) to center reflector (B) using 9 pcs Screws M6x10 (II) and 9 pcs cap nuts (JJ).
- Page 10 ASSEMBLY INSTRUCTIONS Step 9 Place the propane gas tank (not included) on the base. The cylinder must have a listed overfilling prevention device. The cylinder must have a connection device compatible with the connection for the appliance. The cylinder used must include a collar to protect the cylinder valve.
-
Page 11: Operation
OPERATION Before performing a leak test, be sure that no sparks can occur and you are in a spacious outdoor area. Connect the propane gas tank to the regulator and turn the valve on the unit to the “off” position. Brush a soap and water mixture on all connections. Turn the gas supply on; if bubbles occur on any connection there may be a leak. -
Page 12: Maintenance
MAINTENANCE • Before performing any maintenance always disconnect propane gas tank. • Keep the heating item free and clear from combustible materials. • Visually inspect burner for obstructions and keep tank enclosure free and clear from debris. • Use a soft brush to get rid of the mild stains, loose dirt and soil after the burner is completely cooled down. -
Page 13: Troubleshooting
TROUBLESHOOTING Problem Cause Solution The burner will not light. The burner injector is clogged. Clean the burner injector. There is low gas supply pressure. Call your gas supplier. The bur There is low gas pressure. Call your gas supplier. immediately after ignition. The ignition is delayed. -
Page 14: Warranty
WARRANTY The manufacturer warranty will be voided by, and the manufacturer disclaims any responsibility for, the following actions: • • Use and installation are other than what is listed in this manual. Please contact the manufacturer for replacement parts. | Page 14...


Need help?
Do you have a question about the EO-PH001 and is the answer not in the manual?
Questions and answers