
Related Manuals for EAST OAK MN11BN2


Summary of Contents for EAST OAK MN11BN2
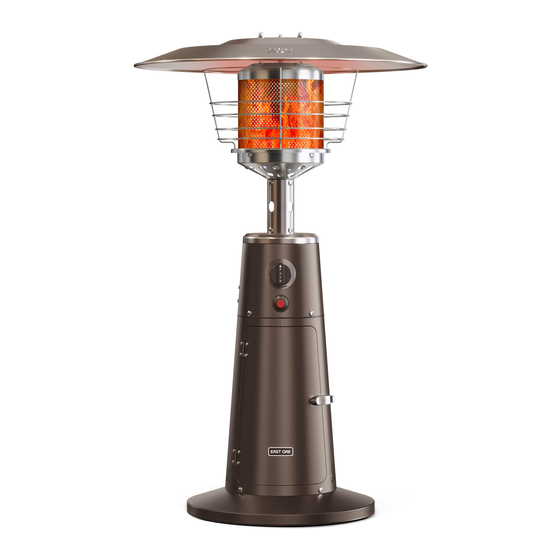
- Page 1 Tabletop Patio Heater 11000 BTU Owner’s Manual MODEL: MN11BN2 MN11BK2 MN11GN2 EASTOAK.COM OWNER’S MANUAL...
- Page 2 Questions? Comments? Reach out to us for expert support! support@eastoak.com eastoak.com 1-833-EAST-OAK ( USA ) ( 1-833-327-8625 ) Mon-Fri 8am-8pm EST Follow eastoakliving on Claim your 3-year warranty Please scan the QR code to view the installation video at eastoak.com/warranty TABLETOP PATIO HEATER EASTOAK.COM OWNER’S MANUAL...
-
Page 3: Safety Information
DANGER IMPORTANT INFORMATION DANGER indicates an imminently hazardous situation which, if not avoided, will result in death or serious injury. Please check all parts and components to ensure no damage or missing items before starting the product’s construction. If you have any problems or discover any missing parts, please contact customer service at support@eastoak.com. -
Page 4: Carbon Monoxide Hazard
SAFETY INFORMATION • Other standards govern the use of fuel gases and heat producing products for specific uses. Your local authorities can advise you about these. • If no local codes exist, follow National Fuel Gas Code, ANS Z223.1. In Canada, DANGER installation must conform to local codes. -
Page 5: Service Safety
WARNING SAFETY INFORMATION • Alert children and adults to the hazards of high surface temperatures. Stay away from these surfaces to avoid burning skin or igniting clothing. • Carefully supervise young children when in the vicinity of the heater. WARNING •... -
Page 6: Package Contents
PACKAGE CONTENTS PACKAGE CONTENTS PART DESCRIPTION QUANTITY Base Cylinder Housing Post with Burner Assembly Emitter Screen Wire Guard Large Reflector Small Reflector TABLETOP PATIO HEATER EASTOAK.COM OWNER’S MANUAL... -
Page 7: Parts List
PARTS LIST PARTS LIST Base Large Reflector ST 4.2 x 9.5 Screw Stud 3/16” Screw X 1 PC X 1 PC X 8 PCS + Spare X 1 X 3 PCS X 4 PCS + Spare X 1 Reflector Spacer Washer M6 Cap Nut X 3 PCS... - Page 8 ASSEMBLY INSTRUCTIONS Insert the burner assembly into top of cylinder housing, make sure the control knob and front door are facing the Insert the cylinder housing into the tabs on the base, make same way. Using 4pcs ST 4.2x9.5 screws and tighten. sure the screw holes of cylinder housing match the holes X 4 PCS X 4 PCS...
- Page 9 Attached 3pcs studs to top of emitter screen. Attached the emitter screen which install studs by last step into the burner unit, make sure holes of two parts can match each other. Using 4pcs 3/16” screws and tighten. X 4 PCS X 3 PCS TABLETOP PATIO HEATER EASTOAK.COM...
- Page 10 Attach the four legs of wire guard into the holes on base of emitter. Attach 3pcs washers to 3pcs studs which assembled on emitter screen by previous step. Then install the large reflector to studs with 3pcs washers and 3pcs X 3 PCS reflector spacers, make all tighten.
- Page 11 Attach 3pcs washers to reflector spacers which assembled, Unscrew the red knob, insert the small battery and tighten and then attach the small reflector on 3pcs reflector spacers, the knob. Lift the buckle to open the door of the cylinder then continue attach 3 washers again on reflector spacers, housing, Remove the gas regulator rubber plug, attach the X 3 PCS...
- Page 12 ASSEMBLY INSTRUCTIONS Using 20lbs propane tank for working. Move the connector of gas hose through the holes at bottom of cylinder housing. Connect the • The propane gas and cylinder are sold separately. gas regulator. Connect the other side of gas hose to the propane tank. •...
-
Page 13: Portable Heater Location
ASSEMBLY INSTRUCTIONS OPERATION INSTRUCTIONS The propane cylinder must be constructed and marked in accordance with the specifications for propane gas cylinders of the U.S. Department of Transportation (DOT) or with the Standard for Cylinders, Spheres and Tubes for Transportation of PORTABLE HEATER LOCATION Dangerous Goods and Commission, CAN/CSA-B339. - Page 14 OPERATION INSTRUCTIONS 5. After the flame comes on, leave the variable control knob on “ ON” for about 5 minutes, and then switch to the desired temperature. • Perodically check the whole gas system for leaks. • Immediately check for leaks if an odor of gas is detected. •...
- Page 15 7. Heater is outdoors (outside any enclosure). OPERATION INSTRUCTIONS 8. There is adequate fresh air ventilation. 9. Heater is away from gasoline or other flammable liquids or vapors. 10. Heater is away from windows, air intake openings, sprinklers and other water sources.
-
Page 16: Care And Maintenance
CARE AND MAINTENANCE Note: In a salt-air environment (such as near an ocean), corrosion occurs more quickly than normal. Frequently check for corroded areas and repair them promptly. WARNING FOR YOUR SAFETY • DO NOT touch or move heater for at least 45 minutes after use. TIPS: Use high-quality automobile wax to help maintain the appearance of your •... -
Page 17: Troubleshooting
TROUBLESHOOTING FEATURES • Utilizing exclusive temperature field reflection technology, transfer heat to PROBLEM POSSIBLE CAUSE CORRECTIVEA CTION effective locations.The heat output is up to 11,000 BTU with 4.5-6.5 ft heating Cylinder valve is closed Open valve radius. Clean or replace orifice or Blockage in orifice or pilot tube •... -
Page 18: Warranty Policy
• Damage caused by acts of nature (storm damage, wind damage, etc.). • Arbitrarily repair or modification by the customer. During the limited warranty period for the product, East Oak will provide parts, repair, or replace your product, at our discretion, due to any defect in materials or manufacturing defects. - Page 19 support@eastoak.com eastoak.com 1-833-EAST-OAK (USA) TABLETOP PATIO HEATER...
Need help?
Do you have a question about the MN11BN2 and is the answer not in the manual?
Questions and answers
When I turn the heaters the unit does not light, even when I use a lighter. I know the propane tank is fine. I do not smell any gas so I assume there is blockage somewhere. I received this heater as a gift and this is the very first time I’ve tried to use it.