Table of Contents
Advertisement
Quick Links
Advertisement
Table of Contents

Related Manuals for EAST OAK PYROL EO-PH22006


Summary of Contents for EAST OAK PYROL EO-PH22006
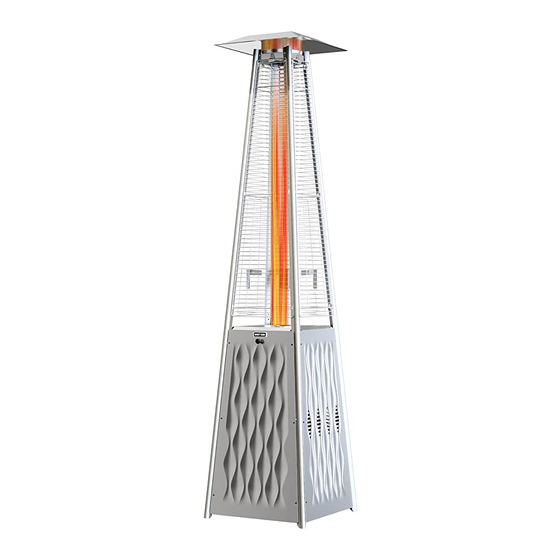
- Page 1 PYROL Pyramid Patio Heater 48000 BTU Owner’s Manual MODEL: EO-PH22006...
- Page 3 eastoak.com Question? Comments? Reach out to us to get expert support! support@eastoak.com eastoak.com 1-833-EAST-OAK (USA) (1-833-327-8625) Follow eastoakliving on Claim 3-year warranty at eastoak.com/warranty EASTOAK.COM PYRAMID PATIO HEATER...
-
Page 4: Important Caution
IMPORTANT CAUTION Please verify all parts and components present and check for any damaged pieces before assembly. If you have any damaged or missing parts, please contact customer service at support@eastoak.com. • Some parts may contain sharp edges and may cause injury or property damage. -
Page 5: Safety Guide
WARNING • Do not store or use any gasoline or other flammable vapors or liquids close to this appliance. All propane tanks not connected to the heater should be stored at a separate location. • Improper installation, alteration, service, or maintenance may cause property damage, injury, or death. - Page 6 SAFETY GUIDE • Do not attempt to use fire to check for gas leaks. • Max. supply pressure is 11 WC. • Recommended propane gas tank size is as follows – diameter: 12”, height: 18”, weight: 20 lbs. • You must use a propane tank that has a collar to protect the gas valve. •...
- Page 7 • Do not operate on a boat or vehicle. This unit must be used on a flat surface and outdoors ONLY. • Always remove protective cover before operating (if applicable). • Check for leaks after not using the unit for long periods of time. •...
- Page 8 SAFETY GUIDE • Do not obstruct the flow of combustion or ventilated air. • Keeping the ventilation opening(s) of the cylinder enclosure free and clear from debris. • Visually inspect the burner flames for anything alarming. • Clean the appliance with recommended products only. •...
-
Page 9: Care And Maintenance
CARE AND MAINTENANCE • Before any maintenance, always disconnect the propane gas tank. • Ensure the heater is free from any debris or combustible materials. • Use a soft brush to clean any mild stains, loose dirt, or soil only after the heater has completely cooled down. -
Page 10: Parts Diagram
PARTS DIAGRAM Item Description Reflector Top Plate Assy Glass Tube Upper Support Protective Guard Black Silicone Ring Side Panel Front Panel Gas Hose & Regulator Middle Plate Control Box Assy Lower Support Wheel Assembly Bottom Plate Block Belt 1-833-327-8625 SUPPORT@EASTOAK.COM... -
Page 11: Parts List
PARTS LIST Bolt M6x10 M6 nut (X4) (X4) Screw M5x10 Stud (X3) (X18) Wing nut Flat washer (X6) (X3) EASTOAK.COM PYRAMID PATIO HEATER... - Page 12 PARTS LIST Fixing Bracket Screw 3/16” (X4) (X30) Knob Large flat washer (X1) (X1) Screw M4 X 8 Philips screwdriver (X1) (X1) 1-833-327-8625 SUPPORT@EASTOAK.COM...
- Page 13 Wrench AA Battery (1.5 V) (X1) (X1) Ground fixer Ground fixer screws (X4) (X4) Before assembly, check and confirm all parts are present. Compare parts present with the content lists, including all hardware. If any parts or hardware pieces are missing or damaged, please contact customer service at support@eastoak.com.
- Page 14 ASSEMBLY INSTRUCTIONS Attach the wheel assembly (M) to the bottom plate (N) with 4 M6x10 bolts (AA) and 4 M6 nuts (BB). NOTE: Move the cover of the bottom plate (N) AA (X4) BB (X4) before connecting the wheel assembly. 2-1.
- Page 15 2-3. Insert the pins on the bottom plate (N) into the holes of the lower support (L). Secure the pins on the bottom late to the lower support with 4 M5x10 screws. CC (X10) OO (X4) Insert the pins of the middle plate (J) into the holes of the lower support (L).
- Page 16 Connect the upper support (D) to the lower support (L) using 8 M5x10 screws. Attach the top plate (B) the upper support (D) with 8 3/16” screws. CC (X10) HH (X8) Attach the reflector (A) to the top plate (B). Secure the top plate to the reflector with 3 studs (DD), 3 flat washers (FF), and 3 wing nuts (EE).
- Page 17 Carefully insert the glass tube through the center opening of the top plate. Make sure to lift the top plate up first. The black silicone ring (F) should be attached to the lower edge of the glass tube (C) as illustrated below. Slide the glass tube ©...
- Page 18 Attach the three side panels (G) to the heater with 18 3/16” screws. ATTENTION: Do not cover the side with the control knob. ATTENTION: Move the cover of side panels (G) HH (X18) before assembly. Install the knob (II) with 1 M4x8 screw and 1 large flat washer (JJ).
- Page 19 Insert the propane gas tank (sold separately) into the lower opening. Connect the gas cylinder to the block belt. To close the propane tank, turn the cylinder valve clockwise. Attach the regulator (J) to the cylinder valve by turning the regulator coupling nut clockwise.
-
Page 20: Operation
OPERATION • Before every leak test, ensure that there are no combustible or flammable materials, such as gas, liquids, or vapor. Ensure there are no items that can catch on fire; this may include loose clothes, hair, etc. • Attach the propane gas tank to the regulator. Turn the valve knob to the “OFF”... -
Page 21: To Turn The Heater On
TO TURN THE HEATER ON WARNING: Ensure the glass tube is not damaged before use and assembly. • Ensure the control knob is positioned to “OFF”. • Connect the gas regulator to a propane gas tank. • Push and turn the control knob to the “PILOT” position and hold for 60 seconds. -
Page 22: Troubleshooting
TROUBLESHOOTING Problem Cause Solution The burner will not light. The burner injector is clogged. Clean the burner injector. There is low gas supply pressure.C all your gas supplier. The bur There is low gas pressure.C all your gas supplier. immediately after ignition. The ignition is delayed. -
Page 23: Warranty And Service
WARRANTY AND SERVICE GUARANTEED 3-YEAR WARRANTY Thank you for choosing East Oak. This product is covered by our company warranty for up to 3 years from its original purchase date. CLAIM WARRANTY If you’d like to claim your product’s warranty, register your new product on our website at www.eastoak.com/warranty. - Page 24 Pyrol Pyramid Patio Heater 1-833-327-8625 SUPPORT@EASTOAK.COM...
- Page 26 support@eastoak.com eastoak.com 1-833-EAST-OAK (USA)