
Related Manuals for Hussmann FG


Summary of Contents for Hussmann FG
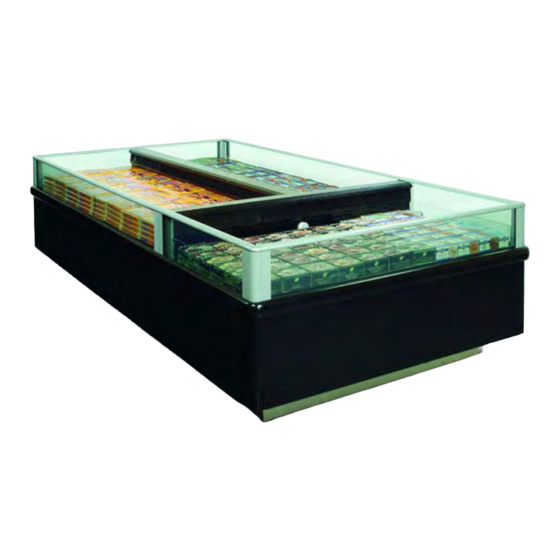
- Page 1 Low Temperature Single Deck Wall & Island Merchandisers Installation & Service Manual Shipped With Case Data Sheets IMPORTANT P/N 0467434_D Keep in store for Impact Excel Series future reference! September 2007...
-
Page 3: Table Of Contents
Installing End Splashguards ... . . 3-5 IMPORTANT Quality that sets industry standards! U.S. & Canada 1-800-922-1919 • Mexico 1-800-522-1900 www.hussmann.com © 2007 Hussmann Corporation P/N 0467434_D ONTINUED ON AGE IV... - Page 4 3. Changed joining order, page 1-8. 4. Changed 3 in. Hex Head screw to 3 Head screw, pages 1-8 and 1-10. 5. Changed on page 1-10. END KEY 6. Added fastener location for joining FWG to FWEG, page 1-10. in. Hex HUSSMANN...
-
Page 5: Installation
This means that from the time the product is received, through storage, preparation and display, the temperature of the product must be controlled to maximize the life of the product. HUSSMANN CORPORATION • BRIDGETON, MO 63044-2483 U.S.A. INSTALLATION Excel wall models have internal frames. A ®... -
Page 6: Unloading
Do NOT remove shipping braces until the merchandisers are positioned for installation. Uptilt riders are top-heavy. Never leave in vertical position. Use caution when moving. HEY ARE NOT such as the weight of a WARNING WARNING HUSSMANN... -
Page 7: Shipping Rider
3. Mark the location of each joint from front to back lines. HUSSMANN CORPORATION • BRIDGETON, MO 63044-2483 U.S.A. 4. FLOORS ARE NOT LEVEL!!! When working with two or more cases to be joined, the whole lineup must be leveled on the same plane, left to right and front to back. - Page 8 At the front of the case, screw down the levelers on each of the center support legs so that they contact the floor and support the front of the case. Leveling F / FG Adjust Legs NOTE: Do not place levels on Display Pans or on Racks.
-
Page 9: Joining Instructions
1 in. (25 mm) gasket at the top of the discharge and return air flues as shown. HUSSMANN CORPORATION • BRIDGETON, MO 63044-2483 U.S.A. • Do not stretch gasket, especially around corners. • Do not butt gaskets;... -
Page 10: Align End Frames
3. Fastener size and location are detailed in Pages 1-8 and 1-9. Loosely assemble bolt, washers, lockwasher and nut as shown on Page 1-7. Do not attempt to draw cases together using nut and bolt. P/N 0467434_D Foam Gasket Foam Gasket HUSSMANN... -
Page 11: Install Fasteners
Washer Bolt NOTE: Joining hardware is shown enlarged for clarity. Clip Location Between Two Cases HUSSMANN CORPORATION • BRIDGETON, MO 63044-2483 U.S.A. Joining End Case to Wide Island 1. Remove nuts and washers from outside of end case Metal Washer 2. -
Page 12: Parent To Parent Installation Key
-18 X 1 in. Hex Head Screw X — (Used for End Case Only) Y — M6 - 1.0 X 25 mm Hex Head Screw Z — Joining Clip FW to FW FWG to FWG P/N 0467434_D Joining Clip HUSSMANN... - Page 13 P/N 0467434_D FI to FI FN to FN F to F HUSSMANN CORPORATION • BRIDGETON, MO 63044-2483 U.S.A. FIG to FIG FNG to FNG FG to FG Low Temperature Excel...
-
Page 14: Parent To End Installation Key
-18 X 1 in. Hex Head Screw X — -18 X 4 in. Tap Bolt Y — M6 - 1.0 X 25 mm Hex Head Screw Z — Joining Clip FW to FWE FWG to FWEG P/N 0467434_D Joining Clip HUSSMANN... -
Page 15: Fasten End Frames
Fasten the upper front last. When joining End cases to Wide Islands, follow the joining order for the wide island, beginning with 2A and 2B. HUSSMANN CORPORATION • BRIDGETON, MO 63044-2483 U.S.A. Tighten in Order Shown Tighten in Order Shown 1-11... -
Page 16: Seal Merchandisers
1. Locate starter bumper shipped with the left-end kit. 2. Remove factory installed bumper by pulling bumper away from bumper retainer. Be careful not to lose the internal joint trim on the bumper. Pull Bumper Internal Joint Trim HUSSMANN... - Page 17 6. Go to the right end of the line up and tap the bumper to close any gaps. Starter Bumper Retainer HUSSMANN CORPORATION • BRIDGETON, MO 63044-2483 U.S.A. 7. Measure and cut last section of bumper. Use a miter box and fine-tooth saw to cut last bumper to length.
-
Page 18: Installing Partitions
2. Apply gaskets to end frame as shown on pages 1-5 and 1-6. 3. Fasten End Assembly to Merchandiser Use Bolt and washer to fasten end assembly to merchandiser in the same way the end case is fastened. Tighten in order shown for joining. HUSSMANN... - Page 19 Insert back of bracket through slot in leg. Use Screws to attach End Splashguard Retainer to end frame. Case End Splashguard Bracket (Flange hooks into case leg slot) HUSSMANN CORPORATION • BRIDGETON, MO 63044-2483 U.S.A. Apply Silicone Sealant Screw 1-15 Apply Silicone...
- Page 20 1-16 NSTALLATION Notes: P/N 0467434_D HUSSMANN...
-
Page 21: Refrigeration / Electrical
Be careful not to burn, scorch or over-heat the shroud when making connections. Once connections have been made, apply silicone sealant to the bottom of the shroud as shown in Figure 2-2. HUSSMANN CORPORATION • BRIDGETON, MO 63044-2483 U.S.A. Figure 2-1 Place shroud over refrigerant piping. Refrigeration... -
Page 22: Multiplexing
Pressure drop can rob the system of capacity. To keep the pressure drop to a minimum, keep the refrigerant line run as short as possible using a minimum number of elbows. Where elbows are required, USE LONG RADIUS ELBOWS ONLY Refrigeration Connection HUSSMANN... -
Page 23: Insulation
If the wide island merchandiser is to be run at a single temperature, factory installed piping interconnect kits are available. HUSSMANN CORPORATION • BRIDGETON, MO 63044-2483 U.S.A. REFRIGERATION THERMOSTAT The refrigeration thermostat body is located in the electrical raceway. The bulb, when factory installed, is located in the discharge flue. -
Page 24: Merchandiser Electrical Data
WIRING COLOR CODE HERMOSTAT EATERS ITHER COLORED LEEVE CASE MUST BE GROUNDED RANGE OR ...L IGHTS AROON ECEPTACLES ...D ELLOW EFROST EATERS ...D EFROST EATERS OLORED NSULATION HUSSMANN 120V 208V... -
Page 25: Drip Piping And Splashguards
Each End of Case Water Seal Clean-out Elbow Factory Furnished Items To Be Installed HUSSMANN CORPORATION • BRIDGETON, MO 63044-2483 U.S.A. CAUTION Splashguard brackets MUST be installed before piping case. INSTALLING DRIP PIPING Poorly or improperly installed drip pipes can seriously interfere with the merchandiser’s opera-... -
Page 26: Optional Drip Piping Arrangements
Bottom of Case Slope Slope One Water Seal per Run of Drip Pipe FWE / FWEG End Case with Elbows Bottom of Case Slope Slope Optional Excel Drip Piping Arrangements Slope Bottom of Case Slope HUSSMANN Slope... -
Page 27: Installing Splashguards
4. Align the tabs on the splashguard brackets with the slots in the bottom edge of the splash- guard. Engage the tabs in the slots and drop the splashguard into place. HUSSMANN CORPORATION • BRIDGETON, MO 63044-2483 U.S.A. Bracket Splashguard Splashguard... - Page 28 End splashguards and close- off panels are installed after the front panels (see Page 3-6). Upper Splashguard Bracket Splashguard Close-off Panel P/N 0467434_D PLASHGUARDS Screw Splashguard Close-off Panel Splashguard Splashguard Upper Splashguard Bracket Lower Splashguard Bracket Lower Splashguard Bracket HUSSMANN...
- Page 29 TO THE FLOOR 4. If required by local health codes the Cove Trim may be sealed to the floor, using a silicone type sealer. Sealant must be removed and replaced when servicing. Excel Low Temperature HUSSMANN CORPORATION • BRIDGETON, MO 63044-2483 U.S.A.
- Page 30 Close-off Panel P/N 0467434_D PLASHGUARDS End Splashguard Bracket End Case Front Splashguard Upper Front Splashguard Retainer Screw (4) Front Splashguard Retainer Lower End Splashguard Panel End Splashguard End Splashguard Installed End Case Side Splashguard End Case Side Splashguard Close-off Panel HUSSMANN...
-
Page 31: Start Up / Operation
Do not use non-approved shelving, baskets, display racks, or any accessory that could hamper air curtain performance. HUSSMANN CORPORATION • BRIDGETON, MO 63044-2483 U.S.A. START UP / OPERATION LOAD LIMITS Each merchandiser has a load limit decal. -
Page 32: Load Limit Profiles
Start-up / Operation LOAD LIMIT PROFILES Load Limit Load Limit Load Limit P/N 0467434_D FWEG FRONT FRONT FRONT Load Limit FRONT Load Limit FRONT Load Limit FRONT HUSSMANN... - Page 33 Thermometer Hussmann Part TM.4911251 Thermometer — Hussmann P/N 430108 Double Stick Tape Flexible Plastic Fits in Price Tag Moldings HUSSMANN CORPORATION • BRIDGETON, MO 63044-2483 U.S.A. — Inside End Panel — Shelf Price Tag Molding — Return Air Grille Suggested Mounting Locations...
- Page 34 Keep with merchandiser or give to store manager — do not destroy. Hussmann P/N 429971A P/N 0467434_D Excerpt from 1999 FDA Food Code: 4-204.112 Temperature Measuring Devices.
-
Page 35: Maintenance
Allow glass fronts, ends and service doors to warm before applying hot water.. HUSSMANN CORPORATION • BRIDGETON, MO 63044-2483 U.S.A. MAINTENANCE • Remove the product and all loose debris to avoid clogging the waste outlet. -
Page 36: Cleaning Airflow Louvers
EVER USE ABRASIVE CLEANSERS OR SCOURING PADS Front and rear internal panels rest on interior panel supports. Panels and supports lift out. Reinstall in reverse order. and Louver Retainer HUSSMANN... - Page 37 FWG Shown — Other Low Temperature Return Air Grille Excel Model Parts are Similar Package Guard Display Clip Rack Interior Glass Front Panel Display Pan Discharge Air Louver Display Rack Support Excel Low Temperature HUSSMANN CORPORATION • BRIDGETON, MO 63044-2483 U.S.A.
-
Page 38: Removing Rear Flue Glass For Cleaning (Fng & Fig)
Most scratches and dings can be removed using the following procedure. 1. Use steel wool to smooth out the surface area of the bumper or top rail. 2. Clean area. 3. Apply vinyl or car wax and polish surface for a smooth glossy finish. HUSSMANN... -
Page 39: Service
6. Replace fan motor/bracket assembly and reinstall screws. 7. Reinstall fan blade. 8. Reconnect fan to wiring harness. 9. Turn on power. HUSSMANN CORPORATION • BRIDGETON, MO 63044-2483 U.S.A. SERVICE Screws Bracket Plenum Note: Plenum length and number of fans will vary with model. -
Page 40: Replacing Electric Defrost Heater
This includes, but is not limited to, such items as fans, heaters, thermostats and lights. P/N 0467434_D Defrost Heater (4 ft, 6 ft, 8 ft or 12 ft length) Hook In a Slot Chain with Hook Turn HUSSMANN... -
Page 41: Replacing Nosing Anti-Sweat Heater
6. Reattach exterior nosing extrusion to interior nosing extrusion. 7. Replace louver. 8. Turn on power to merchandiser and check for proper operation. HUSSMANN CORPORATION • BRIDGETON, MO 63044-2483 U.S.A. Heater Plug Nosing Anti-Sweat Heater WARNING Always disconnect the electrical power at the main disconnect when servicing or replacing any electrical component. -
Page 42: Replacing Return Air Heater
P/N 0467434_D Glass Return Heat Retainer Heater (4 ft, 6 ft, 8 ft or 12 ft) Install Retainer DETAIL Flush on Top of Wireway Support Cover Support Bushing to Route Wires / Plug Heater Screw Foil Tape Remove Screws HUSSMANN... -
Page 43: Replacing Drip Pan Heater
Clip Screw Clip Sealer HUSSMANN CORPORATION • BRIDGETON, MO 63044-2483 U.S.A. 6. Position the new heater. Apply new acrylic sealer to the underside of clips. Carefully reinstall clips in their original position. 7. Route heater lead wire through the interior panel supports. -
Page 44: Replacing Discharge Thermopane
Always disconnect the electrical power at the main disconnect when servicing or replacing any electrical component. This includes, but is not limited to, such items as fans, heaters, thermostats and lights. P/N 0467434_D Always Use Gloves When Handling Glass!! Trim HUSSMANN... - Page 45 P/N 0467434_D Hand Rail Discharge Module Hand Rail Louver HUSSMANN CORPORATION • BRIDGETON, MO 63044-2483 U.S.A. Discharge Heated Glass Discharge Rear Deflector Excel Low Temperature...
-
Page 46: Replacing Return Thermopane
This includes, but is not limited to, such items as fans, heaters, thermostats and lights. Outside of Case Glass Assembly Hand Rail Glass Assembly End Post Case Wall or End HUSSMANN... -
Page 47: Replacing Hand Rail
➁ ➁ , until back of hand rail snaps over back of retainer. Hand Rail Snapped onto Retainer HUSSMANN CORPORATION • BRIDGETON, MO 63044-2483 U.S.A. REPLACING PANEL EDGE GUARD Beginning at one end of the edge guard, insert a thin wide plastic tool (such as a putty knife) to separate the guard from the panel until a finger can be inserted to rotate the guard off the panel. -
Page 48: Repairing Aluminum Coil
6-10 ERVICE REPAIRING ALUMINUM COIL The aluminum coils used in Hussmann merchandisers may be easily repaired in the field. Materials are available from local refrigeration wholesalers. Hussmann recommends the following solders and technique: Solders Aladdin Welding Products Inc. P.O. Box 7188 1300 Burton St. - Page 49 To obtain warranty information or other support, contact your Hussmann representative. Please include the model and serial number of the product. U.S. & Canada 1-800-922-1919 • Mexico 1-800-522-1900 www.hussmann.com Hussmann Corporation, Corporate Headquarters: Bridgeton, Missouri, U.S.A. 63044-2483 01 July 2005...
Need help?
Do you have a question about the FG and is the answer not in the manual?
Questions and answers