
Related Manuals for SHX SHX85PAN2001F


Summary of Contents for SHX SHX85PAN2001F
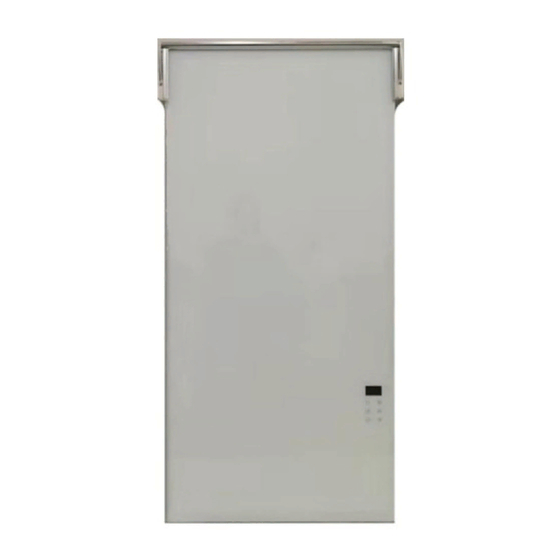
- Page 1 BEDIENUNGSANLEITUNG GLAS INFRAROTHEIZUNG MIT HANDTUCHTROCKNER SHX85PAN2001F HERZLICHEN GLÜCKWUNSCH! VIELEN DANK, DASS SIE SICH FÜR EIN PRODUKT VON SHX ENTSCHIEDEN HABEN.
-
Page 2: Table Of Contents
Diese Bedienungsanleitung gibt es in folgenden Sprachen Seite 2 – 17 DEUTSCH Seite 18 – 31 ENGLISH INHALTSVERZEICHNIS Wichtige Informationen zur Sicherheit, Standort und zum 3 – 4 elektrischen Anschluss Recycling, Entsorgung, Konformitätserklärung Lieferumfang Beschreibung des Geräts 6 – 12 Inbetriebnahme Schutzeinrichtung Reinigungshinweise... - Page 3 Dieses Gerät ist ausschließlich zum Heizen von Wohnräumen in Haushalten vorgesehen und darf für keine anderen Zwecke eingesetzt werden. Das SHX-Panel ist mit einer IP34-Schutzklasse ausgestattet. Das bedeutet, dass das Gerät gegen feste Fremdkörper mit einem Durchmesser von 2,5mm und gegen Spritzwasser geschützt ist. ...
- Page 4 Benutzen Sie das Heizpanel nicht in direkter Nähe zu Benzin, Gas, Öl, Alkohol oder anderen explosionsgefährlichen und leicht brennbaren Flüssigkeiten/Gasen. Hängen Sie das Handtuch NIEMALS direkt auf das PANEL! Es kann aufgrund der entstehenden Hitze des Panels zu Beschädigungen des Handtuchs als auch des Panel kommen. ...
-
Page 5: Lieferumfang
Richtlinien der EU entspricht. Die ausführliche Konformitätserklärung können Sie jederzeit unter folgendem Link einsehen: www.shx.at/downloads Irrtümer und technische Änderungen vorbehalten. www.shx.at LIEFERUMFANG Im Lieferumfang der SHX-Heizpanels erhalten Sie: 1x Heizpanel mit vormontierten Halterungen 4x Schrauben mit vormontierter Haltevorrichtung ... -
Page 6: Inbetriebnahme
Gegenstände vor dem Heizpanel. 9. Verlegen Sie keinesfalls das Kabel hinter dem Panel. HINWEIS Damit das SHX-Heizpanel bei der Montage nicht beschädigt wird, empfehlen wir die Montage zu zweit durchzuführen. 1. MONTAGE 1. Öffnen Sie den Karton und entnehmen das Gerät. - Page 7 10. Schrauben Sie anschließend die Schrauben mit Haltevorrichtungen mithilfe eines Schraubenziehers in die Wand. 11. Hängen Sie anschließend das Panel auf die Halterung an die Wand. 12. Drehen Sie nun die Verschlüsse auf der Rückseite des Panels zu um das Panel zu fixieren. 13.
- Page 8 2. BESCHREIBUNG DES DISPLAYS Zusatzerklärungen zu den Symbolen: Kontinuierliches Heizen: Wenn die eingestellte Temperatur erreicht wird, schaltet das Panel automatisch in den Stand- By Modus schaltet sich selbst wieder ein, sobald die Raumtemperatur sinkt. Handtuchtrockung: Das Gerät hat einen automatischen Vorgang, bei dem Das Panel 4 Stunden lang automatisch läuft.
- Page 9 3. BESCHREIBUNG DES BEDIENFELDS & DER FERNBEDIENUNG Die Tasten am Bedienfeld und der Fernbedienung sind identisch. Sie können die Funktionen des Panels sowohl mit Hilfe der Fernbedienung als auch direkt am Gerät einstellen. Bei Steuerung mittels Fernbedienung ist diese direkt auf den Sensor am Gehäuse zu richten, damit eine einwandfreie Funktion gewährleistet ist.
- Page 10 5. FUNKTIONEN EINSTELLEN Sie können alle Funktionen des Gerätes sowohl direkt am Gerät, mithilfe des Bedienfelds, oder mit der Fernbedienung einstellen. 1. BEREITSCHAFTS-MODUS Bevor Sie das Gerät einschalten, betätigen Sie bitten den ON/OFF-Schalter, der sich auf der rechten Seite des Heizpanels befindet das Gerät ist nun betriebsbereit, jedoch nicht eingeschalten.
- Page 11 4. HEIZ MODUS - Taste ein – auf dem Display erscheint die 1. Schalten Sie das Gerät mithilfe der Raumtemperatur. 2. Drücken Sie sooft die -Taste bis das -Symbol auf dem Display erscheint. 3. Das Gerät fängt nun an, auf höchster Stufe zu heizen. 4.
-
Page 12: Schutzeinrichtung
Zeitperiode und stellen einen neuen Timer an. SCHUTZEINRICHTUNG Das SHX-Panel ist mit einer Schutzeinrichtung ausgestattet, die sowohl das Gerät schützt als auch eine Brandgefahr ausschließen soll. Bitte beachten Sie, dass es sich bei dem Mechanismus nicht um einen Autostopp- oder eine sonstige Komfortfunktion handelt. -
Page 13: Reinigungshinweise
Abdeckungen der Schrauben und anschließend die Schrauben. Wir empfehlen Ihnen diesen Arbeitsschritt immer zu zweit zu erledigen. HINWEIS Damit das SHX-Heizpanel bei der Demontage nicht beschädigt wird, empfehlen wir Ihnen diese zu zweit durchzuführen. Verpacken Sie das Gerät und bewahren Sie es an einem sicheren, kühlen und trockenen Ort auf. -
Page 14: Behebung Von Problemen
BEHEBUNG VON PROBLEMEN Bevor Sie sich mit unserer Kundenhotline/ Servicestelle in Verbindung setzen, prüfen Sie bitte, ob sich der Fehler anhand der untenstehenden Hinweise beheben lässt. PROBLEM MÖGLICHE URSACHE LÖSUNG Stromausfall. Wiederherstellung Stromversorgung abwarten. Das Gerät ist nicht an der Gerät korrekt Das Heizpanel schaltet... -
Page 15: Technische Informationen
Technische Informationen Artikelnummer: SHX85PAN2001F Eingangsspannung: 220-240V Frequenz: 50-60Hz Stromstärke: 750W Heizbereich: 5C° - 40C° Gewicht: 17 kg Abmessungen: 550 x 1100 x 13 mm Kontaktadressen für weitere Informationen Schuss Home Electronic GmbH und Serviceline: Scheringgasse 3, A-1140 Wien Tel: +43 (1) 97 0 21 – 0 Serviceline: +43 (1) 97 0 21 –... -
Page 16: Erforderliche Angaben Zu Elektrischen Einzelraumheizgeräten
Erforderliche Angaben zu elektrischen Einzelraumheizgeräten Artikelnummer SHX85PAN2001F Angabe Symbol Wert Einheit Angabe Einheit Nur bei elektrischen Speicher- Einzelraumheizgeräten: Wärmeleistung Art der Regelung der Wärmezufuhr: Nennwärmeleistung Pnom Manuelle Regelung der Wärmezufuhr Nein mit integriertem Thermostat Mindestwärmeleistung Manuelle Regelung der Wärmezufuhr (Richtwert) mit Rückmeldung der Raum- und/oder... -
Page 17: Garantie
Mit diesem Qualitätsprodukt von SHX haben Sie eine Entscheidung für Innovation, Langlebigkeit und Zuverlässigkeit getroffen. Für dieses SHX Gerät gewähren wir eine Garantiezeit von 2 Jahren ab Kaufdatum gültig in Österreich und Deutschland! Sollten in diesem Zeitraum wider Erwarten dennoch Servicearbeiten an Ihrem Gerät notwendig sein, garantieren wir Ihnen hiermit eine kostenlose Reparatur (Ersatzteile und Arbeitszeit) oder (nach Ermessen der Firma Schuss) das Produkt auszutauschen. -
Page 18: English
CONTENT 18 – 20 Important information on safety, location and electrical connection Recycling, Disposal and Declaration of Conformity Delivery Content Description of the device 21 – 27 Installation Safety Measurments Cleaning Instructions Activities at the beginning and end of the season Trouble shooting Technical Informations Required information on electrical individual room heaters... - Page 19 This device is only intended for heating living spaces in households and must not be used for any other purpose. The SHX panel is equipped with an IP34 protection class. This means that the device is protected against solid foreign bodies with a diameter of 12.5mm and against splash water. ...
-
Page 20: Recycling, Disposal And Declaration Of Conformity
We hereby confirm that this article complies with the essential requirements, regulations and guidelines of the EU. You can view the detailed declaration of conformity at any time under the following link: www.shx.at/downloads Subject to errors and technical changes. www.shx.at... -
Page 21: Delivery Content
The SHX heating panel can only be mounted vertical walls. 1. The SHX heating panel may only be installed with the wall mounting brackets supplied. 2. Make sure that the wall you mount the panel on can carry the weight of the panel. - Page 22 NOTE It is recommended that the assembly be carried out by two people, in order to avoid damaging the SHX heating panel. 1. ASSEMBLY 1. Open the gift box and take out the device. 2. Remove the packaging from the device.
- Page 23 12. Turn the fasteners on the back oft he panel to fix the panel 13. Remove the protective film on the front of the panel. 14. Finally, plug in the power cord and press the switch on the right side of the device to switch on the panel.
- Page 24 3. DESCRIPTION OF THE CONTROL PANEL & THE REMOTE CONTROL The buttons on the control panel and the remote control are identical. You can set the functions of the panel using the remote control or directly on the device. When using the remote control, this must be pointed directly at the sensor on the housing to ensure that it functions properly.
- Page 25 5. SET FUNCTIONS You can set all functions of the device directly on the device, using the control panel, or with the remote control. 1. STANDBY MODE Before you switch on the device, please press the ON / OFF switch, which is located on the right-hand side of the heating panel ...
- Page 26 4. HEATING MODE 1. Switch the device on using the button. The room temperature appears on the display. 1. Press the key until the symbol appears on the display. 2. The device now starts to heat at the highest level. 3.
-
Page 27: Safety Measurments
SAFETY MEASURMENTS The SHX panel is equipped with a protective device that protects the device as well as eliminating the risk of fire. -
Page 28: Cleaning Instructions
If you want to remove the device from the wall, first carefully remove the covers of the screws and then the screws. We recommend that you always do this step in pairs. NOTE So that the SHX heating panel is not damaged during disassembly, we recommend that you do it together. ... -
Page 29: Troubleshooting
IMPORTANT Never try to repair the device by yourself. This can lead to the immediate loss of the guarantee. Technical Infomation Item no: SHX85PAN2001F Current 220-240V Frequency 50-60Hz Input voltage 750W Heating area 5C°... -
Page 30: Required Information On Electrical Individual Room Heaters
REQUIRED INFORMATION ON ELECTRICAL INDIVIDUAL ROOM HEATERS Model identifier: SHX85PAN2001F Detail Symbol Value Unit Detail Unit Only for electrical storage individual Heat output Room heaters: Type of regulation of heat supply: Nominal heat output Manual control of the heat supply with integrated thermostat. -
Page 31: Seite 2 Von
WARRANTY By purchasing a SHX quality product you have acquired an innovative, long lasting and reliable item. For this SHE device we grant a warranty of 2 years from the date of purchase, valid in Austria and Germany! If service work on your device should nevertheless be necessary during this period, we hereby guarantee you free repair (spare parts and working hours) or (at the discretion of the company SCHUSS) replace the product.
Need help?
Do you have a question about the SHX85PAN2001F and is the answer not in the manual?
Questions and answers