Advertisement
Quick Links
Sentry Buildings
Assembly Book
Revised November 22, 2017
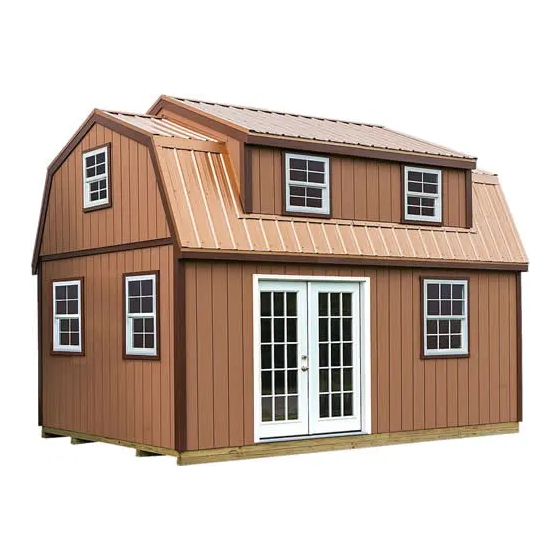
the Lakewood
12' x 18'
Manufactured by Reynolds Building Systems, Inc.
205 Arlington Drive
Greenville, PA 16125
This manual is copyrighted. Under the copyright laws, this manual
may not be copied, in whole or in part, without consent from Reynolds
Building Systems, Inc.
© Copyright 2017
Advertisement

Related Manuals for Sentry Buildings the Lakewood 12' x 18'


Summary of Contents for Sentry Buildings the Lakewood 12' x 18'
- Page 1 Sentry Buildings Assembly Book Revised November 22, 2017 the Lakewood 12' x 18' Manufactured by Reynolds Building Systems, Inc. 205 Arlington Drive Greenville, PA 16125 This manual is copyrighted. Under the copyright laws, this manual may not be copied, in whole or in part, without consent from Reynolds Building Systems, Inc.
-
Page 2: Tool List
MPORTANT NFORMATION BOUT Download the most current instruction book at www.barnkits.com; use the "manuals" link on the menu bar and then select your building kit and size. Material Delivery: The building materials will be delivered in (2) two shipments. The material for the lower walls and loft floor, and the optional wood floor, will be delivered by a local lumber supplier. - Page 3 Read Me First: Important Information on Building The Walls Study the information below on assembling the wall frames and applying the siding. This information may not be repeated in the assembly steps. Always wear safety glasses when cutting or nailing. Pre-cut wall studs will measure 92-1/4"...
- Page 4 Construction Details for Optional 12'x18' Floor System Foundation size is 12'-0" x 18'-0". Check local building codes in your area, the construction may have to change. 1. Cut (16) sixteen 2x4-12' treated boards to 11' 8-7/8". These will be the floor joists. 2.
- Page 5 Step 1 Assemble (2) Two Dormer Trusses Building Tip: To aid in the assembly of the trusses, temporarily tack 1x4 blocks to the floor. There are short 1x4s supplied in the kit for this purpose. This will trap the truss parts and ensures the other truss will be assembled the same.
- Page 6 The length of pre-cut studs will vary from 92-1/4" to 93" depending the what part of the county you are located. The length does not matter in assembling the walls. If you want to install windows in the end walls, review the 'General Window Instructions' on the next page and go to Step 3 for instructions on building the wall frame.
- Page 7 General Window Instructions The instructions below shows how to assemble window and/or door headers and frame in window openings. There are extra pre-cut 2x4 wall studs, 2x6 boards and 7/16" OSB fillers provided for this. Additional filler strips can be cut from the 4'x7' OSB cover sheet on the main pallet (you will need a 4'x4' section of the cover sheet for Step 20.
- Page 8 Step 3 Assemble 12' End Wall With Two Windows This layout shows assembling an end wall using a 24"x36" Jeld-Wen (V-2500 Series) single hung window. ThermaStar, by Palla, makes a similar window; their window is 24"x38". Adjust the opening size to the window header and framing around the window opening. 1.
- Page 9 Step 4 Assemble Front Wall Frames Steps 4 thru 6 shows installing a patio door and window; see front cover. An alternative would be to use a walk-in door with a window on either side. For assembly instructions using this layout, go to Step 7. This layout is for a 32"...
- Page 10 Step 4 Assemble Front Wall Frames (continued) 1. Cut (1) one treated 2x4-10' and (1) one untreated 2x4-10' to a length of 116-1/2". 2. Install (5) five pre-cut studs between the top and bottom plates where shown. Use 16d galvanized nails for the bottom plate and 16d coated sinker nails for the top plate. 3.
- Page 11 Step 5 Apply Siding to Front Wall Frames - Door on Right If you want the door opening located to the right, see cover photo, follow the instructions below. If you want the door opening on the left, go to Step 6. Select the wall frame with the window opening and install the window.
- Page 12 Step 6 Apply Siding to Front Wall Frames - Door on Left 1. Select the wall frame with the window opening and install the window. 2. Install a siding panel with the 'LAP' edge extending 3-1/2" past the end of the wall frame. Use 8d galvanized box nails spaced 8"...
- Page 13 Step 7 Assemble Front Wall Frames - Single Window These instructions illustrate how to assemble a front wall with a walk-in door in the center and locating a window to the left and right of the door. 1. Cut (1) one treated 2x4-8' and (1) one untreated 2x4-8' to a length of 68-1/2". Install (4) four pre-cut studs between the top and bottom plates where shown below.
- Page 14 Step 8 Assemble Front Wall Frame with Walk-in Door The instructions below shows how to assemble a wall for a 2/8x6/8 door. Adjust the opening size for other types and sizes of entry doors. 1. Cut (1) one treated 2x4-10' and (1) one untreated 2x4-10' to a length of 72". 2.
- Page 15 Step 9 Apply Siding to Front Wall Frames - Walk-in Door 1. Butt the 68-1/2" window panel with siding from Step 7 against the left side of the 72" door panel from Step 8. Do Not fasten the frames together so they can be separated after the siding is applied.
- Page 16 Step 10 Assemble 116-1/2" Long Back Wall 1. Cut (1) one treated 2x4-10' and (1) one untreated 2x4-10' to a length of 116-1/2". Position the boards together and indicate with 'X' marks where the wall studs will be located. 116-1/2" Wall Plate Untreated Top Plate Treated Bottom Plate 19-3/4"...
- Page 17 Step 11 Assemble 92-1/2" Long Back Wall 1. Cut (1) one treated 2x4-10' and (1) one untreated 2x4-10' to a length of 92-1/2". Position the boards together and indicate with 'X' marks where the wall studs will be located. 92-1/2" Wall Plate Untreated Top Plate Treated Bottom Plate 23-1/4"...
- Page 18 Step 12 Set Wall Panels 1. Set one of the end wall panels and the longer back wall panel. Secure the wall panels together at the corners using (5) five 10d sinkers. Nail wall panels to the floor using 16d galvanized nails in every stud opening. 2.
- Page 19 Step 13 Install 2x4 Tie Plates 1. Install a 2x4-12' tie plate on back wall using 10d coated sinker nails, double row, spaced 18" apart. Cut a 2x4-12' in half and install a 6' long 2x4 next to the one just installed. 2.
- Page 20 Step 15 Install 2x6 Joist Headers & Floor Joist Material is provided for a 12'x10' loft over one end of the building. The instructions below will place the loft on the left end, see Step 14 for diagram. If you want the loft on the right end start installing floor joist on the right end of the building.
- Page 21 Step 16 Install Double 2x6 Joists 1. Nail the last (2) two 134" long 2x6 boards together with 10d coated sinker nails, double row spaced 16" apart. Install this double floor joist using a double joist hanger; see drawing below. 2.
- Page 22 Step 18 Install Loft Shelf on 12' Back Wall 1. Cut a 2x6-12' in half. Install one of the 6' boards between the loft floor and the ledge on the end wall. Cut and install (2) two 17-1/2" long 2x4 blocks between this 2x6 and joist header. 2.
- Page 23 Step 20 Assemble (2) Two 12' Dormer Walls Since the dormer walls will be installed on the upper loft, it may be easier to build them on the loft floor. When built, slide the walls over the open area of the loft. 1.
- Page 24 Step 21 Assemble Roof Gables End Frames 1. The gable frames are shipped nested together. Remove hardware and other material placed inside the frames. Separate these frames by removing screws. The screw bit is packaged in the hardware bag. Gable End Frame Gable Center Frame Gable End Frame 2.
- Page 25 Step 22 Assemble Roof Gables Building Tip: To aid in the assembly of the gables, temporarily tack 1x4 blocks to the floor. This will trap the gable frames and ensure the other gable and roof trusses, assembled next, will be assembled the same. 1.
- Page 26 Step 23 Apply Siding to Roof Gables 1. Install a siding panel on the left end of the gable frame with the 'Cut Edge' flush with the side of the frame. The siding should extend 3/4" below the bottom plate. Use 8d galvanized box nails spaced 8"...
- Page 27 Step 25 Set Roof Gable and Dormer Wall 1. Install a roof a gable over the end wall that has the large floor area. Set the gable with the siding extending over the trim on the lower wall, see Detail 'A' . Center the gable; the gable should extend 1-1/2"...
- Page 28 Step 26 Install 2x6 Truss Plates 1. Cut truss plates to length from 72" long 2x6 boards, the truss plates will be approximately 35-1/2" in length. Install one at each corner against the gable. Install the 2x6 plate 1/2" from the end of the gable plate. Nail each plate using 10d sinker nails.
- Page 29 Step 28 Install Gambrel Truss 1. Select the truss that has a gusset applied to one side. Install this truss against the dormer wall with the gusset facing the roof gable. The bottom tip of the truss will extend past the truss plate.
- Page 30 Step 29 Install Common Trusses Truss with Gusset One Side 1. Select the truss that has gussets applied to both sides. Install the truss between the gable end and the truss just installed. Space the truss evenly in the opening. 2.
- Page 31 Step 31 Install 2x8 Ridge Beam 1. Cut a 2x8 board to a length of 140-1/2" and install as a ridge beam into the slots of the dormer trusses. 2. Secure the ends of the 2x8 with a metal joist hanger and 10d coated sinker nails. 3.
- Page 32 Step 32 Install 2x6 Rafters Locate (10) ten 78-3/4" long 2x6 rafters. Working from the center, install (2) two rafters on the front side of the ridge and one back side. The rafters should align with the dormer trusses and will be approximately 3/4"...
- Page 33 Step 33 Install Roof Sheathing & Soffit Boxes 1. Install 5/8" plywood roof sheathing as shown below. Install the roof sheathing starting in the center of the rafters. Insert plyclips between rafters; see Step 34 for detail. The roof sheathing will extend approximately 1-1/4" past the sheathing on the dormer ends. Use 7d coated sinker nails spaced 6"...
- Page 34 Step 34 Install Roof Sheathing - Lower Roof 1. Screw (2) two 2x3-6' long boards (cut boards to fit) to the dormer wall to support the roof sheathing installed later. Use 2-1/2" wood screws spaced to catch the wall studs behind. Aline the top corner of the 2x3 board with the top of the 2x6 truss.
- Page 35 Step 35 Install 1x6 Fascia Boards on Lower Soffit 1. Install a 73" long 1x6 fascia board over the front soffit box. Install 1x6 against the bottom of the roof sheathing, flush with the siding on the roof gables. Use 8d galvanized box nails spaced to catch the 2x4 blocks behind.
- Page 36 Install Finish Roof Covering - Owner Supplied Install shingles according to the instructions on the wrapper. This roof design is more complex than a straight roof and requires flashing to be installed. You may want to consider hiring a professional roofer who has the necessary equipment to install the finish roof covering. 1.
- Page 37 Step 38 Install Dormer Soffit & Corner Trim 1. Install 33-3/4" long 1x3 corner trim flush with the siding on the dormer sides. Use 8d galvanized box nails. 2. Repeat to install 1x3 trim on the other corners. 3. Cut small fillers from leftover siding to cover the end of the rafters and the 1x4 soffit boards.
- Page 38 Step 40 Install Upper Gable Trim & Fascia Trim 1. Install 80-1/2" long 1x6 dormer rafter trim flush with the top of the roof sheathing and end of the rafters using 8d galvanized box nails spaced 16" apart. Trim to fit, if needed. 2.
- Page 39 Step 42 Install Windows General Instructions for Installing Upper Windows 1. Apply window caulking around the window opening before installing the windows. 2. Insert window in opening. Have someone hold window in place from the inside or the outside. 3. DO NOT use a hammer to nail through the flange. 4.
- Page 40 49" x 84" Main Pallet 49" x 84" Main Pallet Cardboard Wrap 95-3/4" 78-3/4" lbs. 16d Galvanized Nails 96" 79-1/2" lbs. 16d Coated Sinkers 49" lbs. 10d Coated Sinkers 44" x 72" Pallet 31-3/4" angled 10 lbs. 8d Galvanized Box 72"...
Need help?
Do you have a question about the the Lakewood 12' x 18' and is the answer not in the manual?
Questions and answers