Sentry Buildings the Pinewood Assembly Book
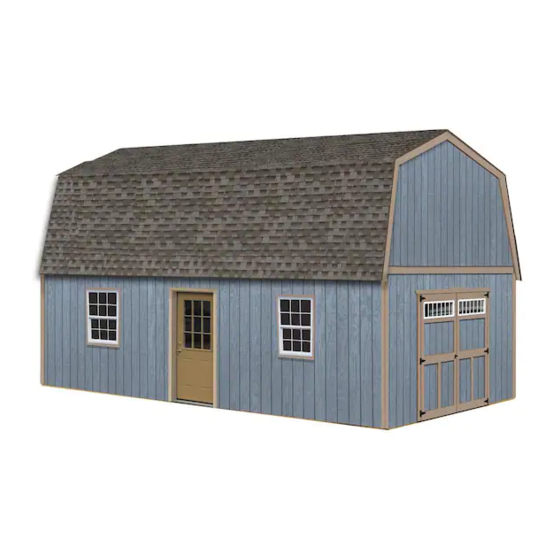
14'x28' building
Hide thumbs
Also See for the Pinewood:
- Assembly book (30 pages) ,
- Assembly book (29 pages) ,
- Assembly book (29 pages)
Advertisement
Quick Links
Sentry Buildings
Assembly Book
Revised October 13, 2021
the Pinewood
14'x28' Building
Manufactured by Reynolds Building Systems, Inc.
205 Arlington Drive
Greenville, PA 16125
This manual is copyrighted. Under the copyright laws, this manual
may not be copied, in whole or in part, without consent from Reynolds
Building Systems, Inc.
© Copyright 2020
Advertisement

Related Manuals for Sentry Buildings the Pinewood


Summary of Contents for Sentry Buildings the Pinewood
- Page 1 Sentry Buildings Assembly Book Revised October 13, 2021 the Pinewood 14'x28' Building Manufactured by Reynolds Building Systems, Inc. 205 Arlington Drive Greenville, PA 16125 This manual is copyrighted. Under the copyright laws, this manual may not be copied, in whole or in part, without consent from Reynolds Building Systems, Inc.
- Page 2 MPORTANT NFORMATION BOUT Check with your local HOA or building code office for any requirements, Building Permits: restrictions or permits necessary for construction. By owner. Refer to next page for foundation suggestions and size. Foundation: Our package includes pre-cut materials for the 2nd floor roof gables, roof What's Included: trusses and gable trim.
- Page 3 Constructing Details for Optional Heavy Duty Floor System Do Not make the foundation larger than 14' x 28'. Check local building codes, the construction may have to change. Depending on your intended use a cement slab may be more appropriate. 1.
- Page 4 Constructing Details for Floor System continued Stagger Solid Blocking over Center Runners 10. Cut leftover 2x6 boards to length and install between the floor joist over the center 4x4 runners. Stagger the 2x6 blocks to make it easier to nail the block between the joist.
- Page 5 Step 1 Assemble (2) Two 8' Back Wall Frames 1. Cut, if necessary, (2) two 2x4-8' (one will be treated) to a length of 96". Position the boards together and indicate with 'X' marks where the wall studs will be located. 96"Top Wall Plate 96"...
- Page 6 Step 2 Assemble (2) Two 8' Frames w/ Window Openings 1. Cut, if necessary, (2) two 2x4-8' (one will be treated) to a length of 96". Position the boards together and indicate with 'X' marks where the wall studs will be located. 96"Top Wall Plate 96"...
- Page 7 Step 3 Assemble 12' Back Wall Frame 1. Cut, if necessary, (2) two 2x4-12' (one will be treated) to a length of 144". Position the boards together and indicate with 'X' marks where the wall studs will be located. 12'-0"Top Wall Plate 12'-0"...
- Page 8 Step 4 Assemble 12' Front Door Wall Frame 1. Trim, if necessary, (2) two 2x4-12' boards (one will be treated) to a length of 144". Position the boards together and indicate with 'X' marks where the wall studs will be located. Mark an 'S' on bottom plate where the door header supports will be located.
- Page 9 Step 5 Assemble a 13-5" Long End Wall Frame If 2x4-14' boards are not available 16' long 2x4 will be substituted. 1. Cut (2) two 2x4-14' (one will be treated) to a length of 13'-5". Position the boards together and indicate with 'X' marks where the wall studs will be located. 13'-5"...
- Page 10 Step 7 Assemble a 13'-5" Long End Wall Door Frame 1. Cut (2) two 2x4-14' (one will be treated) to a length of 13'-5". Position the boards together and indicate with 'X' marks where the wall studs will be located and an 'S' where the door header support studs will be located.
- Page 11 Step 8 Install Wall Frames & 2x4 Tie Plates The 13'-5" long wall frames are positioned between 8' side walls. 1. Erect a 8' long wall frame on the back side of the floor. .IMPORTANT make sure frames are square and plumb. 12' Wall Frame 8' Wall Frame 2.
- Page 12 Step 9 Install Siding Install siding with a damage edge at a corner where it will be covered with corner trim. If installing building on concrete slab, install siding flush with the bottom plate. For wood floor, extend siding 3/4" below bottom plate. 1.
- Page 13 Step 10 Install 2x8 Joist Headers on Back Walls 1. Cut a 12' long 2x8 board to 139". Install this 2x8 to the 8' back wall panel, against the 13'-5" end wall without door opening. Install the 2x8 flush with the top of the 2x4 tie plate. Secure with (2) two rows of 10d sinker nails spaced 4"...
- Page 14 Step 11 Install 2x8 Floor Joist 1. Install joist hangers, on all 2x8 joist headers, over the 'X' marks, flush with the bottom of the 2x8s. Use 1-1/2" hanger nails. Joist Hanger If 2x8-14' boards are not available 16' long 2x8 will be substituted. 2.
- Page 15 Step 12 Install Loft Flooring 1. Cut (3) three 5/8" thick sheets into (2) two 48"x48" pieces. Cut (1) one sheet into (2) 24"x96" pieces. Cut (1) one sheet into (2) two 24"x48" pieces. The remaining piece is not used. 48"...
- Page 16 Step 14A Assemble Gable Frame 1. Cut a 16' long 2x4 to a length of 14'-2". 2. Gather (2) 62-1/8" long and (2) 69-7/8" long 2x4s. Place blue marked ends of 69-7/8" 2x4s together at the ridge. Position 62-1/8" boards as shown below. Set the 14'-2" long 2x4 on edge and nearest to 14' end wall.
- Page 17 Step 14B Assemble Gable Frame continued 6. Install pre-cut gable studs inside the gable frame. Use a framing square to make sure the studs are plumb and fit tight to the top 2x4 top frame and bottom plate. Use 3-1/2" x 8" OSB gussets to temporally secure the tops of the gable studs until the siding is applied.
- Page 18 Step 15 Install Siding on Gable Frame 1. Select the first gable frame assembled and position the gable frame so the wood gussets are facing towards the floor. 2. The bottom 2x4 plate prevents the gable from laying flat on the floor. Locate 6' long 2x4s that have a 1x3 board attached.
- Page 19 Step 16 Install Gable 2x4-12' Vertical Boards 1. Install (2) two 2x4-12' boards on the end wall to prevent the gable from falling off during installation. Install (2) two more 2x4-12 boards to brace the vertical 2x4 in place. Be- fore installing the vertical 2x4s attach (2) two 2x4 blocks to the back of the 2x4s.
- Page 20 Step 17 Assemble 2x6 Roof Trusses 1. Lay truss parts inside the 1x4 blocks used around gable frames. One end of the 70-3/8" long 2x6 boards have a blue mark. Place these ends together at the ridge. Move (2) two 1x4 blocks to the bottom of the truss legs to keep these from moving.
- Page 21 Step 19 Install Trusses 1. Starting at the end wall without the door opening indicate with 'X' marks where the trusses will be located. The last space will be wider than the first (21-3/8") space. Mark 2x6 Plate on Front and Back Walls 24"...
- Page 22 Step 20 Install Front & Back Wall Overhangs 1. Locate (4) four 7-1/4" long 1x4 trim blocks packed in our kit. Install one of the 1x4 trim blocks at each corner of front wall. Install the 1x4 trim blocks under the 2x4 gable plate, flush with the siding on the gable.
- Page 23 Step 21 Install Roof Sheathing Cut (7) seven sheets of 7/16" OSB into the quantity and sizes shown below. Cut (1) one 4x8 Sheet Cut (2) one 4x8 Sheet Cut (4) Four 4x8 Sheets 20-3/4" x 48" 20-3/4" x 96" 20-3/4"...
- Page 24 Step 22 Install Gable Trim 1. Install 70-1/4" long 1x6 trim boards at the top of the gable. Install the trim with the vertical cut located at the peak of the gable. Install 1x6 flush with the top of the roof sheathing. Use 6d galv.
- Page 25 Step 23 Install Door Trim 1. Install 3-7/8" x 84" primed LP door jamb material to the sides of the door opening. Install door jamb flush with the siding. Use 6d galv. nails. 2. Install (2) two 48-3/4" long 1x4 trim boards and a 1x6 keystone across the top of the door opening.
-
Page 26: Install Doors
Step 25 Install Doors If your door opening is out of square, the space around the doors will not be even. You can remove and re-position the side trim to make allowances for this. The side trim does not have to be flush with the frame of the door opening. You can move the trim in or out to make the door spacing equal. - Page 27 Step 25 Install Windows 1. Apply caulking around the window opening before installing the windows. 2. Hold the window in the opening using a few nails with a flat head so the trim can be inserted in the slot. Nails used to install shingles work well. 3.
- Page 28 Step 29 Install Roofing — Not Supplied in Kit Roof Covering (Not Included) bdl. Roof Shingles pcs. Roof 'drip' Edge-10' 700 sq. ft. Felt Paper Qty. Material Shipped in 48" Door Ctn. Qty. Material from Local Supplier 48" x 84" Pre-built Doors Pre-cut Wall Studs 12"...
- Page 29 Qty. Material Shipped on Pallet Qty. Hardware Breakdown Truss - Top Cords x 69-7/8" lbs. Galvanized Spiral Nails Truss Legs x62-1 /8" lbs. Coated Sinkers Pre-built Door Header x 37-1/2" lbs. Galvanized Nails Pre-built Soffit Overhangs 65" lbs. Galvanized Spiral Nails Gable Top Wall Plates x 70-3/8"...
Need help?
Do you have a question about the the Pinewood and is the answer not in the manual?
Questions and answers