Advertisement
Quick Links
Sentry Buildings
Assembly Book
Revised August 8, 2023
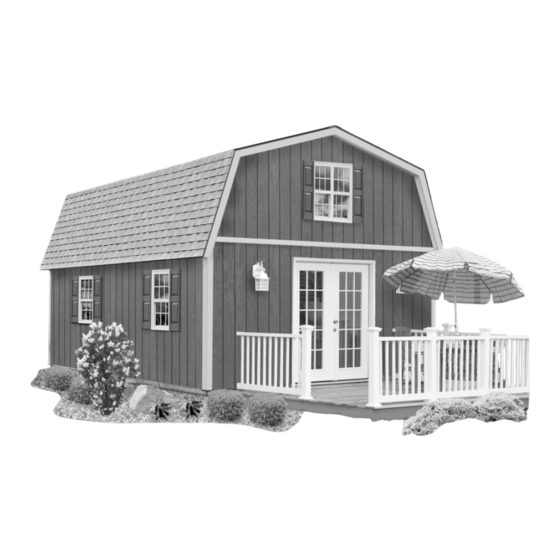
the Richmond
16'x28' Building
Manufactured by RBS Holdings, LLC
205 Arlington Drive
Greenville, PA 16125
This manual is copyrighted. Under the copyright laws, this manual
may not be copied, in whole or in part, without consent from
RBS Holdings, LLC
© Copyright 2022
Advertisement

Related Manuals for Sentry Buildings Richmond


Summary of Contents for Sentry Buildings Richmond
- Page 1 Sentry Buildings Assembly Book Revised August 8, 2023 the Richmond 16'x28' Building Manufactured by RBS Holdings, LLC 205 Arlington Drive Greenville, PA 16125 This manual is copyrighted. Under the copyright laws, this manual may not be copied, in whole or in part, without consent from RBS Holdings, LLC ©...
- Page 2 MPORTANT NFORMATION BOUT Check with your local HOA or building code office for any requirements, Building Permits: restrictions or permits necessary for construction. By owner. Refer to next page for foundation suggestions and size. Foundation: Our package includes pre-cut materials for the 2nd floor roof gables, roof What's Included: trusses and gable trim.
- Page 3 Foundation Types & Measurements Important: You will need to have a proper foundation installed to support the building. Depending on the intended use determines what type of foundation is best. Do Not make the foundation larger than the building size. When installing the building on a concrete slab, install the siding flush with the bottom plate.
- Page 4 Supplemental Details The Richmond doesn't include windows or doors which allows you to purchase the quantity, size and style to suit your needs. When reviewing these assembly instructions you will need to plan for rough openings and modify wall framing as appropriate. Additional framing material may need to be purchased.
- Page 5 Step 1 Assemble (2) Two 92-1/2" Rear Wall Frames 1. Cut (2) two 2x4-8' (one will be treated) to a length of 92-1/2". Position the boards together and indicate with 'X' marks where the wall studs will be located. 2. Mark a 'C' anywhere between first two stud marks. This is referenced in a later step. 92-1/2 Top Wall Plate 92-1/2"...
- Page 6 Step 2 Assemble (4) Four 8' Long Side Wall Frames 1. Select (2) two 2x4-8' (one will be treated) if necessary trim to a length of 96". Position the boards together and indicate with 'X' marks where the wall studs will be located. 96"...
- Page 7 Step 3 Assemble (2) Two 12' Side Wall Frames 1. Trim, if necessary, (2) two 2x4-12' boards (one will be treated) to a length of 144". Position the boards together and indicate with 'X' marks where the wall studs will be located. 144"...
- Page 8 Step 4 Assemble 15'-5' Front Wall Door Frame Add window or door rough opening(s) where necessary. 1. Cut (2) two 2x4-16' (one will be treated) to a length of 15'-5".! 2. Assemble the front wall frame using the wall plates cut above and pre-cut wall studs. Use 16d galvanized deck nails for the bottom plate and 10d sinkers for the top plate.
- Page 9 Step 5 Set Wall Frames 1. Install one of the 92-1/2" rear wall frames against inside of a 8' side wall frame. Brace walls with pre-cut studs. 2. Install the other 92-1/2" rear wall frame to the rear wall frame. Nail the rear wall frames together where they butt with (8) eight 10d sinker (stagger nails on each side of the studs) .
- Page 10 Step 6 Install 2x4 Tie Plates 1. Install a 16' long 2x4 on the back wall. Use 10d sinkers space 16" apart to secure tie plates. 2. Repeat to install a 16' long 2x4 tie plate on the opposite front wall. 12' Long 2x4 Tie Plate 16' Long 2x4 Tie Plate Back Wall...
- Page 11 Step 7 Install Siding on Wall Frames continued 1. Install a full width siding panel on the side wall with the 'LAP' edge flush with the 2x4s on the back wall. Install (6) six more siding panels. If necessary cut last panel flush with 2x4s on front wall.Use 8d galv.
- Page 12 Step 9 Install 2x10 Joist Headers IMPORTANT: If you purchased the optional stair kit, go now to the instructions in the stair kit book to install the stairs, floor joist and flooring. Otherwise, modify the instructions on Step 11 to provide another way to access to the loft area. 1.
- Page 13 Step 11 Install Floor Joist Cut 2x10-16' boards to 182" length and install between the side walls. Secure to joist hanger with 1-1/2" hanger nails. 182" Long 2x10 Floor Joist...
- Page 14 Step 12 Install Loft Flooring Starting at the front (door wall) install 3/4" T&G flooring with the 'Tongue' edge flush with the 2x4 tie plates on side walls. Stagger the seams in an alternating pattern (see below). Continue to back wall. Secure flooring with 8d galvanized spiral deck nails spaced 12" apart.
- Page 15 Step 13A Assemble Rear Gable Assemble the roof gables and trusses on the center of the loft floor. This will make it easier to stand the gable upright over the lower wall. 1. Cut (2) two 2x4-10' boards to a length of 97-1/2". Position these 2x4s, on edge and butt together. 2.
- Page 16 Step 13B Assemble Rear Gable continued 1. Secure the 2x6 boards together at the knee and ridge with 1/2" OSB gussets. Use 6d common nails. Nail 5-1/4" x 12" OSB fillers where shown below. 5/1/4" x 12" OSB Gusset 1/2" Gusset at Ridge 5-1/4"...
- Page 17 Step 14 Install Siding on Rear Gable Frame 1. Stand up the gable frame and slide it to the rear of the building. Position the frame with the bottom towards the rear wall so it can be erected after the siding is applied. Install a pre-cut siding panel with the 'cut edge' flush with the left side of the gable frame.
- Page 18 Step 16 Install Rear Roof Gable 2x4-12' Vertical Boards 1. Install (2) two 2x4-12' boards on the back wall to prevent the gable from falling off during gable installation. Install (2) two more 2x4-12 boards to brace the vertical 2x4 in place. Before bracing the vertical 2x4s in place attach (2) two 2x4 blocks to the back of the 2x4s.
- Page 19 Step 17 Assemble & Install Front Gable 1. Repeat Step 16 to assemble front gable. If you are installing a window cut pre-cut wall studs to frame in the window opening. 2. Stand up the gable frame and slide it to the front of the building. Position the frame with the bottom towards the front wall so it can be erected after the siding is applied.
- Page 20 Step 19 Install 2x6 Soffit Blocks 1. Locate pre-built 2x6 soffit blocks, (4) Four will have siding attached. Starting from back wall position a soffit block with attached siding under bottom plate of gable and flush with face of gable siding. Secure to wall using (2) two 3" deck screws. 2.
- Page 21 Step 20 Assemble Roof Trusses 1. Lay truss parts inside the 2x4 blocks used around gable frames. One end of the 81-3/4" long 2x6 boards have a blue mark. Place these ends together at the ridge. Add a 2x4 block at the bottom of the truss legs to keep this 2x6 from moving.
- Page 22 Step 21 Install Roof Trusses 1. Install 2x6 hangers over the 'X' marks on the truss plate and flush with outside edge of 2x6. Use 1-1/2" joist hanger nails. Set truss legs into hanger. Use 10d coated sinker nails to secure the truss to the metal hanger (use hanger eyelets to guide the nails at the correct angle).
- Page 23 Step 23 Install Front Gable Soffit 1. Install 81-3/4" long 2x4s on the top of the front gable, flush with the top of the gable frame. Install 2x4x81-3/4" the ends with the blue mark together at the peak of the gable. Use 10d sinkers spaced 12" apart. 2.
- Page 24 Step 24B Install Roof Sheathing continued Straight 2. Starting at gable knee install roof sheathing at the Edge front of the building, refer to the sheathing layout below. Using a straight edge position the first sheets 48"x59" Roof Sheathing plumb with the soffit panels. The roof sheathing should meet at center of the trusses.
- Page 25 Step 25A Install Front Gable Trim 1. Insert a 81-3/4" long 2x4 between the soffit panels and the roof sheathing on the upper gable. Use 1-1/4" trim screws to secure the soffit panels to the 2x4s. Use 7d sinkers to secure the roof sheathing to the 2x4s.
- Page 26 Step 25B Install Front Gable Trim continued 4. Install 82-1/4" long 1x6 trim boards at the top of the gable. Install the end with the blue marking at the ridge. Install 1x6 flush with the top of the roof sheathing. Use 8d galv. nails. Blue Ends Together 82-1/4"...
- Page 27 1000 sq. ft. Felt Paper helpful resources available online. Packing List Richmond 16' Wide x 28' Building Kit Material Shipped by Local Supplier Qty. Material Shipped by Local Supplier Qty. Without Stair Kit Pre-cut Wall Studs...
- Page 28 Richmond 16' Wide x 28' Building Kit Packing Qty. Material Shipped on 'A' Pallet Qty. Material Shipped on 'B' Pallet Pre-built Gable Frames 21-3/4" x 48" Truss - Top Cord x 81-3/4" Pre-built Gable Frames 19-1/4" x 48" Gable Overhang x 81-3/4"...
Need help?
Do you have a question about the Richmond and is the answer not in the manual?
Questions and answers