Table of Contents
Advertisement
Quick Links
INSTRUCTIONS
U-UVF248A
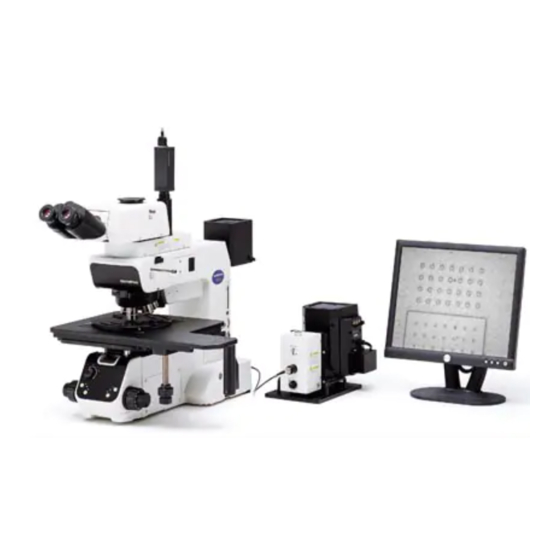
MOTORIZED 248 nm UV
MICROSCOPE UNIT
This instruction manual is for the Olympus Motorized 248 nm UV Microscope Unit Model U-UVF248A.
To ensure the safety, obtain optimum performance and to familiarize yourself fully with the use of
this unit, we recommended that you study this manual thoroughly before operating the microscope
system. To understand the comprehensive operating procedures, it is also recommended to read
the instruction manual for the manual type U-UVF248 unit (packaged together with the U-UVF248IM).
Retain this instruction manual in an easily accessible place near the work desk for future reference.
A X 7 6 8 0
Advertisement
Table of Contents

Summary of Contents for Olympus U-UVF248A
- Page 1 MOTORIZED 248 nm UV MICROSCOPE UNIT This instruction manual is for the Olympus Motorized 248 nm UV Microscope Unit Model U-UVF248A. To ensure the safety, obtain optimum performance and to familiarize yourself fully with the use of this unit, we recommended that you study this manual thoroughly before operating the microscope system.
- Page 2 Refer to your local Olympus distributor in EU for return and/or collection systems available in your country. NOTE: This equipment has been tested and found to comply with the limits for a Class A digital device, pursuant to Part 15 of the FCC Rules.
-
Page 3: Table Of Contents
U-UVF248A CONTENTS IMPORTANT — Be sure to read this section for safe use of the equipment. — NOMENCLATURE CONTROLS PREPARATION Centering the Mercury/Xenon Burner ........................6 Adjusting the Illumination Center ........................... 7 SUMMARY OF VISIBLE/UV LIGHT OBSERVATION PROCEDURE SPECIFICATIONS TROUBLESHOOTING GUIDE FOR UV OBSERVATION... -
Page 4: Important - Be Sure To Read This Section For Safe Use Of The Equipment
IMPORTANT With the U-UVF248A unit, the U-UVF248LB that is the manual type light source box is replaced with the U-UVF248LBM that is the motorized type light source box. The U-UVF248LBM is capable of motorized control of the opening/closing of the shutter and the adjustment of the light intensity. - Page 5 “ ” (OFF). 8. Be sure to ground the power supply to ensure safety. If it is not grounded/earthed, Olympus can no longer warrant the electrical safety performance of the equipment.
- Page 6 Caution indications Caution indications are affixed at parts where special precaution is required when handling and using the microscope. Always heed the cautions. Lamp housing for mercury/ High temperature caution] Caution indication xenon burner (U-LH80HGXE) positions Power supply [High voltage caution]...
-
Page 7: Nomenclature
U-UVF248A NOMENCLATURE The modules enclosed in belong to the U-UVF248A UV Microscope Unit. Other modules should be prepared by the user. The modules marked in the illustration are for exclusive use in a motorized system. }If you have not completed the assembly yet, see chapter 7, “ASSEMBLY” before proceeding to the following. -
Page 8: Controls
CONTROLS UV248 Light Source Box U-UVF248LBM Centering scope (Page 6) Caution label (Page 1) Lamp housing mount (Page 12) UV light guide mount Motorized shutter/light intensity adjustment cable connector Camera cable connector (BNC connector) Motorized shutter/light intensity adjustment cable... -
Page 9: Preparation
U-UVF248A PREPARATION }The motorized control of the MX61A and U-UVF248A is executed using the MX2-BSW control software. For details on the software, refer to the instruction manual provided with it. To prevent accidental UV irradiation due to mistake, it is prohibited to control a system combining CAUTION the MX-OPU61A controller or the MX-HS61A with the MX61A. -
Page 10: Adjusting The Illumination Center
² Adjusting the Illumination Center (Fig. 3) }This adjustment consists of aligning the UV light guide with the center of the MApo100X objective for 248 nm UV observation. 1. Set the MX61A to the “BF” observation mode. 2. Place a specimen with a mirror surface on the stage. 3. -
Page 11: Summary Of Visible/Uv Light Observation Procedure
U-UVF248A SUMMARY OF VISIBLE/UV LIGHT OBSERVATION PROCEDURE }The motorized control of the MX61A and U-UVF248A is executed using the MX2-BSW control software. }The mercury/xenon burner takes 5 to 10 minutes until the arc is stabilized after ignition. (Operation) 1. Switch the power supply for the mercury/xenon burner to “ I ” (ON). -
Page 12: Specifications
SPECIFICATIONS UV248 Light Source Box U-UVF248LBM Item Specifications Applicable light source Lamp housing: U-LH80HGXE. Mercury/xenon burner: UXM80E (Life: Approx. 1000 hours). Power supply: U-HX-T Optical wavelength 248 ±4 nm. Brightness adjustment 0% to 100%. Adjustment with pulse motor drive. Shutter Shutter opening/closing with pulse motor drive. -
Page 13: Troubleshooting Guide For Uv Observation
U-UVF248A TROUBLESHOOTING GUIDE FOR UV OBSERVATION If problems occur, please review the following list and take remedial action as needed. If you cannot solve the problem after checking the entire list, please contact Olympus for assistance. Page Trouble Cause Remedy... -
Page 14: Assembly
³. Be sure to use the UXM80E burner (mfd. by USHIO) that is available through Olympus. # Be careful not to soil the burner with fingerprints or dust. If it becomes dirty, wipe clean the burner surface with a piece of Fig. - Page 15 U-UVF248A Attaching the Lamp Housing (Fig. 6) ² 1. Loosen the two lamp housing clamping screws @ of the UV248 light source box. 2. Insert the mount seat ² of the lamp housing into the mount and tighten the clamping screws @.
-
Page 16: Preventive Inspection Sheet For Illumination Devices
{If there are any check marks ( ) noted, immediately stop use of the product and seek service or replacement for the illumination device(s) for prevention. {If you detect an abnormality other than that listed below with your illumination device or other Olympus product, request inspection from your Olympus distributor. - Page 17 MEMO...
- Page 18 MEMO...
- Page 20 Manufactured by Distributed by Printed in Japan on December 25, 2012 M 000-03 AX7680 03...


Need help?
Do you have a question about the U-UVF248A and is the answer not in the manual?
Questions and answers