Advertisement
Quick Links
INSTRUCTIONS
U-DA
DRAWING ATTACHMENT
This instruction manual is for the Olympus Drawing Attachment Model U-DA. To ensure the safety, obtain
optimum performance and to familiarize yourself fully with the use of this attachment, we recommend that
you study this manual thoroughly before operating the microscope. Retain this instruction manual in an
easily accessible place near the work desk for future reference.
A X 5 8 9 0
Advertisement

Related Manuals for Olympus U-DA


Summary of Contents for Olympus U-DA
- Page 1 U-DA DRAWING ATTACHMENT This instruction manual is for the Olympus Drawing Attachment Model U-DA. To ensure the safety, obtain optimum performance and to familiarize yourself fully with the use of this attachment, we recommend that you study this manual thoroughly before operating the microscope. Retain this instruction manual in an easily accessible place near the work desk for future reference.
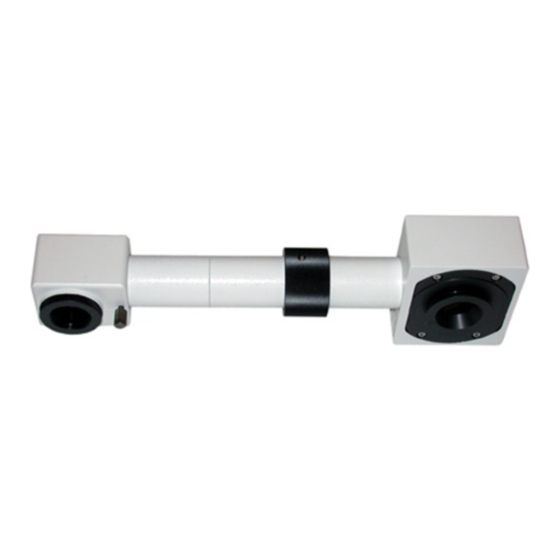
- Page 3 · The U-DA drawing attachment allows the observer to see the paper sheet on the desk top and the specimen image in a superimposed image so that the specimen image can be drawn easily.
- Page 4 Observation tube Drawing attachment U-DA Magnification Intermediate Polarized light Universal Reflected Universal Fluorescence changer tube intermediate illuminator illuminator illuminator lluminator U-CA for AN360 tube U-URA U-RLA BX-URA2 BX-RFA U-ECA U-OPA U-CPA Microscope frame Microscope frame Microscope frame BX40 BX60 BX41...
-
Page 5: Table Of Contents
U-DA CONTENTS NOMENCLATURE ASSEMBLY 2-1 Mounting the Drawing Attachment on the Microscope ..............2 2-2 Mounting the Observation Tube ............................2 OPERATION SPECIFICATIONS... -
Page 6: Nomenclature
NOMENCLATURE }Depending on the mounting position of the U-DA, the adapter tube may become unnecessary, in which case the drawing lens has to be remounted. 1. When only the U-DA is mounted on the microscope frame }The configuration is identical even when another intermediate is mounted above the U-DA. -
Page 7: Assembly
… ³ ² 4. Screw the lens adapter frame ƒ, provided with the U-DA, into the threaded ƒ | hole at the bottom of the mirror housing. 5. Screw the drawing lens | removed in step 2 above, into the lens adapter Fig. -
Page 8: Operation
OPERATION Positioning the Drawing Paper ³ Place drawing paper horizontally on the desktop exactly below the mirror in the mirror housing. The paper should be secured after alignment. Adjusting the Mirror Housing (Fig. 4) 1. Loosen the mirror housing clamping knob @ and rotate the mirror hous- ing until it is positioned perpendicularly to the drawing paper. - Page 9 3. Attach the mirror housing directly to the relay tube ƒ. ² 4. Screw in the lens adapter frame …, provided with the U-DA, into the threaded hole at the mirror housing bottom. ³...
-
Page 10: Specifications
SPECIFICATIONS Item Specification (1) Tube magnification (2) Maximum field number 22 (mm ) (3) Drawing image magnification 16X (When there is an intermediate tube between the microscope and drawing attachment, the magnification may be variable by ±3%.) 10X (When the U-DAL10X is used) (4) Drawing field 352 mm ( 220 mm when the U-DAL10X is used) (5) Focusing (on paper) - Page 12 Manufactured by Shinjuku Monolith, 2-3-1 Nishi-Shinjuku, Shinjuku-ku, Tokyo 163-0914, Japan Distributed by 8F Olympus Tower, 446 Bongeunsa-ro, Gangnam-gu, Seoul, Korea 135-509 AX5890 04...
Need help?
Do you have a question about the U-DA and is the answer not in the manual?
Questions and answers