
Related Manuals for Campbell 014A


Summary of Contents for Campbell 014A
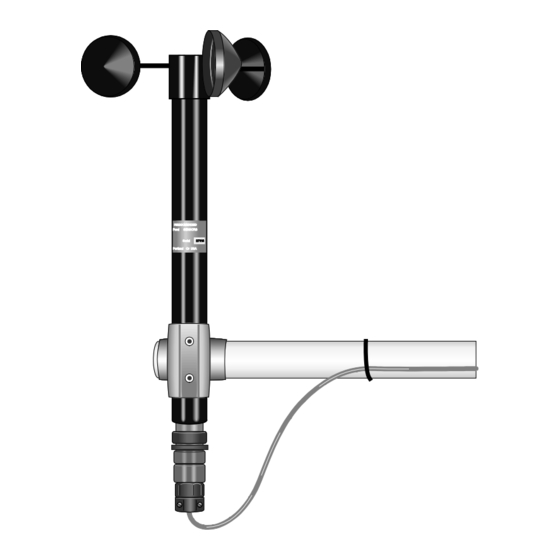
- Page 1 Model 014A Met One Wind Speed Sensor Revision: 4/14 C o p y r i g h t © 1 9 8 0 - 2 0 1 4 C a m p b e l l S c i e n t i f i c ,...
- Page 3 Limited Warranty “Products manufactured by CSI are warranted by CSI to be free from defects in materials and workmanship under normal use and service for twelve months from the date of shipment unless otherwise specified in the corresponding product manual. (Product manuals are available for review online at www.campbellsci.com.) Products not manufactured by CSI, but that are resold by CSI, are warranted only to the limits extended by the original manufacturer.
- Page 4 SCIENTIFIC, INC., phone (435) 227-9000. After an application engineer determines the nature of the problem, an RMA number will be issued. Please write this number clearly on the outside of the shipping container. Campbell Scientific’s shipping address is: CAMPBELL SCIENTIFIC, INC.
- Page 5 Periodically (at least yearly) check electrical ground connections. • WHILE EVERY ATTEMPT IS MADE TO EMBODY THE HIGHEST DEGREE OF SAFETY IN ALL CAMPBELL SCIENTIFIC PRODUCTS, THE CUSTOMER ASSUMES ALL RISK FROM ANY INJURY RESULTING FROM IMPROPER INSTALLATION, USE, OR MAINTENANCE OF TRIPODS, TOWERS, OR ATTACHMENTS TO TRIPODS AND TOWERS SUCH AS SENSORS, CROSSARMS, ENCLOSURES, ANTENNAS, ETC.
-
Page 7: Table Of Contents
Table of Contents PDF viewers: These page numbers refer to the printed version of this document. Use the PDF reader bookmarks tab for links to specific sections. 1. Introduction ..............1 2. Cautionary Statements ..........1 3. Initial Inspection ............1 Ships With .................... - Page 8 Figures 4-1. 014A shipping box ................2 4-2. Allen wrench tightening bolt ............... 3 4-3. 014A mounted on a crossarm with pn 1049 ........4 4-4. CM220 Right Angle Mounting Bracket ..........4 C-1. Reed switch assembly ..............C-1 C-2.
-
Page 9: Introduction
U.L. 94 H.B. and will pass FMVSS302. Local fire codes may preclude its use inside buildings. Caution – Although the 014A is rugged, it should be handled as a • precision scientific instrument. -
Page 10: Quickstart
6 inch to 10 inch torpedo level 4.1.2 Assemble the Sensor The 014A ships with the cup assembly separate from the main housing. Assemble the sensor using the following procedure: 1. Take the cup assembly and main housing out of the shipping box (see FIGURE 4-1). -
Page 11: Mount To A Tripod Or Tower
2. Orient the crossarm North-South, with the CM220 mount or 1049 NU-RAIL on the north end. 3. Insert the base of the 014A into the 1049 NU-RAIL or CM220 U-bolt (FIGURES 4-3, 4-4) and tighten the set screws on the NU-RAIL, or U-bolt on the CM220 (do not over tighten). -
Page 12: 014A Mounted On A Crossarm With Pn 1049
6. Secure the cable to the crossarm and tripod/tower using cable ties. Sensor Base Crossarm 1049 NU-RAIL FIGURE 4-3. 014A mounted on a crossarm with pn 1049 U-bolt holds sensor base CM220 Mounting Bracket Crossarm FIGURE 4-4. -
Page 13: Use Scwin To Program Datalogger And Generate Wiring Diagram
Met One 014A Wind Speed Sensor Use SCWin to Program Datalogger and Generate Wiring Diagram Short Cut is an easy way to program your datalogger to measure the 014A and assign datalogger wiring terminals. The following procedure shows using Short Cut to program the 014A. - Page 14 4. Select Datalogger Model and Scan Interval (default of 5 seconds is OK for most applications). Click Next. 5. Under the Available Sensors and Devices list, select the Sensors | Meteorological | Wind Speed & Direction folder. Select 014A Wind Speed Sensor. Click to move the selection to the Selected device window.
-
Page 15: Overview
The accompanying Met One manual contains additional information on operating principals, installation, and maintenance. The –L portion of the model number indicates that the 014A has a user- specified cable length. TABLE 5-1 gives the recommended lead length for mounting the sensor at the top of the tripod/tower with a CM202 crossarm. -
Page 16: Specifications
24 ft 14 ft 24 ft 37 ft The 014A’s cables can terminate in: • Pigtails that connect directly to a Campbell Scientific datalogger (cable termination option –PT). Connector that attaches to a prewired enclosure (cable termination • option –PW). Specifications Features: •... -
Page 17: Installation
Mounting Options The 014A can be attached to a CM200-series crossarm via a 1049 NU-RAIL fitting or a CM220 Right Angle Mounting Bracket. The procedure for using these mounts is provided in the quickstart (Section 4.1.3, Mount to a Tripod or Tower). -
Page 18: Wiring
Clear Shield A control port may also be used to measure the 014A. With this option, the white wire is connected to the 5 V terminal. Please note that the control port method cannot be used with a CR200(X), CR500, CR510, CR7, 21X, or CR10 datalogger. -
Page 19: Wind Speed
Met One 014A Wind Speed Sensor Short Cut cannot edit programs after they are imported and edited NOTE in CRBasic Editor. A Short Cut tutorial is available in Section 4.2, Use SCWin to Program Datalogger and Generate Wiring Diagram. If you wish to import Short Cut code into either CRBasic Editor or Edlog to create or add to a customized program, follow the procedure in Appendix A.1, Importing Short Cut Code... -
Page 20: To 24 Month Service
Met One 014A Wind Speed Sensor 8.1.2 12 to 24 Month Service Replace sensor bearings. 8.1.3 24 to 36 Month Service A complete factory overhaul of the sensor is recommended. Contact Met One directly for wind speed sensor repair and recalibration service. This repair and calibration service includes disassembly and detailed inspection of all moving mechanical parts and all electronic components. - Page 21 Met One 014A Wind Speed Sensor The State Climatologist, 1985: Publication of the American Association of State Climatologists: Height and Exposure Standards, for Sensors on Automated Weather Stations, vol. 9, No. 4. WMO, 1983: Guide to Meteorological Instruments and Methods of Observation, World Meteorological Organization, No.
- Page 22 Met One 014A Wind Speed Sensor...
-
Page 23: Importing Short Cut Code
Appendix A. Importing Short Cut Code This tutorial shows: How to import a Short Cut program into a program editor for • additional refinement. How to import a wiring diagram from Short Cut into the comments of • a custom program. A.1 Importing Short Cut Code into a Program Editor Short Cut creates files that can be imported into either CRBasic Editor or Edlog program editor. -
Page 24: Edlog Dataloggers
Appendix A. Importing Short Cut Code 5. The program can now be edited, saved, and sent to the datalogger. 6. Import wiring information to the program by opening the associated .DEF file. Copy and paste the section beginning with heading “-Wiring for CRXXX–”... -
Page 25: Example Programs
Appendix B. Example Programs B.1 Pulse Port Examples The following CR1000 and CR10X programs use a pulse port to measure the 014A every 5 seconds. The programs store mean wind speed (in m s –1 ) every 60 minutes. Wiring for the examples is given in TABLE B-1. -
Page 26: Cr10X Example Program
Appendix B. Example Programs B.1.2 CR10X Example Program ;{CR10X} *Table 1 Program 01: 5.0000 Execution Interval (seconds) Batt Voltage (P10) Loc [ Batt_Volt ] Pulse (P3) Reps Pulse Channel 1 Switch Closure, Output Hz Loc [ WS_ms Multiplier 0.447 Offset If (X<=>F) (P89) X Loc [ WS_ms <... -
Page 27: Control Port Example Program
'Enter Sub instructions here 'EndSub 'Main Program BeginProg Scan (1,Sec,0,0) 'Measure the WindSpeed Profile 014A, 3 anemometers connected to C4, C5, C6 ports TimerIO (WindSpeed(1),11000111,00222000,100,0) 'Frequency on falling edge 'Convert measurement to m/s For j = 1 to 3 WindSpeed(j) = 0.447 + WindSpeed(j)/1.25... - Page 28 Appendix B. Example Programs...
-
Page 29: Sensor Maintenance
FIGURE C-1. Reed switch assembly C.2 Bearing Replacement Procedure The bearings used in the 014A sensor are special stainless steel ball bearings with a protective shield. Bearings are lubricated and sealed. DO NOT LUBRICATE BEARINGS AS THE LUBRICATION WILL ATTRACT DUST AND INHIBIT BEARING OPERATION. -
Page 30: Cable Diagram
Appendix C. Sensor Maintenance Insert a right-angle type of tool, such as an Allen wrench, into bearing. Cock it slightly to one side and remove both bearings. D. Install new bearings. Be careful not to introduce dirt particles into bearings. CLEAN HANDS ONLY! DO NOT ADD LUBRICATION OF ANY KIND. -
Page 31: Parts Diagram
Appendix C. Sensor Maintenance FIGURE C-3. Parts diagram... - Page 32 Appendix C. Sensor Maintenance TABLE C-1. Met One Parts List Reproduced by Campbell Scientific, Inc. Item Part No. Description Qty./Assy 1011685-2 Housing 101685-4 Bearing Mount 101685-7 Collar 101715 Magnet Assembly 101812 Assy, Cup (Alum) 101898 Bearing 86001 Shaft 101048-2 Label...
-
Page 33: Theory Of Operation
(reed switch closures) per revolution. The frequency of closures is linear from threshold to 45 m s –1 D.2 Calibration The 014A sensor has a threshold speed of 0.447 m s –1 and follows the equation: V = 0.447 + f/1.250 where... - Page 34 Appendix D. Theory of Operation...
- Page 36 • info@campbellsci.com.cn • info@campbellsci.de www.campbellsci.com www.campbellsci.de Campbell Scientific do Brasil Ltda. (CSB) Campbell Scientific Spain, S. L. (CSL Spain) Rua Apinagés, nbr. 2018 ─ Perdizes Avda. Pompeu Fabra 7-9, local 1 CEP: 01258-00 ─ São Paulo ─ SP 08024 Barcelona...
Need help?
Do you have a question about the 014A and is the answer not in the manual?
Questions and answers