Table of Contents
Advertisement
Quick Links
Advertisement
Table of Contents

Subscribe to Our Youtube Channel
Related Manuals for Belling BE444444695


Summary of Contents for Belling BE444444695
- Page 1 Free Standing Cooker / User Manual BE444444695 BE444444696 BE444444697...
- Page 2 Thank you for choosing this product. This User Manual contains important information on safety and instructions intended to assist you in the operation and maintenance of your appliance. Please take the time to read this User Manual before using your appliance and keep this book for future reference.
-
Page 3: Table Of Contents
CONTENTS CONTENTS 1.SAFETY INSTRUCTIONS ....................4 2.INSTALLATION AND PREPARATIONS FOR USE ............11 2.1. Instructions for the Installer ..................11 2.2. Installation of the Cooker .....................12 2.3. Gas Connection ......................12 2.4. Gas Conversion (If available) ..................13 2.5. Electrical Connection and Safety.................14 2.6. -
Page 4: Safety Instructions
1. SAFETY INSTRUCTIONS • Read these instructions carefully and completely before using your appliance and keep them in a convenient place for reference when necessary. • This manual is prepared for more than one model. Your appliance may not have some of the features described in this manual. - Page 5 shock. • For models which incorporate a hob lid, clean any spillages off the lid before using and allow the Cooker to cool before closing the lid. • Do not operate the appliance by means of an external timer or separate remote-control system. •...
- Page 6 out by authorised service technicians. Installation and repair work that is carried out by unauthorised technicians may be dangerous. Do not alter or modify the specifications of the appliance in any way. Inappropriate hob guards can cause accidents. • Before connecting your appliance, make sure that the local distribution conditions (nature of the gas and gas pressure or electricity voltage and frequency) and the specifications of the appliance...
- Page 7 • All possible measures have been taken to ensure your safety. Since the glass may break, care should be taken while cleaning to avoid scratching. Avoid hitting or knocking the glass with accessories. • Make sure that the supply cord is not trapped or damaged during installation.
- Page 8 • Protect your appliance against atmospheric effects. Do not expose it to effects such as sun, rain, snow, excessive humidity etc. • The material around the appliance (cabinet) must be able to withstand a minimum temperature of 100°C. 1.3. During Usage • When you first use your Oven you may notice a slight smell.
- Page 9 • Make sure the appliance control knobs are always in the “0” (stop) position when it is not used. • The trays incline when pulled out. Take care not to spill or drop hot food when removing it from the ovens.
-
Page 10: Installation And Preparations For Use
use. Avoid touching the 2. INSTALLATION AND PREPARATIONS FOR USE inside surface. WARNING: This appliance must be • Do not hang towels, installed by an authorised service person or qualified technician, according to the dishcloths or clothes instructions in this guide and in compliance from the appliance or its with the current local regulations. -
Page 11: Installation Of The Cooker
freezer, washing machine or clothes dryer. Air inlet section min. 100 cm • The appliance can be placed close to other furniture on condition that in the area where the appliance is set up, the furniture’s height does not exceed the height of the cooktop. -
Page 12: Gas Connection
2.3. Gas Connection hose is 1.5 m. Assembly of gas supply and leakage • The hose that supplies the appliance check with gas must be changed once a year The connection of the appliance should be for your security. performed in accordance with applicable • The hose must be kept clear of areas local and international standards and that may heat up to temperatures of... -
Page 13: Gas Conversion (If Available)
the counter-part. Use appropriately-sized The Cooker must be installed and spanners for a safe connection. For maintained by a suitably qualified gas surfaces between different components registered technician in accordance with always use the seals provided in the gas current safety legislation. conversion kit. -
Page 14: Electrical Connection And Safety
WARNING: THE APPLIANCE MUST with a flame failure safety device, the screw BE EARTHED. is located on the side of the valve spindle as in figures. For valves without a flame • Before carrying out the connection to failure safety device, the screw is located the power supply, the voltage rating inside the valve spindle as in figure. -
Page 15: Anti-Tilting Kit
Blue Product Dimensions A (mm) B (mm) (Width X Depth X Height) (Cm) 60x60x90 (Double Oven) 297.5 50x60x90 (Double Oven) 247.5 90x60x85 60x60x90 309.5 Brown Yellow+Green 60x60x85 309.5 50x60x90 247.5 50x60x85 247.5 2.6. Anti-tilting kit 50x50x90 247.5 50x50x85 247.5 Screw (x1) 2.7. -
Page 16: Product Features
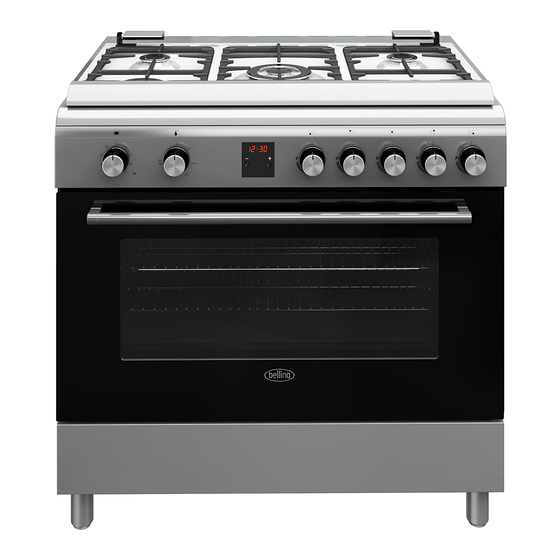
3. PRODUCT FEATURES Important: Specifications for the product vary and the appearance of your appliance may differ from that shown in the figures below. List of Components 1. Cooktop 2. Control Panel 3. Oven Door Handle 4. Oven Door 5. Adjustable Feet Control Panel 6. -
Page 17: Use Of Product
4. USE OF PRODUCT 4.1. Use of gas burners Ignition of the burners The position symbol above each control knob determines the burner that the knob controls. Manual Ignition of the Gas Burners OFF position MAX position If your appliance is not equipped with any ignition aid or in case there is a failure in the electric network, follow the procedures listed below:... - Page 18 Turn the knob to the corresponding symbol Rapid / Wok Burner 22-26 cm of the desired cooking function. For the Semi-rapid Burner 14-22 cm details of different functions see ´Oven functions`. Auxiliary Burner 12-18 cm Oven thermostat knob Make sure that the tips of the flames do not After selecting a cooking function, turn this spread out from the outer circumference knob to set the desired temperature.
-
Page 19: Use Of Digital Minute Minder
which provides air circulation, giving a 190°C. slighly grilled effect to the food. It is Double Grill and Fan recommended that you pre-heat the oven Function: The oven’s for about 10 minutes. The fan and lower thermostat and heating function is ideal for baking food warning lights will be such as pizza, evenly in a short period of turned on. - Page 20 WARNING: The inside surface of drawer may become hot during use. 2. Select the desired Do not store any food, plastic or time period using the - inflammable materials in the drawer. and + keys while flashing. 3. The symbol lights continuously, the time is saved and the warning is set.
-
Page 21: Cleaning And Maintenance
appliance. • Use cream cleaners or liquid cleaners which do not contain particles. Do not use caustic (corrosive) creams, abrasive cleaning powders, rough wire wool or hard tools as they may damage the cooker surfaces. • Do not use cleaners that contain particles, as they might scratch the glass, enameled and/or painted parts of your appliance. - Page 22 be scratched over time due to the use, Removal of inner Glasses this is not a production fault. Before cleaning the oven door glass, you must remove the inner glass as shown: • Do not use metal sponge for cleaning any part of the hob. 1.
-
Page 23: Maintenance
5.2. Maintenance WARNING: The maintenance of this appliance should be carried out by an authorised service person or qualified technician. Change of Oven Lamp WARNING: Switch off the appliance and allow it to cool down before cleaning your appliance. 2. Open the saddle bracket (a)(with the aid • Remove the glass lense and then of a screwdriver) up to the end position. -
Page 24: Troubleshooting&Transport
6. TROUBLESHOOTING&TRANSPORT 6.1. Troubleshooting After checking these basic trouble shooting, if you have still problem with your appliance, please contact with an authorised service person or qualified technician. Problem Possible Cause Solution Check the position of oven and/or grill burner’s The burners may be ´off` position. -
Page 25: Transport
Lamp has failed. Replace lamp according to the instructions. Oven light (if avaliable) does not Electrical supply is disconnected or Make sure the electrical supply is turned on at wall operate. switched off. socket outlet. If there is foreign matter caught between the timer buttons Remove the foreign matter and try again. - Page 26 Brand BE444444695 Model BE444444696 BE444444697 Type of Hob Number of Cooking Zones Heating Technology-1 Size-1 Auxiliary Energy Efficiency-1 Heating Technology-2 Size-2 Semi-Rapid Energy Efficiency-2 59,0 Heating Technology-3 Size-3 Semi-Rapid Energy Efficiency-3 59,0 Heating Technology-4 Size-4 Rapid Energy Efficiency-4 57,0 Heating Technology-5...
- Page 27 Brand Model BE444444695 BE444444696 BE444444697 Type of Oven ELECTRIC Mass 72,0 Energy Efficiency Index - conventional 118,0 Energy Efficiency Index - fan forced 104,7 Energy Class Energy consumption (electricity) - conventional kWh/cycle 1,15 Energy consumption (electricity) - fan forced kWh/cycle...
- Page 28 G30 28/30mbar 10,7 kW 778 gr/h G25 25 G25.3 25 G20 20 G30 28-30 NL Cat:II2L3B/P + II2EK3B/P mbar mbar mbar mbar Class:1 LARGE BURNER DIA. of INJECTOR (1/100mm) NOMINAL RATING (KW) CONSUMPTION 321,2 l/h 314,3 l/h 276,2 l/h 210,9 g/h MEDIUM BURNER DIA.
- Page 30 Burgemeester Maenhautstraat 64 B-9820 Merelbeke T: +32 (0)2100210 Registering your product: To make things easy for you, you can register your Belling product online. This will help you make the most of the guarantee offered by Belling. For the Netherlands: https://www.belling.nl/klantenservice/product-registratie/ For Belgium: http://www.belling.be/klantenservice/product-registratie/...
- Page 31 On the websites, you will also find Belling's guarantee and repair conditions. In the unlikely event that your appliance has a fault, please contact our service department during office hours.
Need help?
Do you have a question about the BE444444695 and is the answer not in the manual?
Questions and answers