
Related Manuals for Belling BDU958DBK


Summary of Contents for Belling BDU958DBK
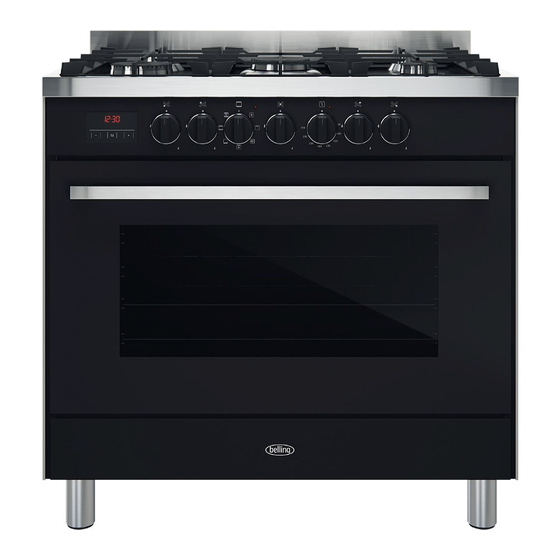
- Page 1 BDU958DBK 90cm Dual Fuel Upright Cooker, Matte Black INSTRUCTION MANUAL PLEASE READ THE INSTRUCTION MANUAL CAREFULLY BEFORE USING THE UNIT. www.belling.com.au www.belling.co.nz...
-
Page 3: Table Of Contents
Introduction Index - Thank you for choosing one of our qua- Warning ........... 4 - 5 lity products, capable of giving you the General precautions ......4 very best service. To make full use of its Abnormal operation ....... 5 performance features, read the parts of Warning Installation ....... -
Page 4: Warning
Warning • WARNING: Accessible parts may become GENERAL PRECAUTIONS hot during use. Young children should be - Always disconnect the power supply before kept away. any work inside the oven or where live parts may be accessed. • Children should be supervised to ensure - Never use the warming compartment for that they do not play with the appliance. -
Page 5: Abnormal Operation
Warning DO NOT MODIFY THIS APPLIANCE. inside the oven). Call in your service engi- neer. MAINTENANCE SCHEDULE -When the oven and grill are switched on for We recommend that you clean your appli- the first time there may be a typical smell ance as soon as any spillovers occur and that and smoke may come out of the oven. -
Page 6: Warning Installation
Warning Installation WARNING INSTALLATION final position, the oven must be stabilized by • The cookers must not be installed on a using the two chains located at the rear of the pedestal. oven. (see fig. 11) • Fix the cookers with the chains available Each chain must be firmly attached to the rear on the back of the appliance and secure vertical wall behind the oven. -
Page 7: Fitting The Feet
Warning Installation a temperature of 75 degrees C and they must CONNECTING TO THE GAS SUPPLY not be higher than the cooker hob. Before connecting the cooker, check that it is preset for the gas to be used. Otherwise, make FITTING THE FEET (LEVELLING) the conversion as described in the section Cookers are equipped with adjustable feet to... -
Page 8: Adapting To Different Types Of Gas
Warning Installation ADAPTING TO DIFFERENT TYPES OF GAS and back off by about 3 turns (turning the If the cooker is not already preset to operate screwdriver anti-clockwise); with the type of gas available, it must be con- - turn the tap rod anti-clockwise again until it verted. -
Page 9: Electric Ignition
Warning Installation FOR COOKERS WITH ELECTRIC IGNITION ent) are not close to the injectors, so that they The correct gaps between the electrode and cannot run across them. the burner are shown in figures,7a,7b, If no spark is generated, do not keep on trying BEFORE LEAVING as this might damage the generator. -
Page 10: Technical Data And Specifications
Technical data and specifications EQUIPMENT Nominal external Cooker Depending on the models, cooker may also dimensions 90x60 have: Height at hob cm. 88-96 - Safety device for one or more hob Depth with door closed cm. 59 burners Depth with door open cm. -
Page 11: For The User
For the user HOW TO USE THE COOKER FOR COOKERS WITH ELECTRIC IGNI- TION VENTILATION All the above applies, except that the match is no longer required; a spark is obtained All gas cooking appliances produce heat and moisture in the rooms where they are by pressing the button on the control panel once or more, or by pressing the knob of the installed. -
Page 12: Using The Electrical Grill
For the user HOW TO USE THE ELECTRIC GRILL MULTI-FUNCTION ELECTRIC OVEN - For models with “Multifunction Electric With different heating elements controlled Oven” only, controlled by two knobs using a selector switch and regulated by a separately /selector-thermostat), grilling thermostat, this oven offers various cooking is permitted with the door closed, with- methods. -
Page 13: Use Of The "Touch Timer" 3 Keys
For the user USE OF THE TOUCH TIMER 3 KEYS (fig. 13) using the + or - keys. Release the + or - key The first start up when you have matched your desired time. In a few seconds the current time appears The numbers and the A letter on the display on the display together with the (4) symbol. - Page 14 For the user immediately starts, while on the programmer OTHER PROGRAMMER FUNCTIONS display the current time is shown again in a few seconds. How to delete a cooking time - The A and (2) symbols will be on the display. Semi-Automatic or Automatic Once the set end of cooking time is finished, To delete a semi-automatic or automatic...
-
Page 15: How To Use The Oven Accessories
For the user level. Note: number 1 is referred to the highest sound level. The available levels are 3. Warning: Power cut causes the loss of any program, even the clock. That means the programmer will have to be set again. HOW TO USE OVEN ACCESSORIES - The oven shelf is designed to take normal oven dishes for cooking sweets or roasts,... -
Page 16: Figures
Figures = AUXILIARY = RAPID TC(W) = WOK CONNECTION DIAGRAM TWO-PHASE Wire gauge > 3,5 kW 3x2,5 mm 2,2 - 3,5 kW 3x1,5 mm U-LPG 0 - 2,2 kW Nat.Gas... - Page 17 Figures...
- Page 18 Figures POSITION 1 POSITION 2...
- Page 19 Figures If the cooker is INSTALLED between two cupboards you must drill a 16mm hole level to the safety chain height on either cupboard as far back as possible, locate the cooker into position and pass the safety chains through the 16mm holes, with the cooker in the final position pull both safety chains and secure them to the inside of the cupboard with two screws on each safety chain.
- Page 20 Figures Incorrect Installation Accidental Tipping Chains are provided as a preventative measure against accidental tipping. T hes e chains must be fitted as part of the installe rs complian ce.. Failure for your install er to fit ch ains in accordance with the r elevant ins tallation code will make t he i nstallation of your upright cooker non -compli ant and class as an...
- Page 21 Figures Corre ct Chain In stallation Right Side Left Side In order to prev ent th e oven fr om tippin g forward a s shown on t he pr evious page , we need to mak e sure b oth chains provided with th e oven are u sed. O n the lef t sid e of th e oven a 16 mm drill bit was us ed to drill th rough the ca binetry into the adjacent cabinet, as you can see the hole has not been drilled hard up against the wall because there is a 16mm board at the rear of the cabinet.
-
Page 22: Warranty
5 years from the date the product is purchased as a brand-new product from a retailer located in Australia / New Zealand. b) In the case of Belling Design products used for purposes other than personal, domestic or household purposes (including business or commercial use), a period of 90 days from the date the product is purchased as a brand-new product from a retailer located in Australia / New Zealand. - Page 23 b) The product requires repairs due to damage resulting from accident, misuse, incorrect installation, insect or vermin infestation, improper liquid spillage, cleaning or maintenance, unauthorised modification, use on an incorrect voltage, power surges and dips, voltage supply problems, tampering or unauthorised repairs by any persons, use of defective or incompatible accessories or exposure to abnormally corrosive conditions, events independent of human control which occurred after the goods left the control of Glen Dimplex;...
- Page 24 d) If required by us, provide us (or any person nominated by us) with access to the premises at which the product is located at times nominated by us (so that we can inspect the product). 5. Warranty claims If you make a valid claim under this warranty and none of the exclusions set out in section 2 apply, we will, at our election, either repair the product or replace the product with a product of identical specification (or where the product is superseded or no longer in stock, with a product of as close a specification as possible).
- Page 25 NOTES ______________________________________________________ ______________________________________________________ ______________________________________________________ ______________________________________________________ ______________________________________________________ ______________________________________________________ ______________________________________________________ ______________________________________________________ ______________________________________________________ ______________________________________________________ ______________________________________________________ ______________________________________________________ ______________________________________________________ ______________________________________________________ ______________________________________________________ ______________________________________________________ ______________________________________________________ ______________________________________________________ ______________________________________________________...
- Page 26 READ THE INSTRUCTION BOOKLET BEFORE INSTALLING AND USING THE APPLIANCE. The manufacturer will not be responsible for any damage to property or to persons caused by incorrect installation or improper use of the appliance. The manufacturer is not responsible for any inaccuracies, due to printing or transcription errors, contained in this manual.
Need help?
Do you have a question about the BDU958DBK and is the answer not in the manual?
Questions and answers