Table of Contents
Advertisement
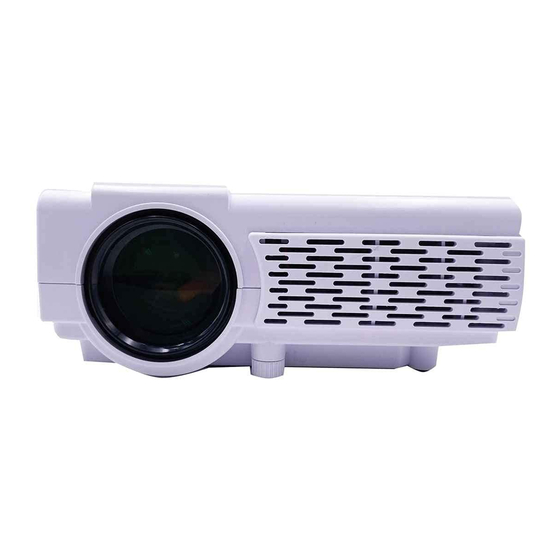
RPJ106
MODEL NO.
Home Theater Projector with Bluetooth
PLEASE READ BEFORE OPERATING THIS EQUIPMENT
This product is manufactured and sold by Curtis International Ltd.
RCA, the RCA logo, the two dogs (Nipper and Chipper) logo, are registered
trademarks or trademarks of RCA Trademark Management and are used
under license by Curtis International Ltd. Any other product, service,
company, trade or product name and logo referenced herein are neither
endorsed nor sponsored by RCA Trademark Management or its affiliates.
Ideal for dark viewing environments for optimal performance.
Please note:Projector brightness is measured in ANSI lumens.
Your viewing environment is the deciding factor on how many lumens
your projector needs.
Advertisement
Table of Contents

Related Manuals for RCA RPJ106


Summary of Contents for RCA RPJ106
- Page 1 PLEASE READ BEFORE OPERATING THIS EQUIPMENT This product is manufactured and sold by Curtis International Ltd. RCA, the RCA logo, the two dogs (Nipper and Chipper) logo, are registered trademarks or trademarks of RCA Trademark Management and are used under license by Curtis International Ltd. Any other product, service, company, trade or product name and logo referenced herein are neither endorsed nor sponsored by RCA Trademark Management or its affiliates.
- Page 2 1. Read these Ins 2. Keep these I 3. Heed all Warnings. 4. Follow all ins 5. Do not use this apparatus near water. 6. Clean only with a dry cloth. 7. Do not block any openings. Install in accordance with the manufacturer’s ins 8.
- Page 3 Warnings and P 1. Do not look directly into the projector light. 2. Don’t touch the project lens. 3. Mains adapter is used as disconnect device and it should remain readily operable during intended use. In order to disconnect the apparatus from the mains completely, the mains plug should be disconnected from the mains socket outlet completely.
-
Page 4: Fcc Warning
EXIT PLEASE READ BEFORE OPERATING THIS EQUIPMENT This product is manufactured and sold by Curtis International Ltd. RCA, the RCA logo, the two dogs (Nipper and Chipper) logo, are registered PQRS WXYZ trademarks or trademarks of RCA Trademark Management and are used under license by Curtis International Ltd. -
Page 5: Table Of Contents
Table of Contents Important Safety Instructions - - - - - - - - - - - - - - - - - - - - - - - - - - - - P1 Additional Warnings and Precautions - - - - - - - - - - - - - - - - - - - - - - P2 FCC Warning - - - - - - - - - - - - - - - - - - - - - - - - - - - - - - - - - - - - - - - - - P3 In The Box - - - - - - - - - - - - - - - - - - - - - - - - - - - - - - - - - - - - - - - - - P3 Table of Contents - - - - - - - - - - - - - - - - - - - - - - - - - - - - - - - - - - - - P4... -
Page 6: Remove & Close The Lens Cover
Remove & Close The Lens Cover Remove the lens cover before using Close the lens cover when unit not using REMOVE CLOSE LENS COVER LENS COVER Placing Your Projector Your projector can be installed in four different configurations (see picture below): Front Table Front Table: Select this location with the projector placed near... -
Page 7: Distance Between The Projector And Screen
To Reduce Image Dist • Move the projector as close to the center of the screen as possible. • The light beam from the projector should be perpendicular to the screen for a rectangular or square image. Distance Between The Projector And Screen Measure the distance between the projector and where you want to position the screen. -
Page 8: Adjust The Vertical Location
Adjust The V Follow below picture to adjust the vertical location. SCREEN SCREEN PROJECTOR VERTICAL VERTICAL DIMENSION DIMENSION PROJECTOR HDMI SCREEN VERTICAL DIMENSION PROJECTOR Adjust this knob ( ANGLE ADJ. knob) to fine- tune the display angle to higher. Adjust The Focus And Keystone Follow below picture to adjust the focus and trapezoidal screen. -
Page 9: Controls Of Remote
Controls Of Remote FLIP EXIT MENU EXIT PQRS WXYZ RECALL FAV/ Install / Re Of Remote Remove the battery compartment cover on the back of your remote by carefully sliding to open. The battery cover can then be lifted away. Fit the correct batteries (not included), referring to the polarity markings. -
Page 10: Controls Of Projector
Controls Of Projector 15 16 17 18 19 20 HDMI 1 HDMI 2 LENS 11. R ANGEL ADJ. Knob VGA IN Port 13. M IR Sensor 14. S FOCUS ADJ. Knob 15. EAR PHONE Jack TRAPEZOIDAL ADJ. Knob 16. AV IN Jack 17. -
Page 11: Install Power Adapter
Install Power Adapter Follow below picture to connect power adapter Connect small end of adapter FIRST. Plug the adapter body to power outlet. WARNING: Before connecting to the power supply, ensure that the supply corresponds to the information on the rating label at the back of the apparatus. -
Page 12: Connect Av Show The Image On Projector Screen
Connect HDMI Show The Image On Projector Screen Refer to the following picture to connect a set top box, a BD/DVD player or a streaming player to the HDMI input. 1. Turn off the unit before connect HDMI cable. 2. After connection, press the button to turn on unit and power indicator will light GREEN 3. -
Page 13: Connect Vga Show The Image On Projector Screen
Connect VGA Show The Image On Projector Screen Follow below picture to connect VGA cable and device. Turn off the unit before connect VGA cable. Press the button to turn off power of your projector before connection. After connect, press the button to turn on unit and power indicator will light GREEN Press the... -
Page 14: Connect Audio Output (Aux Out / Line Out / Earphones)
Connect Audio Output ( Aux Out / Line Out / Earphones) Follow below picture to connect audio cable and device. Press the button to turn off power of your projector before connection. Use audio cable to connect follow below figure. After connect and turn on both units. -
Page 15: Using Tf Card And Usb Playback (Media Player)
Using TF Card And USB Playback (Media Player) Install USB / TF device: Turn off the unit before install USB / TF card. Install the USB device into USB port / Install the TF device into TF slot. NOTE: Sub-Menu on Photo screen Figure 1. -
Page 16: Using Bluetooth Playback
Using Bluetooth Playback Pairing is the term used when two Bluetooth devices are connected wirelessly for the first time. This allows the devices to see each other and sets up a one to one communication channel between both devices. Bluetooth Connection 1. -
Page 17: Using Projector Menu 1.0
Using Projector Menu 1.0 Press button to enter projector menu. Picture Mode Standard This Picture menu showed on right upper of Color Temperature view screen. Aspect Ratio Auto Noise Reduction PC Setting Reduce Display 100% TO SELECT to select different picture effect to Standard / Soft / User / Vidid. -
Page 18: Using Projector Menu 2.0
Using Projector Menu 2.0 Press button to enter projector menu, press buttons to select SOUND menu. Sound Mode Standard Balance 0 This SOUND menu showed on right upper of view screen. Auto Volume Off TO SELECT to select different sound effect Standard / Music / Movie / Sports / User. -
Page 19: Using Projector Menu 3.0
Using Projector Menu 3.0 Press button to enter projector menu, press buttons to select OPTION menu. OSD Languag a i l Restore Factory Default This OPTION menu showed on right upper of Rotate 0 view screen. OSD Duration 30 S Software Update(USB) TO SELECT button to select different language. -
Page 20: Specifications
Specifications Bluetooth Version Light Source Type White light output ANSI IDMS V1.03 SECTION 15.3 33 LMS White brightness output ANSI IEC/ISO 21118 33.1LMS Display Native Resolution 800 x 480 RGB HDMI Input Supported 1080p , 1080i , 720p, 576i , 480p, and 480i Video Resolution. - Page 21 To make a warranty claim, do not return this product to the store. Please email support@curtiscs.com or call 1-800-968-9853. 90 day Warranty This product is warranted to be free from defects in material and workmanship for a period of ninety (90) days from the date of original purchase. During this period, your exclusive remedy is repair or replacement of this product or component found to be defective, at our option;...
Need help?
Do you have a question about the RPJ106 and is the answer not in the manual?
Questions and answers