Table of Contents
Advertisement
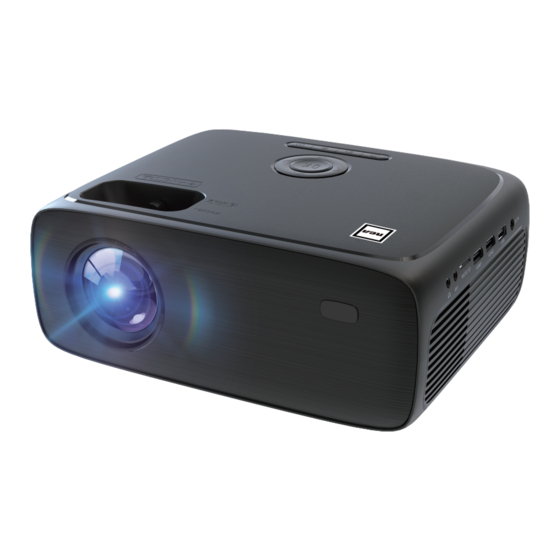
MODEL NO.
Ideal for dark viewing environments for optimal performance.
Please note:Projector brightness is measure in ANSI lumens. Your viewing
environment is the deciding factor on how many lumens your projector needs.
PLEASE READ BEFORE OPERATING THIS EQUIPMENT
This product has been manufactured and sold under the responsibility of
CURTIS INTERNATIONAL LTD.
RCA, the RCA logo and the two dogs (Nipper and Chipper) logo are trademarks
used under license by CURTIS INTERNATIONAL LTD. – further information
at www.rca-brand.com.
All other products, services, companies, trademarks, trade or product names
and logos referenced herein are the property of their respective owners.
RPJ174-COMBO
HD PROJECTOR COMBO WITH
100" FOLDABLE SCREEN
Advertisement
Table of Contents

Related Manuals for RCA RPJ174-COMBO


Summary of Contents for RCA RPJ174-COMBO
- Page 1 This product has been manufactured and sold under the responsibility of CURTIS INTERNATIONAL LTD. RCA, the RCA logo and the two dogs (Nipper and Chipper) logo are trademarks used under license by CURTIS INTERNATIONAL LTD. – further information at www.rca-brand.com.
- Page 2 Important Safety Instructions 1.Read this instructions. 2.Keep this instructions. 3.Heed all Warnings. 4.Follow all instructions. 5.Do not use this apparatus near water. 6.Clean only with a dry cloth. 7.Do not block any ventilation openings. Install in accordance with the manufacturer’s instructions. 8.Do not install near any heat sources such as radiators, heat registers, stoves, or other apparatus (including amplifier) that product heat.
-
Page 3: Additional Warnings And Precautions
Additional Warnings and Precautions 1.Do not look directly into the projector light. 2.Don’t touch the projector lens. 3.Do not use this device near water. 4.Clean only with a slightly damp cloth. 5.Do not cover or block any ventilation openings. When placing the device on a shelf, leave 5 cm (2”) free space around the whole device. -
Page 4: Fcc Warning
FCC Warning This device complies with Part 15 of the FCC rules. Operation is subject to the following two conditions: (1) this device may not cause harmful interference, and (2) this device must accept any interference received, including interference that may cause undesired operation. -
Page 5: Table Of Contents
Table of Contents Important Safety Instructions - - - - - - - - - - - - - - - - - - - - - - - - - - - -P1 Additional Warnings and Precautions - - - - - - - - - - - - - - - - - - - - - - - P2 FCC Warning - - - - - - - - - - - - - - - - - - - - - - - - - - - - - - - - - - - - - P3 What’s Included - - - - - - - - - - - - - - - - - - - - - - - - - - - - - - - - -- - - P3 Table of Contents - - - - - - - - - - - - - - - - - - - - - - - - - - - - - -- - - - - P4... -
Page 6: Remove & Close The Lens Cover
REMOVE & CLOSE THE LENS COVER Remove the lens cover before using Close the lens cover when unit not using REMOVE REPLACE LENS COVER LENS COVER Placing Your Projector picture below): Front Table: Select this location with the projector placed near the floor in front of the screen. -
Page 7: To Reduce Image Distortion
TO REDUCE IMAGE DISTORTION It is recommended to move the projector as close to center of screen. Square /Rectangle Screen Projector PLACING YOUR PROJECTOR ON CEILING When installing the projector in the ceiling, please purchase a projector mount recommended by an installation professional and follow the instructions that come with the mount. -
Page 8: Adjust The Vertical Location
ADJUST THE VERTICAL LOCATION Follow below picture to adjust the vertical location. SCREEN SCREEN PROJECTOR VERTICAL VERTICAL DIMENSION DIMENSION PROJECTOR SCREEN VERTICAL DIMENSION PROJECTOR Adjust this knob(Adjusting Knob) ADJUST THE FOCUS AND KEYSTONE It is recommended to move the projectior as close to center of screen. FOCUSING RING Then sharpen the image by rotating focus knob... -
Page 9: Projector Remote
MENU Projector Remote POWER ON Power: Press to power ON. HOME MENU Press twice to power OFF. Mute: Press to mute volume. NAVIGATOR BUTTONS VOL+ /VOL-: Press to adjust audio level. MUTE Arrows / OK : Press to navigate and confirm VOLUME- selections in Settings and other menus. -
Page 10: Controls Of Projector
Controls Of Projector 9 10 11 12 13 14 15 12. HDMI Port 1 1. POWER Button 13. HDMI Port 2 2. RETURN Button 14. USB Port 3. NAVIGATION 15. POWER INPUT 4. MENU Button 16. Adjusting Knob 5. SOURCE Button 17. -
Page 11: Distance Between The Projector And Screen
Projector Control Functions Arrows/OK Press to navigate on- screen menus and make selections. Power Back Press to Press to return power on the to a previous projector. page or setting Press twice to power in the on- screenmenus. Source Press to Menu change media Press to access... -
Page 12: Select An Input Source
Connection Instructions Select an input source You will see the picture below when the projector is turned on. HDMI1/HDMI2/HDMI3) by pressing the arrows buttons(UP/DOWN/LEFT/RIGHT) on the projector touch panel or remote control. connection instructions. Interface HDMI device connection The projector can connect to devices with HDMI input function. It is compatible with laptops, DVD players, Blu-ray players, Chromecast, TV Stick, etc. -
Page 13: Multimedia Connection
Multimedia connection Insert USB/Micro SD card (maximum up to 1 TB) into the corresponding slots (as shown in the picture). Select “ MOVIE”, “MUSIC”, “ PHOTO” to enter the content you want to play. Sub-Menu on Photo screen When photo playback, press the button and more function screen show on lower (figure 1). -
Page 14: Av Video Device Connection
AV video device connection Connect the projector AV interface with the AV cable, as is shown in the pictures. Video Cable: YELLOW Audio Left Channel: WHITE Audio Right Channel: RED Female AV Cable(not include) AV OUT Portable DVD Player/Video Player Male AV Cable(not include) Projector Audio devices connection... -
Page 15: Projector Setting Menu 1.0
PROJECTOR SETTING Options Related to “PICTURE” are set on this screen Press button to enter projector menu. Press again to previous status. buttons to select manual page. PICTURE Picture Mode Standard This manual showed on Contrast AUDIO right upper of view Brightness Color OPTION... -
Page 16: Projector Setting Menu 2.0
PROJECTOR SETTING Options Related to “AUDIO” are set on this screen. Press button to enter projector menu. Press again to previous status. buttons to select manual page. PICTURE Sound Mode Standard This manual showed on Treble AUDIO right upper of view Bass Auto Volume screen. -
Page 17: Projector Setting Menu 3.0
PROJECTOR SETTING Options Related to “OPTION” are set on this screen. Press button to enter projector menu. Press again to previous status. buttons to select manual page. This manual showed on PICTURE OSD Language English Aspect Ratio 16:9 right upper of view AUDIO Projection mode Front... -
Page 18: Projector Setting Menu 4.0
PROJECTOR SETTING Options Related to “TIME” are set on this screen. Press button to enter projector menu. Press again to previous status. buttons to select manual page. PICTURE Clock This manual showed on Off Time SOUND On Time right upper of view Sleep Timer OPTION screen. -
Page 19: Specifications
Specifications Light Source Type Brightness Output White light output ANSI: 190 lm Display Native Resolution 1280 720 HDMI Input Supported 1080p , 1080i , 720p, 576i , 480p,480i Video Resolution. Power Consumption Operating 72W; Standby 0.8W Power Input DC 30V , 2.4A Connect Included Adapter Included Adapter Input AC100-240V,50/60Hz... -
Page 20: Troubleshooting
3. Second, remove backing paper 4. Then stick the hooks on every on the hook. position marded on the wall and screw it up. 5. Finally, put the screen flat by hanging the grommets on the relevant hooks. TROUBLE SHOOTING Before resorting the maintenance service, please kindly check by yourself with the following chart. - Page 21 Is the warning light indicator red? If so, the projector is overheating which turns the light o automatically. 1.Leave the projector to cool for a few moments. The Lamp (Bulb) switches 2.Once cooled, check nothing is blocking the o after a period of time ventilation vents.
- Page 22 To make a warranty claim, please email support@curtiscs.com or call 1-800-968-9853. 90 day Warranty This product is warranted to be free from defects in material and workmanship for a period of ninety (90) days from the date of original purchase. During this period, your exclusive remedy is repair or replacement of this product or component found to be defective, at our option;...
Need help?
Do you have a question about the RPJ174-COMBO and is the answer not in the manual?
Questions and answers
I plug in the HDM cable but The image on my computer screen does'nt appears on the projector screen
The image from your RCA RPJ174-COMBO projector may not appear when you plug in the HDMI cable due to the following reasons:
1. Wrong Input Selected – Ensure the correct input source is selected on the projector. Check which HDMI port the streaming stick or device is connected to and use the projector remote to select the corresponding input.
2. Improper HDMI Connection – Verify that the HDMI cable or streaming stick is firmly plugged into the correct HDMI port (e.g., HDMI 3) on the projector.
3. Streaming Stick in Standby Mode – If using a streaming stick, press a button on its remote to wake it from standby or screensaver mode.
4. Power Issues – If the streaming stick requires power, connect it to the USB 2 port on the projector using the included USB cable.
5. Cabling Issues – Disconnect and reconnect all cables, including the power cable, to ensure proper connectivity.
Following these steps should help restore the image on your projector.
This answer is automatically generated
Stuck on burn in screen mode