Table of Contents
Advertisement
Advertisement
Table of Contents

Related Manuals for RCA RPJ112


Summary of Contents for RCA RPJ112
- Page 1 MODEL NO. RPJ112 MULTIMEDIA PROJECTOR...
- Page 2 Important Safety Instruc ons Important Safety Instruc ons 1. Read these Instruc ons. 2. Keep these Instruc ons. 3. Heed all Warnings. 4. Follow all instruc ons. 5. Do not use this apparatus near water. 6. Clean only with a dry cloth. 7.
- Page 3 Addi onal Warnings and Precau ons 1. Do not look directly into the projector light. 2. Don’t touch the project lens 3. Mains adapter is used as disconnect device and it should remain readily operable during intended use. In order to disconnect the apparatus from the mains completely, the mains plug should be disconnected from the mains socket outlet completely.
-
Page 4: Fcc Warning
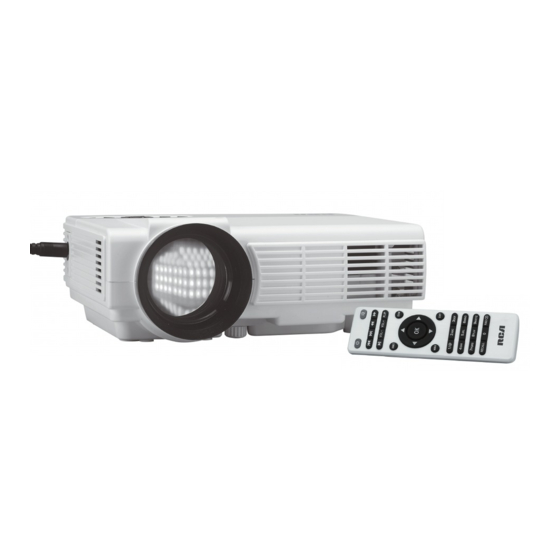
FCC Warning Warning: Changes or modified to this unit not expressly approved by the party responsible for compliance could void the user’s authority to operate the equipment. NOTE: This equipment has been tested and found to comply with the limits for a Class B digital device, pursuant to Part 15 of the FCC Rules. - Page 5 Using SD Card and USB Playback Using Projector Menu 1.0 Using Projector Menu 2.0 Using Projector Menu 3.0 Using Projector Menu 4.0 Specifications In The Box Main unit MODEL NO. RPJ112 MULTIMEDIA PROJECTOR Remote AC Power Adapter Lens Hood User Manual...
- Page 6 Remove & Close The Lens Cover If the projector is not used for an extended period of time, please cover the lens with the included lens cap. CLOSE REMOVE LENS COVER LENS COVER Install The Lens Hood INSTALL REMOVE LENS HOOD LENS COVER Close the lens cover when unit not in use.
- Page 7 Placing Your Projector You projector can be installed in four different configurations (see pictures below). NOTE: If the projector is installed in rear configurations, please use a screen suitable for rear projection. FRONT PROJECTION FRONT PROJECTION REAR PROJECTION REAR PROJECTION Square /Rectangle To reduce image distortion, it is A projector mount is required to install...
- Page 8 Installing your projector in the ceiling When installing the projector in the ceiling, please purchase a projector mount recommended by an installation professional and follow the instructions that come with the mount. Before installing the projector in the ceiling, please check to make sure the ceiling structure can support the weight of the projector and the mount.
- Page 9 Adjust The Ver cal Loca on Follow below picture to adjust the vertical location. To reduce image distortion, it is recommended that the center of the projector lens be as close to the center of the screen as possible. SCREEN SCREEN PROJECTOR VERTICAL...
- Page 10 Controls of Remote ZOOM FLIP SEARCH NETVIGATOR EXIT MUTE POWER MENU SKIP SOURCE BATTERY COMPARTMENT PLAY /PAUSE (VIEW SIDE OF REMOTE) VOLUME Install / Remove Ba ery Of Remote AAA / UM4 AAA / UM4 BATTERY DOOR Remove the ba ery compartment cover on the back of your remote by carefully sliding to open.
- Page 11 Controls Of Projector 12 13 1. NETVIGATOR Bu ons 10. IR Window 2. LENS 11. ANGEL ADJ. Knob 3. FOCUS ADJ. Knob 12. EAR PHONE Jack 4. TRAPEZOIDAL ADJ. Knob 13. AV OUT Jack 5. POWER Indicator 14. TF Card Slot ( Micro SD Card ) 6.
- Page 12 Install Power Adapter Follow below picture to connect power adapter Connect small end of adapter FIRST. Main Opera on - Press the bu on to turn on unit, press again to turn off. / SOURCE - Press the bu on to select input source. / MENU - Press the bu on to enter projector menu.
- Page 13 Connec ng a video player by HDMI cable Follow below picture to connect a video player to the projector. 1. Press the bu on to turn off power of your projector before connec on. 2. A er connect, press the bu on to turn on unit and power indicator will light GREEN 3.
- Page 14 Connec ng to a computer by VGA cable Follow below picture to connect a computer to the projector. 1. Press the bu on to turn off power of your projector before connec on. 2. A er connect, press the bu on to turn on unit and power indicator will light GREEN 3.
- Page 15 Connec ng a video player by AV cable Follow below picture to connect a video player to the projector. 1. Press the bu on to turn off power of your projector before connec on. 2. Use AV cable to connect follow below figure 3.
- Page 16 Connec ng audio output to an external amplifier Follow below picture to connect the audio out from the projector to an amplifier. 1. Press the bu on to turn off power of your projector before connec on. 2. Connect the audio cable by referring to the figure below. 3.
- Page 17 Connec ng an USB drive and Micro SD (TF) card Follow below picture to connect an USB drive or a Micro SD (TF) card. Press the bu on to turn off power of your projector before connec on. Micro SD card Playback from an USB drive or a Micro SD (TF) card 1.
- Page 18 Using Projector Menu 1.0 Press button to enter projector menu. Press again to previous status. OSD Language Restore Factory Default bu ons to select manual page. Rotate1 This manual showed on right upper of view screen. OsdDuration off Software Update (USB) TO SELECT OSD Language to select different language.
- Page 19 Using Projector Menu 2.0 Picture Mode Color Temperture Aspect Ratio bu ons to select manual page. Noise Reduction This manual showed on right upper of view screen. PC Setting TO SELECT to select different picture effect to So / Medium / Vidid / User. Use to select Red / Picture Mode PRESS OK...
- Page 20 Using Projector Menu 3.0 Press button to enter projector menu. Press again to previous status. Soumd Mode Medium Balance 0 bu ons to select manual page. Auto Volume Off This manual showed on right upper of viewing screen. Surround Sound Off TO SELECT Soumd Mode Medium to select different sound effect Medium / Movie /...
- Page 21 Using Projector Menu 4.0 Press bu on to enter projector menu. Press again to previous status. Clock - - - - Off Timer Off On Time Off bu ons to select manual page. Sleep Timer Off This manual showed on right upper of viewing screen. Auto Time Off TO SELECT to select clock to Day / Month / Year /...
-
Page 22: Specifications
Specifications Light source type Display na ve resolu on 800 x 480 HDMI input supported video 1080p, 1080i, 720p, 576i, 480p and 480i resolu on Power consump on Opera ng 36W; Standby 0.8W Power Input DC 12V , 3A Connect included adapter Included Adapter Input AC100-240V,50/60Hz Connect DC input of unit... - Page 23 LIMITED PRODUCT WARRANTY This quality product is warranted to be free from manufacturer’s defects in material and workman-ship, provided that the unit is used under the normal operating conditions intended by the manufacturer. Should you have any problem with this product, please and it is highly recommended to visit our website at www.curtisint.com before you take any other steps as we have additional copies of instruction manuals, operating manuals and trouble shooting tips on our website which gives you the answer on most of the...
Need help?
Do you have a question about the RPJ112 and is the answer not in the manual?
Questions and answers