Table of Contents
Advertisement
Quick Links
Advertisement
Table of Contents

Related Manuals for Fimer PVS-12.5-TL


Summary of Contents for Fimer PVS-12.5-TL
- Page 1 Solar Inverter PVS-10/12.5/15-TL Product Manual...
- Page 2 Fimer and its affiliates are not liable for damages and/or losses related to such security breaches, any unauthorized access, interference, intrusion, leakage and/or theft of data or information.
-
Page 3: Table Of Contents
Table of Content 1. Safety and accident prevention 1.1 Safety information and instructions 1.2 Symbols and signs 1.3 Installation and maintenance safety 1.3.1 General safety information 1.3.2 Environmental conditions and risks 1.3.3 Electrical and thermal safety 1.4 Residual risks 2. Introduction and general information 2.1 Warranty and supply conditions 2.1.1 Not included in the supply conditions 2.2 Scope and target audience... - Page 4 3.6 Efficiency curves 3.7 Power derating 3.7.1 Power derating due to environmental conditions 3.7.2 Power derating due to the input voltage 3.7.3 Power derating due to altitude 3.7.4 P-Q Capability 3.8 Characteristics of a photovoltaic generator 3.9 Description of the equipment 3.9.1 Operating diagram (example) 3.9.2 Mutual connection of multiple inverters 3.9.3 Notes on the system sizing...
- Page 5 6.1 General conditions 6.2 Description of synoptic 6.3 Description of display 6.3.1 Parameters displayed 6.4 Smart button 6.5 User interface 6.5.1 FIMER Installer for Solar Inverters 6.5.2 Integrated Web User Interface 6.5.3 Aurora Vision ® 6.6 Measurement tolerance 7. Operation 7.1 General conditions...
- Page 6 7.4.5 Web User Interface main menus 7.4.6 Web User Interface structure 7.4.7 Web User Interface function detail 8. Maintenance 8.1 General conditions 8.2 Inverter total de-energization 8.2.1 Operator and maintenance personnel skills/prerequisites 8.2.2 Clothing and protection of personnel 8.2.3 Safety equipment and tools 8.2.4 Inverter total de-energization procedure 8.3 Routine maintenance 8.4 Troubleshooting...
-
Page 7: Safety And Accident Prevention
The operators must read and comply with the technical information and instruction provided in the manual and in any additional attached documentation. NOTE – FIMER accepts no liability for failure to comply with the instructions for a correct installation and cannot be held responsible for any other upstream or downstream equipments. READ THE MANUAL –... -
Page 8: Installation And Maintenance Safety
Do not perform insulation or voltage withstand tests on the inverter with exception for those indicated in this document. WARNING – FIMER inverters must be earthed via the connection points marked with the protective earth symbol and using a cable with an appropriate conductor cross-section for the maximum ground fault current that the generating system might experience. -
Page 9: Residual Risks
1.4 Residual risks ATTENTION – Despite the warnings and safety systems, there are still some residual risks that cannot be eliminated. These risks are listed in the following table with some suggestions to prevent them: Risk analysis and description Suggested remedy Noise pollution due to installation in unsuitable environments or where individuals routinely work and/or animals dwell most of the Reassess the environment or the place of installation. -
Page 10: Introduction And General Information
• use or installation by unqualified persons. FIMER is not responsible for disposal of the equipment, or part of it, which does not take place on the basis of the regulations and laws in force in the country of installation. -
Page 11: Application Area, General Conditions
2.3 Application area, general conditions FIMER shall not be liable for any damages whatsoever that may result from incorrect or careless operations. FORBIDDEN – Please, do not use this equipment for any application not mentioned in the field of use. -
Page 12: Characteristics
WW = Week of manufacture -XX to +XX °C -XX to +XX °F SSSSSS = Progressive number XX minutes - Inverter access point SSID: FIMER-YYWWSSSSSS - “Host Name”: http://FIMER-YYWWSSSSSS.local - It is required to register the inverter in Aurora Vision. PN: PPPPPPPPPPP WO:XXXXXXXXXXXX... -
Page 13: Communication Identification Label
PK: 0000-0000-0000-0000 FIMER Installer for Solar Inverters. QR Code: To be used to commission inverter using FIMER Installer for Solar Inverters for claiming process. 3.3 Models and range of equipment NOTE –... -
Page 14: Component Reference Numbers
3.4 Component reference numbers Inverter external view Inverter Heatsink Synoptic Protective earth (PE) external connection point Mounting bracket DC disconnect switch Signals connection box AC quick fit connector USB connector for accessories board Ethernet 1/2 connectors Digital input and RS485 connector Quick fit input connectors Wi-Fi antenna connector Smart button... -
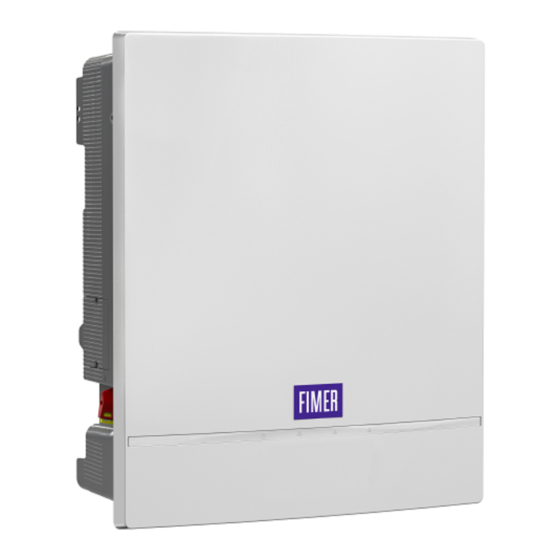
Page 15: Inverter External View
3.4.1 Inverter external view... -
Page 17: Technical Data
3.5 Technical data 3.5.1 Technical data table PVS-10-TL PVS-12.5-TL PVS-15-TL Input side Absolute maximum DC input voltage (Vmax,abs) 1100 V Start-up DC input voltage (Vstart) 250...500V (default 360V) Operating DC input voltage range (Vdcmin...Vdcmax) 200…1000 V Rated DC input voltage (Vdcr) - Page 18 4. Hereby, FIMER S.p.A. declares that the radio equipments (radio module combined with the inverter), to which this user manual refers, are in compliance with the Directive 2014/53/EU. The full text of the EU Declaration of Conformity is available at the following internet address: www.fimer.com...
-
Page 19: Tightening Torques
3.5.2 Tightening torques Component Signals cable gland (20) - M20 cable gland 7 Nm Ethernet 1/2 cable gland (21) - M25 cable gland 7.5 Nm AC cable gland (23) 7...7.5 Nm Signals connection box screws 3 Nm Side bracket screws (18) - M5 screws 3,5 Nm Protective earth (PE) external connection point (04) - M6 screw 4 Nm... -
Page 20: Overall Dimensions Of The Inverter
3.5.5 Overall dimensions of the inverter The overall dimensions, including the mounting bracket (05), are expressed in millimeters / inches. 473.6 / 18.64 207 / 8.15 3.5.6 Overall dimensions of the mounting bracket The dimensions of the wall mounting bracket (05) are expressed in millimeters and inches. 421 / 16.6 358 / 14.1 421 / 16.6... -
Page 21: Efficiency Curves
The efficiency curves are linked to technical parameters that are continually being developed and improved and should therefore be considered approximate. PVS-10-TL Rated Output Power (%) 480 Vdc 620 Vdc 800 Vdc PVS-12.5-TL Rated Output Power (%) 480 Vdc 620 Vdc 800 Vdc PVS-15-TL Rated Output Power (%) -
Page 22: Power Derating
The inverter can therefore reduce the power during certain periods of the day according to the value of these parameters. The graph shown below the power reduction in relation to the ambient temperature at the nominal input voltage. PVS-10-TL; PVS-12.5-TL; PVS-15-TL 73.3 57.0... -
Page 23: Power Derating Due To Altitude
3.7.3 Power derating due to altitude The power reduction due to altitude can occour with temperature above 45°C. PVS-10-TL; PVS-12.5-TL; PVS-15-TL 1000 1500 2000 2500 3000 3500 4000 6561 7217 7874 8530 9186 9842 10498 11154 11811 Altitude (m / ft) 3.7.4 P-Q Capability... -
Page 24: Characteristics Of A Photovoltaic Generator
3.8 Characteristics of a photovoltaic generator A PV generator consists of an assembly of photovoltaic modules that transform solar radiation into DC electrical energy and can be made up of: • Strings: number (X) of PV modules connected in series •... -
Page 25: Description Of The Equipment
“AC” alternate current. This conversion, known as inversion from DC to AC, is done in an efficient way by the FIMER inverters, without using any rotary elements, rather only via static electronic systems. -
Page 26: Functionality And Components Description
® Integrated logging capability allows remote monitoring of the plant without the needs of any additional external loggers. Aurora Vision is a cloud based platform enabling remote monitoring and asset management of FIMER devices in range of solar power application. -
Page 27: Drm0 Functionality (As/Nzs 4777.2 Standard)
One of these requirements is demand response mode for zero export (DRM 0), which reduces export to grid to zero upon command from the utility. This is done by connecting an external Demand Response Enabling Device (FIMER DRM0 Interface) to the inverter digital input. 3.10.6 Reactive power production This inverter is able to produce reactive power and can feed this power into the grid via the power factor setting. -
Page 28: Topographic Diagram Of The Equipment
3.12 Topographic diagram of the equipment The diagram summarises the internal structure of the inverter. PVS-10/12.5/15-TL... -
Page 29: Safety Devices
3.13 Safety devices 3.13.1 Anti-Islanding In the event of a local grid outage by the electricity company, or when the equipment is switched off for maintenance operations, the inverter must be physically disconnected to ensure the protection of the people working on the grid, in accordance with the relevant national laws and regulations. -
Page 30: Lifting And Transport
When you open an equipment package, check that the equipment is undamaged and make sure all the components are present. NOTE – If any defects or damage are found, stop unpacking and consult the carrier, and also promptly inform FIMER customer support. -
Page 31: Lifting
Risk of injury due to the heavy weight of the equipment! FIMER usually stores and protects individual components by suitable means to make their transport and subsequent handling easier. Nonetheless, as a rule, it is necessary to turn to the experience of specialised staff to take charge of loading and unloading components. -
Page 32: List Of Supplied Components
4.4 List of supplied components The table below shown the available component in the inverter package (common for all models): Component Quantity Vertical mounting bracket (05) AC quick fit connector (09) + locking clip 1 + 1 Two-hole gasket (6mm Ø) for M20 Digital input and RS485 cable gland (20) and 1 + 1 Three-hole gasket (6mm Ø) for M25 Ethernet 1/2 cable gland (21) and caps 1 + 2... -
Page 33: Installation
5. Installation 5.1 Installation safety instruction WARNING – The inverter front cover can be removed from authorized service personnel only (the users are not authorized to remove inverter front cover). WARNING – When the photovoltaic panels are exposed to sunlight they provide continuous DC voltage to the inverter. Before installation may begin, photovoltaic panels must be shaded or isolated. -
Page 34: Distances
• Provide a sufficient working space in front of the inverter that operation. If the inverter is installed in a place where there allows to removing the front cover (FIMER service only) and to are concrete risk of flooding or grass cutting evenience, the allow wiring connections. -
Page 35: Wi-Fi Signal Environmental Checks
5.2.6 Wi-Fi signal environmental checks 5.2.8 Installations with a high level of humidity The inverter can be commissioned and monitored using the Wi-Fi ATTENTION – Never open the inverter in the case of rain, communication channel. The WLAN board of the inverter uses snow or a level of humidity >95%. -
Page 36: Mounting Instructions
ATTENTION – Staff authorized to carry out the installation must be specialized and experienced in PV plant installation and specifically PV inverters installation. FIMER can provide training on the product to provide suitable knowledge for the installation. ATTENTION – The installation must be performed by qualified installers and/or licensed electricians in accordance with the existing regulations in the country of installation. - Page 37 • Lift the inverter up to the bracket (05) (using the handles • A padlock can be installed to lock the inverter to the bracket so (25) or M8 eyebolts) and insert the two sides anchor points that it cannot be disassembled by outsiders. (placed on sides of the wall bracket) into the two slots on the inverter.
-
Page 38: Grid Output Connection (Ac Side)
NOTE – For protection of the AC line, on the basis of the information above with regard to the differential protection integrated in FIMER inverters, it is not necessary to install a type B ground fault switch. NOTE – In accordance with article 712.413.1.1.1.2 of... -
Page 39: Characteristics And Sizing Of The Protective Grounding Cable
5.4.5 Connection of the PE cable on the protective grounding cable Protective earth external connection point FIMER inverters must be earthed via the connection points marked with the protective earth symbol and using a cable with an appropriate conductor cross-section for the maximum ground The inverter must be connecter to PE on the Protective earth (PE) fault current that the generating system might experience. -
Page 40: Connection Of Ac Output Cable On Ac Quick Fit Connector
5.4.6 Connection of AC output cable on AC • Strip the AC cable and wires quick fit connector ATTENTION – The installation must be performed by 12...16 mm 0.47...0.63 ” qualified installers and/or licensed electricians in accordance with the existing regulations in the country of installation and in accordance of all safety rules for performing electrical works. -
Page 41: Connection Of Ac Quick Fit Connector To The Inverter
5.4.7 Connection of AC quick fit connector to • Install the wires (based on the AC connection type) respecting the connections as indicated on the screw terminal block (L1=R the inverter ; L2=S ; L3=T). • Pull out the protective cap from the AC output connector (17). ATTENTION –... -
Page 42: Input Connection (Dc)
Checking of leakage to ground of the photovoltaic generator: PVS-10-TL 17A / 7.8kW 17A / 7.8kW Measure the voltage present between positive and negative pole PVS-12.5-TL 18A / 8.3kW 18A / 8.3kW of each string with respect to ground. PVS-15-TL... - Page 43 A configuration program that can help to correctly size the photovoltaic system is available on the FIMER website (http://stringsizer. fimer.com).
-
Page 44: Connection Of The Communication And Digital Signals
5.6 Connection of the communication and digital signals The communication and control signals cables must be connected to the dedicated connectors placed on the bottom side of the inverter: - Digital input and RS485 connector (12). - Ethernet 1/2 connectors (11). - USB connector for accessories board (10). -
Page 45: Ethernet Connection
5.6.1 Ethernet connection type of cable is used: • 100m using rigid cables. The Ethernet connection allows a direct data transfer to the FIMER • 50m using patch cables. server for monitoring purpose. When the inverter will be powered 2. In daisy chain configurations, single point of failure is avoided on, network parameters are automatically set and the inverter thanks to the passive LAN relays built into each inverter. - Page 46 Internet connection is required to use all the Aurora Vision remote functionalities. NOTE – Please refer to Aurora Vision documents available on FIMER website for further information how to get an Aurora Vision account for remotely monitoring and managing the installed solar assets. 5.6.1.3 Ethernet cable/s connection procedure: •...
-
Page 47: Digital Input And Rs-485 Connection
5.6.2 Digital input and RS-485 connection • Install the two-holes gasket on the cable/s and reinstall it inside the cable gland. Install 6mm plastic plug (supplied) in any unused The Digital input and RS-485 connector (12) can be used for the hole of the gasket. - Page 48 • Install the signals connection box (08) by screwing the 4 locking 5.6.2.1 RS-485 line screws present on it (see paragraph “3.5.2 Tightening torques”). The RS-485 line can be used in one of the following adjustable modalities: • Digital input and RS485 cable gland (20) ring (see paragraph “3.5.2 Tightening torques”).
- Page 49 In this case data from accessories will be logged and transferred to connect to the grid, switching on the inverter also depends on the FIMER Aurora Vision cloud by inverter itself (master mode). state of the two terminals present on the Digital input and RS-485 connector (12).
-
Page 50: Accessory Board Connection
The enabling or setting functionality of the accessory board connected must be done via Web User Interface. NOTE – AS4777: If DRM0 support is specified, the inverter may only be used in conjunction with a the FIMER DRM0- INTERFACE. NOTE – Visit www.fimer.com for more information on the DRM0 interface. -
Page 51: Instruments
The first rule to prevent damage to the equipment and to the operator is to have a thorough knowledge of the instruments. We, therefore, advise that you carefully read this manual. If you are not sure about any information in this manual, please ask FIMER Service for more detailed information. -
Page 52: Description Of Display
6.3 Description of display 6.4 Smart button The display (26) is located on the front cover of the inverter and it The smart push button is paced on the bottom side of the inverter. allows to view the main parameters of the inverter. The button switches the visualization to the next screen parameters. -
Page 53: User Interface
Aurora Vision is a cloud based platform enabling remote monitoring and asset management of FIMER devices in range of solar power application. Aurora Vision consist of two different products, designed to meet... -
Page 54: Operation
Commissioning can be carried out in two different ways: • Via FIMER “Installer for Solar Inverters” APP “Installer for Solar Inverters” is the new advanced FIMER mobile APP that allows to simplify commissioning, setting parameters and to make troubleshooting of FIMER string multi-inverters in large scale solar plants. -
Page 55: Preliminary Commissioning Operation Using "Installer For Solar Inverters" Mobile App
• Scan the QR code on the “Communication identification label” Point created by the inverter system. and connect to inverter network. The SSID is FIMER-YYWWSSSSSS (Z=10 digit Inverter SN) WLAN MAC: XX:XX:XX:XX:XX:XX • When required enter the PRODUCT KEY (printed on the “Communication Identification label”) as password. -
Page 56: Commissioning Wizard
1. Wi-Fi Access Point. Connection between inverter and a mobile device (like Smartphone, Tablet, Notebook). 2. Wi-Fi Station. Connection between inverter and switch/router. Direct Access SSID: FIMER-WWYYSSSSSS (WWYYSSSSSS= Inverter SN) Aurora Vision® • Fill the field SSID, Password and IP Settings and click on “connect to (SSID)”... - Page 57 7.2.3.2 STEP 2 - Date, Time and Time zone. • Click on “Next” button to complete the configuration wizard. ATTENTION – At the end of the configuration wizard the • Set the Date, Time and Time zone inverter will reboot to be configured. The inverter will automatically fill these fields when available;...
-
Page 58: Leds Behaviour
Indicates that the inverter has detected an anomaly. The type of problem could be checked in the Web UI and FIMER Installer for Solar Inverters APP. The “GFI” (ground fault) indicates that the inverter has detected a ground fault in the DC side photovoltaic generator. - Page 59 Pre-commissioning phase (first start-up of inverter) The commissioning of the inverter must be completed through the Installation wizard steps (Web User Interface) or using the FIMER Installer for Solar Inverters mobile APP Initial configuration failure The inverter is in locked state due to a failure in the initial configuration of the equipment, such as the standard...
-
Page 60: Inverter Web User Interface
NOTE – In case of need, product key can be recovered by Aurora Vision Cloud or by calling FIMER technical support. • Open an internet browser (reccomended browser: Chrome versions from v.55, Firefox versions from v.50) and enter the pre- set IP address 192.168.117.1 to access the login page. -
Page 61: Web User Interface Home Page
7.4.4 Web User Interface Home page A. Menus sidebar B. Logout button C. Switch theme button (dark/light) D. Summary information E. Info section (Identification data of the inverter) F. Language selector 7.4.5 Web User Interface main menus HOME: Visualization of information related of inverter status, production and inverter parameters. SETTINGS: Section dedicated to inverter parameters configurations. -
Page 62: Web User Interface Structure
7.4.6 Web User Interface structure The structure of the menus changes according to the type of access. The table shows the structure of the Web UI and the permissions (U = User, A = Admin, AP = Admin Plus). Reading Writing Menu Menu... - Page 63 Reading Writing Menu Menu Menu Main menu Parameter Level 1 Level 2 Level 3 Channel X Vstart • • • • UV ac power supply timeout • • • • Inverter Settings parameters settings Multiple scan en/dis • • • •...
-
Page 64: Web User Interface Function Detail
YY = Year of manufacture used for registration. WW = Week of manufacture SSSSSS = Progressive number Stage 2 - Registration on https://registration.solar.fimer.com • Open registration site https://registration.solar.fimer.com • Set the desired language • Go to Sign Up or Log In and insert the personal data requested. - Page 65 While one of the tests is being performed, the set NOTE – The latest firmware version is available from the limits will be gradually increased/reduced (depending on download area of the website www.fimer.com or from https:// the type of test) until the threshold at which the inverter is registration.solar.fimer.com disconnected from the grid is reached.
- Page 66 7.4.7.4 PID recovery PID recovery functionality is provided only for dedicated inverter models (;APD suffix). Scope: Polarization of the negative PV array terminal to an adjustable and regulated positive potential with respect to ground when the inverter is off-line (not connected to the AC grid, ensuring that maximum system voltage is not exceeded on any part of the PV array. P&Q=0 = V- = V MAX=30mA...
-
Page 67: Maintenance
8. Maintenance 8.1 General conditions Routine and periodic maintenance operations must only be only carried out by specialized staff with knowledge of how to perform these tasks. WARNING – Some inverter parts may be subject to hazardous voltages for the operator. Before performing any work on the inverter, refer to “Inverter total de-energization”... -
Page 68: Inverter Total De-Energization Procedure
8.2.4 Inverter total de-energization procedure 8.2.4.1 PRELIMINARY CHECKS Weather conditions: It is of paramount importance to evaluate the weather conditions in the risk assessment prior any intervention on the equipment. This procedure can be applied only in case of dry environment. Don’t proceed in case of rain (even light) or high humidity. - Page 69 8.2.4.4 Operations on External AC switches The diagram below represents a possible arrangement of the PV plant. Depending on the design choices made by the developer of the plant some of the devices could not be present. Identify the external AC switch(es) in the plant with the support of the plant manager. INVERTER UNIT (Unit under service) LV/MV...
- Page 70 8.2.4.6 Operations on Internal DC disconnect switches (15) • Open the internal DC switches (07). INVERTER UNIT (Unit under service) Internal DC LV/MV MV Switch LV Distriubution Switches Transformer Internal AC Panel OPEN Switch LOTO External DC External LV External Main LV PV Arrays AC Switch Switch...
- Page 71 8.2.4.9 Check list to be filled prior the access to the inverter The purpose of checklist is to verify that all the operations mentioned in the procedure have been carried out. The checklist below must be attached to the intervention report. Check STATUS (√...
-
Page 72: Routine Maintenance
For a complete maintenance procedure ask for “Preventive Maintenance -Life Cycle” to FIMER costumer service. In this case maintenance operations shall be performed only by FIMER personnel (or qualified personnel under a servicing contract). The maintenance schedule may vary depending on the environmental conditions of the installation. -
Page 73: Troubleshooting
8.4 Troubleshooting ATTENTION – Operations on the inverter to identify and address any faults may only be performed by the installer or by qualified personnel. 8.4.1 Inverter troubleshooting The events that could occur are classified by severity as follows: • Alarm Alarm or “supervised alarm”... - Page 74 Problem Possible causes Solution The Wi-Fi board does not The Wi-Fi board of the inverter Request a service intervention to check that the inverter communicate correctly with could be damaged. Wi-Fi board is working correctly. the inverter inside of which it is installed (inconsistency in the detected data read by the board), or when working in “Access Point...
-
Page 75: Verification Of Ground Leakage
8.5 Verification of ground leakage 8.5.2 Behaviour of a system with leakage In the presence of anomalies or report of ground fault (where provided), there may be a ground leakage from the PV generator If the voltage measured between one of the two poles and ground does not tend to 0V and stabilizes on a value, there is a ground (DC side). -
Page 76: Measuring The Isolation Resistance Of The Pv Generator
8.6 Measuring the isolation resistance of the PV generator WARNING – The operator must always use the personal protective equipment (PPE) required by the laws of the country of destination and whatever is provided by their employer. To measure the isolation resistance of the PV generator compared to ground , the two poles of the PV generator must be short- circuited (using a suitable sized switch). -
Page 77: Storage And Dismantling
8.7.2 Dismantling, decommissioning and disposal FIMER is not responsible for disposal of the equipment, or part of it, which does not take place on the basis of the regulations and laws in force in the country of installation. -
Page 78: Attachments
9.1.2 Network Hosts The inverter will connect to the following hosts. Some servers owned by FIMER, and others are customer or ISP servers. Servers listed as owned by “Customer IT/ISP” must be configured in the inverter using either DHCP or as static network information. - Page 80 With regard to purchase orders, the therein. Any reproduction, disclosure to third representative or visit: agreed particulars shall prevail. FIMER does parties or utilization of its contents – in whole not accept any responsibility whatsoever for or in parts – is forbidden without prior written fimer.com...
Need help?
Do you have a question about the PVS-12.5-TL and is the answer not in the manual?
Questions and answers