Landis+Gyr ULTRAHEAT T450 Service Manual
Static heat and cooling meter
Hide thumbs
Also See for ULTRAHEAT T450:
- Operating instructions (4 pages) ,
- Installation instructions manual (9 pages) ,
- Technical description (36 pages)

Related Manuals for Landis+Gyr ULTRAHEAT T450


Summary of Contents for Landis+Gyr ULTRAHEAT T450
- Page 1 Static Heat and Cooling Meter T450 Residential; local and district heating ® ULTRAHEAT T450 ® ULTRACOLD T450 Service manual 32 21 101 004 a Date: 22.04.2020 © Landis+Gyr GmbH...
-
Page 2: Table Of Contents
7.4.4 Start/stop transmission mode using parameterization mode ..........21 7.4.5 Testing of the module......................21 Pulse inputs ..........................21 Connection of pulse inputs ...................... 21 Activation of pulse inputs ......................22 Replacement of detachable temperature sensors ..............22 © Landis+Gyr... - Page 3 Contents 3/25 10 Firmware update ......................... 23 10.1 System requirements ......................23 10.2 Perform firmware update ......................23 10.3 Checking the actualized firmware version ................24 11 Service software UltraAssist ..................... 24 © Landis+Gyr...
-
Page 4: General Notes
Otherwise, the warranty and calibration validity of the meter will be invalidated. Other available documentation • Operating instructions T450 • Installation instructions T450 • Technical description T450 • Respective module manual • List of accessories Additional information is available on request. © Landis+Gyr... -
Page 5: Safety Information
The meter contains lithium batteries. Do not dispose of the meter and batteries as household waste. Observe local regulations and laws regarding disposal. After lithium batteries have been used, you can return them to the manufacturer for proper disposal. When shipping batteries please © Landis+Gyr... - Page 6 Do not open the batteries. Do not bring batteries into contact with water or expose to temperatures exceeding 80 °C. The meter has no lightning protection. Ensure lightning protection via the house installation. © Landis+Gyr...
-
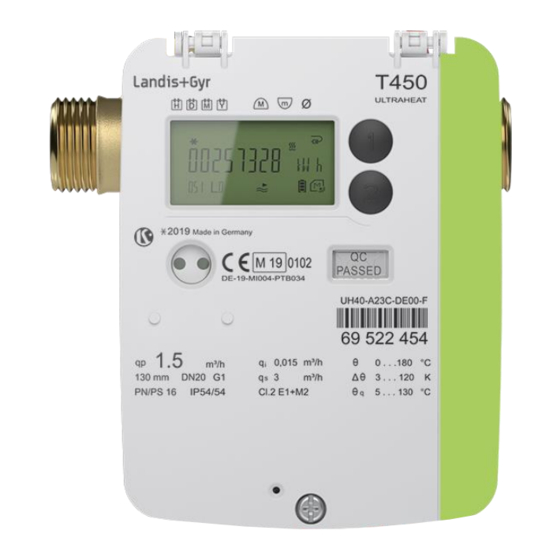
Page 7: Operating Elements
Press the service button for 3 seconds until the LCD displays • Press button 2 to adjust the parametrization. Setting of parameters To select a parameter, proceed as follows: • Press button 1 to advance the display. • Press button 2 to activate the parameter to be changed. © Landis+Gyr... -
Page 8: Adjustable Parameters
000-250 Test communication function Switch radio module on / off Switch unit of heat quantity Only displayed when activated in the factory. Change the installation location Only displayed when of the volume measuring part activated in the factory. © Landis+Gyr... -
Page 9: Delete Error F8
Adjustable parameters 9/25 Switch temperature sensor Only displayed when Pt100 to Pt500 activated in the factory. Switch to normal operation Delete error F8 Delete maxima, minima and average values © Landis+Gyr... -
Page 10: Delete Error- And Volume Measurement Time
Enter mid-month set date To enter the mid-month set date, proceed as follows: Press button 1 repeatedly until the LCD displays Press button 2 repeatedly until the digit to be modified begins to flash. © Landis+Gyr... -
Page 11: Switch Time Of Set Date
Press button 2 repeatedly until the digit to be modified begins to flash. Press button 1 repeatedly until the required value is being displayed on the LCD. Step can be optionally repeated as often as needed until the required value is being indicated. © Landis+Gyr... -
Page 12: Enter Property Number
Press button 1 repeatedly until the required value is being displayed on the LCD. You can repeat steps as many times as you want until the required value appears. To confirm the entered value, press the button 1, making sure that no more digits are flashing. © Landis+Gyr... -
Page 13: Test Communication Function
Adjustable parameters 13/25 4.13 Test communication function 4.14 Switch radio module on / off © Landis+Gyr... -
Page 14: Switch Unit Of Heat Quantity
14/25 Adjustable parameters 4.15 Switch unit of heat quantity 4.16 Change the installation location of the volume measuring part Note: If necessary, adjust the temperature sensors according to the installation requirements. © Landis+Gyr... -
Page 15: Switch Temperature Sensor Pt100 To Pt500
Note: Only batteries approved by the manufacturer may be installed. Note: After lithium batteries have been used, you can return them to the manufacturer for proper disposal. When shipping batteries please observe legal regulations which among other things govern the labelling and packaging of hazardous goods. © Landis+Gyr... -
Page 16: Dynamical Calculation Of Battery Life
Note: Note that after changing the batteries, the number of batteries must be parameterized via UltraAssist. This ensures that the meter can calculate the battery life correctly. Communication module Note: Observe the required ESD protection measures when installing modules. © Landis+Gyr... -
Page 17: Connection Terminals
0.25 … 1.5 mm² ▪ flexible with wire end ferrule without plastic sleeve, 0.25 … 1.0 mm² conductor sizes 26 … 14 AWG ▪ • Recommended screwdriver: ▪ 0.6 × 3.5 mm • Tightening torque: 0.35 … 0.4 Nm © Landis+Gyr... -
Page 18: Pulse Output Module
Secure the cable with the strain relief clamp. • Connect the cable to the module’s terminals. • Pull the cables out through the housing while inserting the module. • First attach the contact surfaces of the module to the module slot. © Landis+Gyr... -
Page 19: Testing Of The Module
First attach the contact surfaces of the module to the module slot. • Gently push the module in. • Close the housing cover by tightening the screw (see chapter Torques) and press the housing cover tightly into place. © Landis+Gyr... -
Page 20: Radio-Module 868 Mhz (Wireless M-Bus)
Note: No later than 60 seconds after installation, the meter automatically detects the inserted modules and is ready for communication. 7.4.2 Start transmission mode The following options are available to start the transmission mode: Open Metering System © Landis+Gyr... -
Page 21: Start Transmission Mode Using Loop 2
The meter readings of the pulse inputs are also indicated on the LCD. Connection of pulse inputs For the connection of pulse inputs, proceed as follows: • If necessary, open the housing cover by loosening the screw. © Landis+Gyr... -
Page 22: Activation Of Pulse Inputs
If necessary, remove the existing temperature sensors from the housing. • Run the warm side temperature sensor cable from the outside through the 4th grommet from the left and the cold side temperature sensor of the through the 5th grommet from the left (see Fig. 4). © Landis+Gyr... - Page 23 Press the service button for approx. 3 sec., until indicated. Place the optical head on the optical interface. Start the UltraAssist software. Click on the icon. The following meter information appears (example): Heat meter UH40 (Version 20.02 / 20.02) in Pb (with calibration seal) found. © Landis+Gyr...
- Page 24 You can check the updated firmware version and the checksum in Loop 0. Head of the loop … Firmware version CRC / CMAC 11 Service software UltraAssist The meter may also be parameterized in the parameterization mode using the optical interface via UltraAssist. © Landis+Gyr...
- Page 25 Contact: Landis+Gyr GmbH Humboldtstraße 64 90459 Nürnberg Germany www.landisgyr.eu...
Need help?
Do you have a question about the ULTRAHEAT T450 and is the answer not in the manual?
Questions and answers