Yealink T58A User Manual
Sip phone with usb camera
Hide thumbs
Also See for T58A:
- User manual (184 pages) ,
- Administrator's manual (116 pages) ,
- Provisioning manual (65 pages)

Related Manuals for Yealink T58A


Summary of Contents for Yealink T58A
- Page 1 YEALINK T58A SIP PHONE WITH CAM50 USB CAMERA PHONE, VOICEMAIL + CAMERA USER MANUAL...
-
Page 2: Table Of Contents
TABLE OF CONTENTS CLICK ON ANY PAGE NUMBER TO RETURN TO THE TABLE OF CONTENTS INSTALLING YOUR YEALINK T58A PHONE............................GETTING TO KNOW YOUR YEALINK PHONE ............................. QUICK REFERENCE GUIDE DEFINING SPECIFIC KEYS + FEATURES. SCREENS AND ICONS....................................THREE IDLE SCREENS. -
Page 3: Installing Your Yealink T58A Phone
It should be covered when not in use. NOTE: The camera can only be connected to the USB port on the top of the phone. The T58A only supports the Yealink CAM50 USB camera. Need support? Connect with us at www.northland.net/support... -
Page 4: Getting To Know Your Yealink Phone
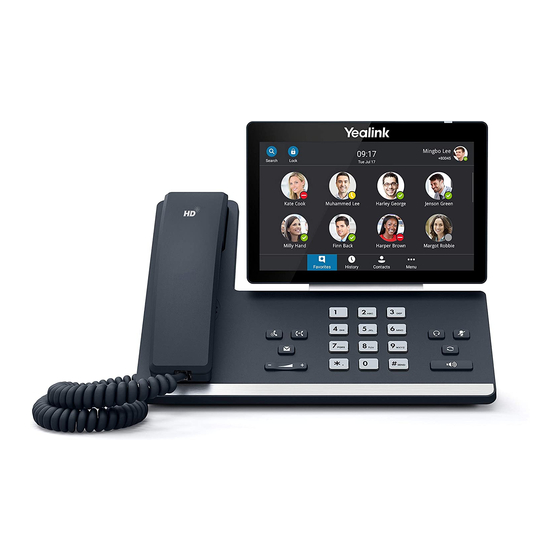
GETTING TO KNOW YOUR YEALINK T58A SIP PHONE PHONE FRONT KEYS AND INDICATORS 1. POWER LED Indicator: Indicates call status, message status and phone’s system status. 2. TOUCH SCREEN: Allows you to view items and navigate menus on the touch sensitive screen. -
Page 5: Screens And Icons
SCREEN + ICONS The user screens and icon indicators help you navigate and understand the information on the phone’s status. CONTROL AND NOTIFICATION CENTER The Control Center or Notification Center provides access to certain features or notifications quickly. To access this screen swipe down from the top of the display. - Page 6 SCREENS The phone has three idle screens by default, the HOME Screen which is condensed when the phone is idle and two additional idle screens.. You can see additional buttons on the HOME Screen by tapping the EXPAND Icon. Swipe left or right to switch from the HOME Screen to the other idle screens.
- Page 7 EXPANDED HOME SCREEN The first idle screen displays much of the same information as the HOME Screen with a couple of additions. When you expand the HOME Screen, the Line and Park keys move to the left to reveal additional features. Name Description Displays the phone’s default subscriber account information, icons and time.
- Page 8 APPLICATIONS SCREEN Application Description Accesses the phone settings and features. Settings File Manager Manages files in the internal SD card as well as a USB flashdrive. Accesses the video/voice mails or leave video/voice mails. Video only available with optional Message camera.
-
Page 9: Navigating Menus + Fields
THIRD IDLE SCREEN The third idle screen displays the calendar and email widgets by default. See page 20 for how to set up an email account. Widget Description Displays calendar data and upcoming events. Calendar Email Displays the email from the specified associated account. Tap to add email account. -
Page 10: Placing And Answering Calls
Or press the SPEAKER Key. NOTE: Video calls can only be made to others in your business group with a T58A with camera. PLACE AN INTERCOM CALL (within your Business Group) Automatically bypasses ringing and opens the speaker of the party you are calling. - Page 11 CALL CONTROLS IN A VIDEO CALL When in a video call, if you don’t see the call controls, tap BACK. Call controls appear at the bottom of the video. Tap TRANSFER to send the call to another extension. Tap HOLD to place the call on hold. Tap CONFERENCE to add another person to the call.
-
Page 12: Hunt Groups
HUNT GROUPS LOG IN/OUT When you are a member of a group (Hunt group or iACD), your account phone is programmed to ring when a choice is made from an automated attendant or when the hunt group number is dialed. You may be required to log in to the hunt group to receive calls. Your telephone will be programmed with a Hunt Group or ACD Key. -
Page 13: Navigatinga Connected Call
NAVIGATING A CONNECTED CALL SPEAKER: Press to make or answer any call without lifting the Handset. TO SWITCH TO SPEAKER FROM HEADSET/HANDSET: Press the SPEAKER Key, replace handset in cradle. TO RESUME PRIVACY: Lift the Handset or Press the HEADSET Key. MUTE: Turns off your Microphone (Speaker, Handset + Headset) to allow you to speak privately. - Page 14 ADHOC CONFERENCE ADHOC CONFERENCE allows you to do a multi-call conference (with call on line) Tap the CONFERENCE Key. First call automatically holds, listen for dial tone. Enter the second number (internal or external) and tap AUDIO CALL or VIDEO CALL. IMPORTANT: Wait for answer and announce the conference.
-
Page 15: Redial + Call History Lists
REDIAL + CALL (HISTORY) LISTS REDIAL: Displays a list of the last numbers placed, redials the last number dialed, + uses the outgoing call records stored in the call log. TO USE: Press REDIAL Key. Display shows recent calls. The default list displayed is dialed calls. You can also tap the CALL LIST Icon to view the call lists. -
Page 16: Convenience Features
CONVENIENCE FEATURES PAGING: Accesses telephone speakers and/or overhead to make an announcement. TO USE: Lift Handset, tap the PAGE Key, wait for tone, make announcement, tap the END CALL Key, hang up. GROUP PICK UP: Allows you to pick up another phone you hear ringing in your group (you must be programmed in a group by a System Administrator). -
Page 17: Rings, Indicators + Programmable Keys
RINGS, INDICATORS + PROGRAMMABLE KEYS RINGS Your telephone rings differently for different types of calls. EXTERNAL: Two short rings repeated (a new external call or a transferred external call). INTERNAL: Single ring repeated. ADJUST RING VOLUME You can adjust the volume while phone is ringing or idle. Leave handset in place Press the PLUS/MINUS VOLUME CONTROL Key to adjust the ring volume when your phone is idle. -
Page 18: Settings And Features
The SETTINGS Icon on the Second Idle Screen consists of four areas of information: Status, Features, Basic Settings and Advanced Settings (see below). This guide will cover basic features and settings. Features and Settings covered in this guide are indicated with an *. For more information on other settings, please refer to the Yealink User Guide at https://support.yealink.com. Features * Call Forward Forwards all calls that ring at your phone to another telephone. -
Page 19: Status Indicators
STATUS INDICATORS STATUS BAR ICONS The icons in the Status Bar help you easily get the current phone status, such as call and message status. Need support? Connect with us at www.northland.net/support Dial 4357 (HELP) 315-671-6262 to speak to a Northland Training Representative... - Page 20 The line key icons show the function of the line key. Icon indicators associated with line key features are shown in the chart below. ICON INDICATORS (ASSOCIATED WITH A LINE) BUSY LAMP FIELD KEYS If your Yealink Phone is equipped with a Busy Lamp Field (BLF) the following indicators appear when keys are programmed with internal users. CAMERA LED INDICATORS LED STATUS...
-
Page 21: Additional Camera Functions
ADDITIONAL CAMERA FUNCTIONS TAKING PICTURES You can take pictures with the camera when the phone is idle. You can easily take pictures with the Camera when the phone is in the idle screen. Ensure the camera is inserted into the phone and the lens cover is open. (Red camera light is on). Swipe to the second idle screen. -
Page 22: Your Voicemail
YOUR VOICEMAIL VOICEMAIL: The voicemail system is voice prompted with easy to follow instructions and commands FIRST TIME VOICEMAIL SET UP Dial *99. Enter your 10 digit subscriber number and press #. Enter the EAS Pin that you were given by your System Administrator. Follow the audio instructions to create a password, record your name + record your personal greeting. - Page 23 LOG IN TO VOICEMAIL FROM ANY TELEPHONE Log in to voicemail from any account phone or external phone to listen to message, work with personal greeting and other voicemail settings. LOG IN FROM YOUR OWN PHONE (VISUAL VOICEMAIL): Press the VOICEMAIL (Envelope) Key. Messages are displayed on the screen.
- Page 24 YOUR VOICEMAIL COMMON VOICEMAIL COMMANDS Listening to Messages Main Menu Repeat Listen to messages Save Send a message to another user Erase Work with personal greetings Reply Mailbox settings Send a copy Work with Reminder Messages Increases the message volume Access deleted messages Slows the message playback down Switch Account (log into another account)
- Page 25 SET UP AN EMAIL ACCOUNT You can add an email account to the telephone just as you would to any device such as a tablet. TO BEGIN: Swipe to the second idle display and tap SETTINGS. Tap APP ACCOUNTS. Tap + ADD ACCOUNT. Select the type of email: EXCHANGE OR PERSONAL (IMAP).
Need help?
Do you have a question about the T58A and is the answer not in the manual?
Questions and answers