Table of Contents
Advertisement
Quick Links
Advertisement
Table of Contents

Related Manuals for AMS TMF882X


Summary of Contents for AMS TMF882X
- Page 1 User Guide UG000495 TMF882X EVM User Guide TMF882X-EVM v4-00 • 2021-Dec-01...
-
Page 2: Table Of Contents
Document Feedback TMF882X Content Guide Content Guide Automation of Measurements..... 23 Introduction ........3 Drivers .......... 28 Kit Content ............ 3 Ordering Information ........4 Schematics, Layers and BOM ..29 Setting Up the EVM ....... 5 Daughter Card ..........29 Setting Up the EVM Hardware ..... -
Page 3: Introduction
Introduction The Time-of-Flight (hereafter referred to as ‘ToF’) EVM demonstration kit provides a way to evaluate ToF optical sensor(s) from ams AG. This document is a basic user guide to the setup and operation of the ToF EVM software. Kit Content Below is a checklist of what is included in the ToF EVM kit. -
Page 4: Ordering Information
TMF8828-EVM TMF8828 EVM As TMF8821 is a superset of the functions of TMF8820, ams recommends to use the TMF8821 EVM for evaluating the performance of TMF8820 and TMF8821. The TMF8828 is a superset of the TMF8821, ams recommends to use the TMF8828 EVM for evaluating the performance of TMF8820, TMF8821, and TMF8828. -
Page 5: Setting Up The Evm
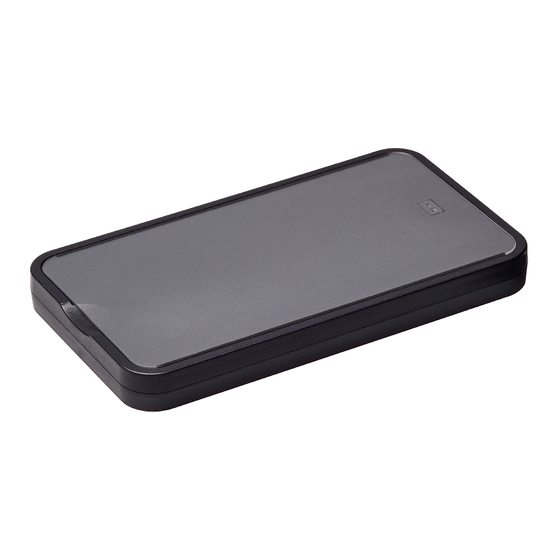
Document Feedback TMF882X Setting Up the EVM Setting Up the EVM This section describes the setup steps necessary to start using the EVM software. Setting Up the EVM Hardware The ToF sensor enclosure is already assembled and ready to plug in to a PC. The EVM with the... - Page 6 Figure 3: EVM Without Enclosure – Front Side (TMF882X facing to table) The TMF882X is shown when placing the Raspberry PI Zero W on the backside (see Figure 4) Figure 4: EVM Without Enclosure – Back Side (TMF882X facing to ceiling) 2.1.1...
- Page 7 Document Feedback TMF882X Setting Up the EVM 2.1.2 Installing the EVM Graphical User Interface The ToF EVM GUI software is included on the USB flash drive. Launch the Windows installer and choose the desired installation options. The EVM graphical user interface executable is titled TMF882X_EVM_GUI.exe.
-
Page 8: Using The Evm Software
Document Feedback TMF882X Using the EVM Software Using the EVM Software This section describes the operation and capabilities of the EVM Graphical User Interface (EVM GUI). Figure 5: EVM GUI Overview in 3x3, 3x6, and 4x4 Pixel Mode Main Tab Selector (see section 3.1.2) Distance Bar Chart (see section 3.2.1) - Page 9 Document Feedback TMF882X Using the EVM Software Figure 6: EVM GUI Overview in 8x8 Pixel Mode Main Tab Selector (see section 3.1.2) Distance Bar Chart (see section 3.2.1) “Control” Box (see section 3.1.4) “Information” Box (see section 3.2.2) “Data Logging” Box (see section 3.1.5) “Measurement”...
-
Page 10: Controls For All Tabs
Document Feedback TMF882X Using the EVM Software Controls for All Tabs 3.1.1 Menu The global menu contains these entries: "File" Menu ● "Save Configuration" - save all EVM GUI settings (control values) ● "Load Configuration" - loads all EVM GUI settings (control values) ●... - Page 11 Figure 8: Control Box “Pixels” Combo Box The TMF882X detects objects in more than one zone. Select the zone setup here. Select one of these: ● 3 x 3 - divides the field of view into nine zones, arranged in a 3 by 3 rectangle ●...
- Page 12 This control is available for 3 x 3, 4 x 4, and 3 x 6 zones. It selects three predefined parameter sets for iterations and threshold: ● Default Mode - 550000 iterations, the TMF882X runs with a measurement frequency of 30 Hz in this mode ●...
- Page 13 Document Feedback TMF882X Using the EVM Software To initiate a new factory calibration you have to click on the "Calibrate" button. It is recommended to set “High performance mode” before starting the calibration. To clear the existing calibration data and to set the EVM back to the uncalibrated mode you have to click on the "Clear Calibration"...
-
Page 14: Evm Gui "Main" Tab
A green label means the connection is working "Module HID" is the connection status with the TMF882X demo software ● A red label indicates that there is a problem communicating with the TMF882X demo software or an internal software error. ●... - Page 15 Photon Count Reference - related to the optical reference channel, not influenced by the target object ● Background Light - related to the (IR only) ambient light, the TMF882X sensor sees ● Temperature - the temperature of the TMF882X sensor (on-chip SPAD sensor array...
- Page 16 Document Feedback TMF882X Using the EVM Software Histogram Matrix Figure 13: Histogram Matrix This is a plot of the TDC histograms for each of the zones (pixels) in the field of view. Information The 8x8-histogram view is not enabled in the EVM GUI. It automatically hides this element in 8x8 mode.
- Page 17 Document Feedback TMF882X Using the EVM Software 3.2.2 Main Tab Controls "Histograms" Box [8] Figure 14: Histograms Box The controls in this box influence the display of the histograms in the histograms plot and the histogram matrix: ● Switch on the histogram legend with the check box "Show Legend".
- Page 18 Information Box This box contains information about the hardware and software in the EVM enclosure: ● The serial number is the unique hardware ID of the TMF882X sensor ● Below that you can find the revision of the embedded sensor firmware ●...
- Page 19 Document Feedback TMF882X Using the EVM Software You can find the version of the current EVM GUI in the "About" dialog in the main menu – “Help / About Dialog”. The EVM GUI also writes this information into the first lines of each generated log file.
-
Page 20: Evm Gui "3D" Tab
Document Feedback TMF882X Using the EVM Software EVM GUI "3D" Tab Figure 18: 3D Tab This graph shows the detected objects in all the zones (pixels) in the field of view of the sensor. As you can see in the screenshot, the sensor detects up to two objects in each zone. Each object is shown as a plate above the base plane. -
Page 21: Evm Gui "Interrupt" Tab
Document Feedback TMF882X Using the EVM Software EVM GUI "Interrupt" Tab Figure 19: Interrupt Tab This tab looks very much like the "3D" tab. The only difference here are the controls that allow setting parameters for object detection. ● Set the minimum and maximum distance for object detection with the corresponding spin boxes ●... -
Page 22: Evm Gui "File Upload" Tab
Document Feedback TMF882X Using the EVM Software Information The EVM GUI displays all objects in the field of view if one object in the field of view satisfies the defined requirements. If "Persistence" is set to zero all other parameters are not relevant anymore. -
Page 23: Automation Of Measurements
Document Feedback TMF882X Using the EVM Software This tab allows you to update the software running on the controller board in the EVM enclosure (Raspberry Pi Zero W). The binaries file (e.g. v2.9_tmf8820_evm_linux.zip) contains all the necessary files in a single ZIP archive. - Page 24 Document Feedback TMF882X Using the EVM Software ● After the connection is established, the EVM sends version and calibration information to the automation host. This will look like this: #VER;4c-c0-00-00;2.49.4.2;2.4.23.0;2.6.2.19;8;0 #CAL;1594814890830;0;2;00;0B;03;00;01;FF;26;02;79;56;34;12;53;49;47;F7;6B;A2; 07;00;6B;A2;07;00;6B;A2;07;00;6B;A2;07;00;6B;A2;07;00;6B;A2;07;00;6B;A2;07;00 ;6B;A2;07;00;6B;A2;07;00;6B;A2;07;00;77;09;02;00;02;00;00;00;02;00;00;00;02;0 0;00;00;02;00;00;00;02;00;00;00;02;00;00;00;02;00;00;00;02;00;00;00;02;00;00; 00;00;00;00;00;00;00;00;00;00;00;00;00;00;00;00;00;00;00;00;00;00;00;00;00;00 ;00;00;00;00;00;00;00;00;00;00;00;00;00;00;00;00;00;00;00;00;00;00;00;00;00;0 0;00;00;00;00;00;00;00;00;00;00;00;00;00;00;00;00;00;00;00;00;00;00;00;00;00; 00;00;00;00;00;00;00;00;00;00;00;00;00;00;00;00 ● The EVM GUI also sends header information for easy import of the log output into Microsoft Excel.
- Page 25 Document Feedback TMF882X Using the EVM Software Set Iterations Sets the number of ToF measurement iterations ("Iterations [k]" spin box). Figure 22: Command Overview Command Code Parameter Example Number of iterations, (I1000) 0 <= iterations <= 65535 Set Object Detection Threshold Sets the object detection threshold ("Threshold"...
- Page 26 Document Feedback TMF882X Using the EVM Software Calibration Handling Control the EVM GUI Calibration Handling. Figure 25: Command Overview Command Code Parameter Example 0 - Initiate new calibration, 1 - Clear calibration, (C2) 2 - Get calibration data The EVM GUI ignores all other parameter values 3.6.3...
- Page 27 Document Feedback TMF882X Using the EVM Software #HLONG01;1500;1542;1452;1498;1425;1527;1513;1440;1533;1443;1502;1415;1423;1457;150 5;1429;1404;1432;1452;1440;1460;1439;1460;1405;1499;1358;1368;1379;1420;1392;1429; 1374;1420;1388;1413;1327;1341;1382;1346;1314;1369;1368;1397;1361;1292;1294;1261;12 99;1479;1778;1747;1572;1341;1317;1362;1270;1356;1235;1266;1324;1273;1314;1179;1283 ;1244;1231;1260;1294;1305;1275;1255;1253;1254;1243;1242;1281;1212;1231;1223;1230;1 205;1162;1179;1163;1246;1161;1164;1199;1205;1127;1232;1178;1120;1128;1176;1193;113 2;1122;1147;1180;1166;1171;1153;1108;1113;1129;1106;1113;1102;1082;1152;1113;1075; 1112;1098;1043;1021;1100;1130;1113;1145;1038;1148;1087;992;1064;1055;1028 #HOCAL0;28;22;39;36;28;31;33;22;28;19;36;23;23;28;13087;134440;51569;16061;8389;44 44;2898;1977;1544;1224;1006;876;727;618;509;403;341;292;222;192;153;125;85;77;49;5 2;47;30;34;32;33;22;25;22;22;18;22;14;17;11;14;23;17;12;23;15;22;10;19;11;13;16;19 ;15;22;13;19;15;13;15;20;16;19;14;11;9;19;18;16;9;14;17;26;16;18;15;23;13;11;12;23 ;19;14;23;21;20;17;16;15;17;10;22;9;11;19;17;22;16;7;16;17;11;17;8;14;14;12;17;21; 15;20;14;12;17 #ITT;1594816405325;550;6;1;2.5 m;3 x 3 Disable measurement histograms and trigger another measurement - send the command (m0) again: ● (m0) #TMP;1594816859466;251;38...
-
Page 28: Drivers
TMF882X Drivers Drivers ams recommends to use one of the available software drivers to operate the TMF882X. The following drivers are available: ● Linux driver – use this for any Linux system (e.g. Android) where the driver is running on the application processor ●... -
Page 29: Schematics, Layers And Bom
Document Feedback TMF882X Schematics, Layers and BOM Schematics, Layers and BOM Daughter Card Figure 26: Daughter Card Picture Figure 27: Daughter Card Schematic Demo Kit Manual • PUBLIC UG000495 • v4-00 • 2021-Dec-01 │ 29... - Page 30 Document Feedback TMF882X Schematics, Layers and BOM Figure 28: Daughter Card Layout – Layers 1-4 Demo Kit Manual • PUBLIC UG000495 • v4-00 • 2021-Dec-01 │ 30...
- Page 31 Document Feedback TMF882X Schematics, Layers and BOM 5.1.1 Figure 29: Daughter Card BOM Demo Kit Manual • PUBLIC UG000495 • v4-00 • 2021-Dec-01 │ 31...
-
Page 32: Revision Information
Document Feedback TMF882X Revision Information Revision Information Changes from previous version to current revision v4-00 Page Extended for TFM8828 specific information ● Page and figure numbers for the previous version may differ from page and figure numbers in the current revision. -
Page 33: Legal Information
AG shall not be liable to recipient or any third party for any damages, including but not limited to personal injury, property damage, loss of profits, loss of use, interruption of business or indirect, special, incidental or consequential damages, of any kind, in connection with or arising out of the furnishing, performance or use of the technical data herein. - Page 34 Mouser Electronics Authorized Distributor Click to View Pricing, Inventory, Delivery & Lifecycle Information: ams OSRAM TMF8821-EVM...
Need help?
Do you have a question about the TMF882X and is the answer not in the manual?
Questions and answers