Table of Contents
Advertisement
Advertisement
Table of Contents

Related Manuals for Linx 10


Summary of Contents for Linx 10
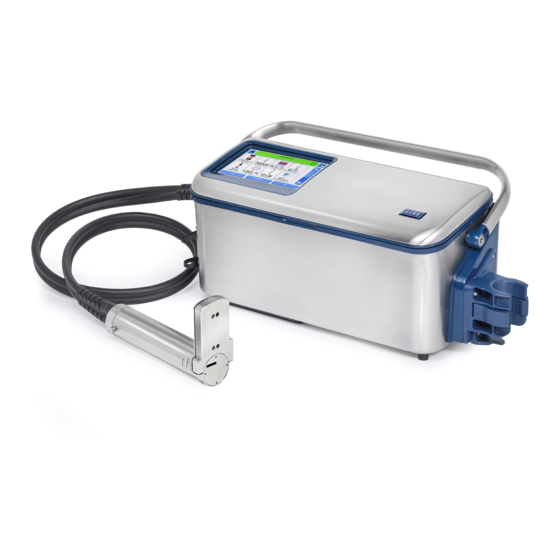
- Page 1 Operating Manual...
-
Page 2: Copyright
All possible care has been taken in the preparation of this manual, and information of a technical nature and particulars of the product and its use are given by Linx in good faith. However, Linx makes no guarantees regarding the accuracy or completeness of this publication. -
Page 3: Table Of Contents
2.4.2 Extended character sets....................8 2.4.3 Primary and secondary keyboards ................. 8 2.5 Printer screen brightness......................9 3 Create, edit, and manage messages..................10 3.1 Create your message ......................10 3.1.1 Add a Text field......................11 3.1.2 Add a Date field ......................12 3.1.3 Add a Time field...................... - Page 4 Linx 10 Operating Manual — Contents 4.1.2 Date & Time........................26 4.1.3 Installation ........................28 4.1.4 User Management ......................28 4.1.5 Change Your PIN Code....................30 4.1.6 Security Options ......................31 4.1.7 User interface settings....................31 4.1.8 Warnings ........................35 4.1.9 Power Down .........................
- Page 5 Linx 10 Operating Manual — Contents 6.2.1 Sequential Number ranges................... 56 6.2.2 Format characters ......................57 6.2.3 Edit Sequential Number field properties ............... 59 6.3 Add a Shift Code field ......................59 6.3.1 Examples........................59 6.3.2 Create a shift code field....................60 6.3.3 Edit a shift code field ....................
-
Page 6: Set Up The Printer
1.1 First use When you first use the Linx 10, you must select the required language and set the date and time at the end of the power-up process. The printer displays the Language screen. The screen shows a list of the languages that are available. - Page 7 Linx 10 Operating Manual — Set up the printer Message position—this step shows how to make sure that the message appears in the correct position on the product (see ‘Print Delay’ on page 53 for more information). Set up line—this step guides through how to set up a production line for the printer (see ‘Line and message settings’...
-
Page 8: Printer User Interface
Linx 10 Operating Manual — Printer user interface 2 Printer user interface This section describes standard printer screens, the printer keyboard, and printer users. 2.1 Printer display The printer uses a touch screen display. You can touch most areas of the printer screens to access printer functions. - Page 9 Linx 10 Operating Manual — Printer user interface 1. Printer status bar The printer status bar shows the current jet state of the printer (for example, “Jet Starting” or “Printing”). The colour of the printer status bar on the Home screen (and on other printer screens, except the Faults &...
- Page 10 By default the carousel shows the following options: • Message Store—touch this button to open the Message Store screen. See ‘Create your message’ on page 10 for more information. • Line Settings—touch this button to view and change the production line settings for the selected message.
-
Page 11: Main Menu Screen
Touch the Home screen within the message preview area to display the zoom buttons. These buttons allow you to increase or decrease the size of the previewed message. The buttons are displayed for a period of 10 seconds before they are dismissed, unless any screen activity is detected. 9. Print control buttons You use these buttons to start and stop the jet, start printing, and pause and continue printing. -
Page 12: Option Screens
Linx 10 Operating Manual — Printer user interface Option Description User Login and Logout Displays one of two options. If there is no user logged in to the printer, the printer displays the User Login button. Touch the User Login button to log in as a user on the printer. -
Page 13: Printer Users
Linx 10 Operating Manual — Printer user interface 2.3 Printer users Printer users have access to different printer functions. The Operator has access to basic printer functions (for example, to select a message to print). The Supervisor has access to advanced printer functions (for example, to change the printer setup). -
Page 14: Printer Screen Brightness
To reduce power usage, the brightness of the printer display is reduced to 10% of its normal level after 10 minutes if there is no touch screen activity (that is, activity occurs if the screen is touched). Display brightness returns to normal if touch screen activity is detected, or a Fault or Warning event occurs. -
Page 15: Create, Edit, And Manage Messages
Linx 10 Operating Manual — Create, edit, and manage messages 3 Create, edit, and manage messages This chapter shows you how to create, save, and edit a simple message that contains a Text field, and then how to add a Date field (and an optional Time field) to that message. For information on how to add other types of field to your message, see ‘Add other fields’... -
Page 16: Add A Text Field
Linx 10 Operating Manual — Create, edit, and manage messages To select a message style: • If the Force Default Style option is enabled (see ‘Force Default Style’ on page 34), a default style is automatically applied to the new message. Go to step 3. -
Page 17: Add A Date Field
Linx 10 Operating Manual — Create, edit, and manage messages When the text is complete, touch the Enter button to display the Editor screen with the entered Text field. The start of the field is inserted in the message at the point where you touched the screen. -
Page 18: Add A Time Field
Linx 10 Operating Manual — Create, edit, and manage messages 3.1.3 Add a Time field To add a Time field to your message: Touch the screen at the required insertion point. Make sure that the field does not overlap any existing field. The printer displays the Select Field Type screen (see Figure 2 on page 11). -
Page 19: Save Your Message
If the correct message is not displayed, touch the Message Store button to go to the Message Store screen (see Figure 6 on page 10). Scroll through the messages to find the message you require, and then touch the Select button to select the message for printing. -
Page 20: Print Your Message
Linx 10 Operating Manual — Create, edit, and manage messages Enter the first letter of the message name (for example, the letter “C”). The printer displays the first message name that starts with the letter entered, together with the letters entered and the number of messages in the store in the printer status bar. -
Page 21: Change The Print Delay
Linx 10 Operating Manual — Create, edit, and manage messages 3.4.3 Change the Print Delay On the Home screen, touch the Message Settings button to display the Message Settings screen. The current Print Delay value is shown on the Print Delay button (see Figure 13):... -
Page 22: Shut Down And Turn Off The Printer
Linx 10 Operating Manual — Create, edit, and manage messages If the print job is completed and you need to turn off the printer, see ‘Shut down and turn off the printer’ on page 17. NOTE: When you pause the print, the printer saves any changes to the message. For example, if you use a sequential number field, the print restarts at the correct position in the sequence. -
Page 23: Add A Text Field
Linx 10 Operating Manual — Create, edit, and manage messages Select the required message on the Message Store screen. Touch the Edit button to display the Editor screen with your selected message. 10034 Figure 14. Editor screen: message selected Touch the Message Style button to display the Select Font Style & Size screen and select the required message style (for example, “1x5 Western Fixed”). - Page 24 Linx 10 Operating Manual — Create, edit, and manage messages The printer displays the Editor screen, which shows the content of your selected message. 10035 Figure 16. Editor screen: add text field Touch the screen at the point where you want to put the new Text field. Make sure that the new field is outside the boundaries of other fields in the message.
-
Page 25: Edit A Text Field
Linx 10 Operating Manual — Create, edit, and manage messages Overlapping fields If the new field touches an existing field, the printer highlights the overlap (item ‘A’ in Figure 18) in red. 89079 Figure 18. Field overlap To correct the problem, you must move the new field (see ‘Move a field’ on page 23), or delete the field (see ‘Delete a field’... - Page 26 Bold Factor— select a value in the range x1 to x10. • Inter Character Gap—allows you to specify an inter character gap of between 1 and 10 rasters for the field. If an inter character gap is set for a field, the field is printed with that number of rasters between the characters.
-
Page 27: Edit A Date Field
Linx 10 Operating Manual — Create, edit, and manage messages 3.6.4 Edit a Date field Select the required message, as described in ‘Edit a Text field’ on page 20. On the Editor screen, touch the Date field to select the field. The field is highlighted in yellow. -
Page 28: Move A Field
Linx 10 Operating Manual — Create, edit, and manage messages • Time Format—displays the Select Time Format screen where you can change the selected Time Format. • Time Offset—you can use this option to add or subtract a fixed time difference (positive or negative) from the correct time. -
Page 29: Other Message Store Options
Linx 10 Operating Manual — Create, edit, and manage messages NOTE: You can use the USB connection of the printer to save messages from the printer to a USB memory device, and transfer messages to the printer from a memory device. See ‘USB connection’... -
Page 30: Properties
Linx 10 Operating Manual — Create, edit, and manage messages Delete Logo NOTE: You cannot create logos or graphics on the printer. You must copy logos or graphics from a USB memory device to the printer. See ‘USB connection’ on page 74 for more information. -
Page 31: Change The Printer Setup
Linx 10 Operating Manual — Change the printer setup 4 Change the printer setup 4.1 Printer Setup screen 4.1.1 Locale Option Description Language Sets the language that the printer software uses in all of the screens that are displayed. For example, menus, dialog boxes, and system messages. To set the printer language, make sure that the printer is not in the ‘Printing’... - Page 32 Saving Time (DST) adjustment for your locale. This adjustment is in the form of an offset from the Coordinated Universal Time (UTC) value always used by Linx printers. For example, a country in the UTC+3 time zone is three hours ahead of UTC, while a country in the UTC-8 time zone is eight hours behind UTC.
-
Page 33: Installation
Linx 10 Operating Manual — Change the printer setup NOTE: If you select a geographic time zone name to enable DST adjustment, you cannot change the printer date or time during the two time periods in the year when the transition to and from DST occurs. - Page 34 Linx 10 Operating Manual — Change the printer setup Option Description Printer Settings Allows access to the Printer Setup screens. Security Settings Allows access to the User Management screens to create, edit, and delete users, and allows access to the Security Options screens.
-
Page 35: Change Your Pin Code
Linx 10 Operating Manual — Change the printer setup You can set a level of user access for each printer function. Touch the name of a printer function (for example, “Message Store”) to set security access rights for that function. The printer displays the Available Levels screen. -
Page 36: Security Options
Linx 10 Operating Manual — Change the printer setup 4.1.6 Security Options These options allow you to control access to the printer functions to prevent use that is not authorised. The following options are available. Option Description Remember Last Login after Restart Select either Enabled or Disabled. - Page 37 Linx 10 Operating Manual — Change the printer setup You can select six other options to assign to the buttons on the carousel. Touch the Customise Home Screen button to display the Customise Home Screen screen. 89116 Figure 27. Customise Home Screen screen The available options are as follows.
- Page 38 Linx 10 Operating Manual — Change the printer setup Option Description Frozen Date If enabled, a button appears in the carousel area on the printer Home screen. Touch the Frozen Date button to enable this option. A screen is displayed to confirm that the option is turned on and an icon is then displayed on the printer status bar.
- Page 39 Linx 10 Operating Manual — Change the printer setup Editor Settings This option allows you to select the settings used to create a new message. Option Description New Message Settings Allows you to apply settings to any new message you create: Use current message settings—any new message you create...
-
Page 40: Warnings
NOTE: The values selected for these options are retained after a printer restart or software upgrade. When auto powerdown is activated, a confirmation screen is displayed for a period of 10 seconds. Touch the Cancel button to cancel the auto powerdown. Otherwise, if no printer activity is detected, the printer powers down after this period has expired. -
Page 41: Screen Saver
• Screen Saver Timeout—this option is enabled if the Screen Saver option is enabled. Enter a timeout period of between 10 seconds and 180 seconds. After this timeout period, the screensaver is displayed. The default timeout period is 120 seconds. - Page 42 Linx 10 Operating Manual — Change the printer setup • Ink and Solvent Levels—if this option is enabled, the printer displays a screensaver that shows current ink and solvent fluid levels after a selected period of printer inactivity. A yellow warning triangle is displayed if ink or solvent fluid levels are low, if the cartridge has expired, or the wrong fluid cartridge has been fitted.
-
Page 43: Line And Message Settings
Linx 10 Operating Manual — Line and message settings 5 Line and message settings 5.1 Basic line settings The Line Settings screen allows you to create and manage production lines for the printer. A production line is where messages are printed on products. -
Page 44: Current Line
Linx 10 Operating Manual — Line and message settings 5.1.1 Current Line The printer allows you to configure up to a maximum of four production lines, so that each line can have different name and settings. Touch the Current Line button to display the Line List screen in ‘selection’... -
Page 45: Line Direction
Linx 10 Operating Manual — Line and message settings To delete all lines, touch the Delete All button. All existing lines are deleted and a new default line (‘Line 1’) is added to the list. Touch the Exit button to return to the Line List screen in ‘selection’ mode. Touch the Exit button again to return to the Line Settings screen. - Page 46 Linx 10 Operating Manual — Line and message settings Touch the Save button to save your changes and return to the Line Settings screen. Touch the Cancel button to discard any changes and return to the Line Settings screen. NOTE: If you do not know the encoder pitch, the printer allows you to calculate the value. See ‘Calculate Line Speed/Calculate Encoder Pitch’...
-
Page 47: Help
Linx 10 Operating Manual — Line and message settings 5.1.5 Help Touch the Help button to display information about line settings options. Touch the Exit button to return to the Line Settings screen. 5.1.6 Advanced Touch the Advanced button to display the Advanced Line Settings screen. See ‘Advanced Line Settings’... -
Page 48: Print Trigger
Linx 10 Operating Manual — Line and message settings If the speed of the line is not known, this option allows you to use the printer to calculate the speed of the line. Touch the button to display the Calculate Line Speed screen. See ‘How to Calculate Line Speed/Encoder Pitch’... -
Page 49: Photocell Type
Linx 10 Operating Manual — Line and message settings 5.2.7 Photocell Type NOTE: This option is not available if you select the Line Sensor option. This option allows you to specify the type of photocell used to trigger a print (either NPN or PNP). -
Page 50: Line Direction
Linx 10 Operating Manual — Line and message settings The printer needs a minimum time to generate the characters and print each character on the product. The time that is needed depends on the message style. The printer displays the maximum line speed for the message style of the current message and you cannot change the value. - Page 51 Linx 10 Operating Manual — Line and message settings Calculate Line Speed Set the printer to Fixed Speed mode (see ‘Speed Mode’ on page 42). On the Line Settings screen, touch the Advanced button and then select the Calculate Line Speed option from the Advanced Line Settings screen.
- Page 52 Linx 10 Operating Manual — Line and message settings Measure the length of the printed calibration message. This value is the distance between the outer edges of the end arrows, shown by the red dots in Figure 37 on page 46. For reference, when the length of the calibration message is 100 mm (plus or minus 1 mm), the line speed is accurate.
- Page 53 Linx 10 Operating Manual — Line and message settings On the Line Settings screen, touch the Advanced button and select the Calculate Encoder Pitch option from the Advanced Line Settings screen. The printer displays the Calculate Encoder Pitch screen. 89148 Figure 41.
-
Page 54: Alarm
Linx 10 Operating Manual — Line and message settings Touch the Enter Measured Calibration Length button to display the Measured Calibration Length screen (see Figure 39 on page 47). Enter the measured calibration length (for example 75 mm) and touch the Save button. The printer calculates the encoder pitch from the entered measurement and displays the Calculate Encoder Pitch screen. -
Page 55: Alarm Setup
Linx 10 Operating Manual — Line and message settings 5.4.1 Alarm setup To access the alarm setup screen, touch the Alarm button on the Line Settings screen to display the Alarm Setup screen for your selected line. 10039 Figure 44. Alarm Setup screen... -
Page 56: Test Mode
Linx 10 Operating Manual — Line and message settings Each alarm mode has a different priority—a Continuous alarm has the highest priority, followed by a Pulsed Continuous alarm, then a Pulsed alarm. If an alarm is active, and an event occurs with a higher-priority alarm type, the higher-priority alarm becomes active. For example, if a Continuous alarm and a Pulsed Continuous alarm are both active, the printer generates a Continuous alarm. -
Page 57: Message Orientation
Linx 10 Operating Manual — Line and message settings To change message settings, touch the Message Settings button on the Home screen. The printer displays the Message Settings screen. 10033 Print Width Message button Orientation buttons Print Delay button Figure 48. Message Settings screen NOTE: The Message Settings screen is not available unless a message is selected. -
Page 58: Print Delay
Linx 10 Operating Manual — Line and message settings Change Message Orientation To change the message orientation, touch the Message Orientation button you require. The selected button is highlighted. 89157 Figure 49. Message Orientation with Horizontal Flip selected 5.5.2 Print Delay The Print Delay is the horizontal distance (in inches or millimetres) between the printhead and the start of the message on the product, measured when the print triggers. -
Page 59: Advanced Message Settings
Linx 10 Operating Manual — Line and message settings In Figure 50(a) the letter “H” is printed at an ideal Print Width—the horizontal spacing (X1) is equal to the vertical spacing (Y). In Figure 50(b), the Print Width is larger than the ideal Print Width—the horizontal spacing (X2) is larger than the vertical spacing (Y). - Page 60 Linx 10 Operating Manual — Line and message settings Horizontal Flip • No, as shown below. 6109 • Yes, the message is reversed, as shown below. 6110 Vertical Flip • No, as shown below. 6109 • Yes, the message is inverted as shown below.
-
Page 61: Add Other Fields
• There are 5000 numbers in the second example range. • There are 26×10×26 (6760) numbers in the third example range. • The fourth example range contains a format character (‘#’) that does not move or change. Page 56 of 88 TP1A072–3 English... -
Page 62: Format Characters
“#” symbol: 0#01, 0#02,..9#98, 9#99 Edit the message, as described in ‘Create, edit, and manage messages’ on page 10. On the Select Field Type screen, touch the Sequential Number button to display the Sequential Number Field screen. - Page 63 “0008” is changed to “8”. • “0010” is changed to “10” (the third zero is not changed). NOTE: This option is not available if any range in the Sequential Number includes a character that is not a number. This option is not available if the Sequential Number contains more than one range.
-
Page 64: Edit Sequential Number Field Properties
Linx 10 Operating Manual — Add other fields Select the required options on the Sequential Number Field screen, and then touch the Exit button to return to the Editor screen in edit mode. A sequential number field with the selected start number is inserted in the message. -
Page 65: Create A Shift Code Field
To add a shift code field to a message: Create and select a message, or find and select an existing message, as described in ‘Create, edit, and manage messages’ on page 10. Touch the Edit this Message button. Touch the screen at the required insertion point. Make sure that the field does not overlap any existing field. - Page 66 Linx 10 Operating Manual — Add other fields Touch the Shift Code button to display the Shift Code Properties screen. The Shift Cycle button shows the current type of shift cycle (Daily or Weekly). 89165 Figure 53. Shift Code Properties screen Touch the Shift Cycle button to display the Shift Cycle screen.
- Page 67 Linx 10 Operating Manual — Add other fields To insert the first item in the shift code, touch the Add button to display the Shift Entry screen. 89168 Figure 56. Shift Entry screen: Daily cycle If you selected a Weekly shift code, the Day of Week button is available, as shown in Figure 57.
- Page 68 Linx 10 Operating Manual — Add other fields To set the time at which the shift begins, touch the Time button to display the Enter Shift Start Time screen. For the ‘Daily’ example on page 60, the first start time is ‘06:00’.
- Page 69 Linx 10 Operating Manual — Add other fields The screen for the Weekly shift cycle is as follows. The title bar shows the number of shifts in the list. 89174 Figure 61. Shift List screen: Weekly shift cycle Touch the Exit button to return to the Shift Code Properties screen.
-
Page 70: Edit A Shift Code Field
Bold Factor—select a value in the range x1 to x10. • Inter Character Gap—allows you to specify an inter character gap of between 1 and 10 rasters for the field. If an inter character gap is set for a field, the field is printed with that number of rasters between the characters. -
Page 71: Add A Prompted Field
6.4.1 Create a prompted field Create a Text field in a message as described in ‘Create your message’ on page 10. The text that you enter in the field becomes the default text for the prompted field. You can edit this text later. - Page 72 Linx 10 Operating Manual — Add other fields At the Editor screen in edit mode, touch the field to select it. The field is highlighted in yellow. Touch the Edit Properties button to display the Text Field Properties screen. Scroll down to the Prompt User button. By default this option is set to No. To enable prompted fields, touch the Prompt User button.
-
Page 73: Configure Prompted Fields
Touch the Maximum Number of Characters button to enter the maximum number of characters that can be entered in the prompted field. The default value is 10 characters. Touch the Default Text button to edit the default text. This option sets the default text for the prompted field that appears in the edit box of the User Entry prompt screen (see Figure 73 on page 72). - Page 74 Linx 10 Operating Manual — Add other fields Touch the Prompt With button to display the Prompted Value screen, where you can select which text appears in the edit box of the User Entry prompt screen for the prompted field.
- Page 75 Linx 10 Operating Manual — Add other fields The number of entries in the list is shown in the status bar. 89184 Figure 70. Prompt List screen To create a prompt list item: (a) At the Prompt List screen, touch the Add button to display the Prompt List Entry screen.
-
Page 76: Use Prompted Fields
Linx 10 Operating Manual — Add other fields Touch the Prompt With button to display the Prompted Value screen (see Figure 69 on page 69) where you can select which text appears in the prompted field. The following options are available when a message that contains the prompted field is selected for printing: •... - Page 77 Linx 10 Operating Manual — Add other fields Find the message “PROMPTED FIELDS” and touch the message name to preview the message on the Message Store screen. 89186 Figure 72. Message Store screen: “PROMPTED FIELDS” message preview Touch the Select button to select the message for printing. The printer displays the User Entry prompt-type screen with the message name and prompt text (“ENTER PRODUCT...
- Page 78 Linx 10 Operating Manual — Add other fields Touch the required list item (for example, “25 PACKS”) to select that item. The printer displays the Home screen with the message ready to print. 89189 Figure 75. Message with prompted fields ready for printing NOTE: You can touch the Cancel button on a prompt screen to cancel the prompt sequence and message selection.
-
Page 79: Printer Communications
Linx recommends that you use a memory device of 512 MB to 32 GB capacity to save and copy messages, and back up and restore printer settings. Do not use a memory device that is near its memory capacity. -
Page 80: Copy Line Settings To Or From Usb
Linx 10 Operating Manual — Printer communications Touch the Copy Messages to USB or the Copy Messages from USB button to display either the Copy Messages to USB or the Copy Messages from USB screen. The printer displays a list of messages that are saved in the printer or memory device. -
Page 81: Copy Graphics To Or From Usb
‘YYYY-MM-DD at HH.MM: SS’. For example, ‘2015-07-29 at 10:29:03’. The printer identifies a backup from another printer with the default printer name from the Installation screen (see ‘Installation’... -
Page 82: Back Up A Printer To A Memory Device
See ‘Restore a printer from a memory device’ on page 77 for more information. NOTE: When you restore messages, graphics, and line settings you must make sure that these files are in the correct folder. For messages, for example, this is the \Linx\Linx_10\Messages folder. -
Page 83: Diagnostic Log
Touch the OK button on the information screen to display the Home screen. 7.3.3 Diagnostic Log You may be asked to use this option by your local Linx Distributor to diagnose any problems with the printer. Page 78 of 88 TP1A072–3 English... -
Page 84: Look After Your Printer
8 Look after your printer The Linx 10 printer is a durable and reliable machine. However, you can help to keep it working at peak efficiency by performing some routine tasks. This chapter describes how you can help to keep your printer in good condition. -
Page 85: Clean The Printer
Linx 10 Operating Manual — Look after your printer 8.1 Clean the printer WARNING: HAZARDOUS SUBSTANCES. THE INK USED WITH THIS PRINTER IS SOLVENT-BASED AND CAN BE HAZARDOUS. IT IS HIGHLY FLAMMABLE, AND THE VAPOUR OR SPRAY CAN BE IRRITATING TO THE EYES AND RESPIRATORY SYSTEM. -
Page 86: Replace The Ink Or Solvent Cartridges
THERE IS A RISK OF FIRE OR EXPLOSION IF THIS SAFETY WARNING IS IGNORED. IMPORTANT: Use only the correct combination of Linx ink and solvent for your printer (as shown in Table 8-5). Always read the instructions on the ink or solvent cartridge before use. -
Page 87: Clear The Nozzle
Linx 10 Operating Manual — Look after your printer NOTE: The Nozzle Flush option is not available unless the jet is stopped. Touch the Stop Jet button on the Home screen to stop the jet. NOTE: The Nozzle Flush sequence can correct an incorrect nozzle alignment. If the procedure is not successful, use the Nozzle Clear option to correct the problem. -
Page 88: Clean Touch Screen
Linx 10 Operating Manual — Look after your printer When the service module replacement time reaches zero, the printer displays the “3.40 Service Module Requires Replacement” Warning screen. You must now replace the service module. Touch the Need Help? button, and then touch the Resolve button to display instructions on the screen about how to replace the service module. -
Page 89: Jet Functions
Linx 10 Operating Manual — Look after your printer 8.8 Jet Functions The Jet Functions screen contains options to start and stop the jet and print, which can help with fault diagnosis. Option Description Jet Test - Start Allows you to perform a quick jet start to help with fault diagnosis. -
Page 90: Valve Reset
8.11 Valve Reset This option operates all of the valves on the printer to reset them. You will not need to use this option unless asked to by your local Linx Distributor. 8.12 Consumables History The Consumables History screen contains information about current and historical printer ink and solvent levels and usage, and service module life. - Page 91 1. You cannot reset this value at Supervisor level. Please contact your local Linx Distributor for more information. 2. The ink usage varies according to the ambient temperature, the solvent type, and the period of time that the printer is in the ‘Jet Running’...
-
Page 92: Faults And Warnings Screens
Faults and Warnings screens 9 Faults and Warnings screens The Linx 10 printer should operate without problems, but the printer can require attention. The Faults and Warnings screens provide information about problems with the printer and how to correct these problems. -
Page 93: Clear A Fault Or Warning
Linx 10 Operating Manual — Faults and Warnings screens If a Fault condition exists, the printer status bar is highlighted in red and the print control button is disabled. 10132 Figure 80. Printer status bar: Fault condition Touch the status bar to display the Current Faults and Warnings screen. See ‘Current Faults &...
Need help?
Do you have a question about the 10 and is the answer not in the manual?
Questions and answers