Table of Contents
Advertisement
Advertisement
Table of Contents

Related Manuals for SAJ R5 Series


Summary of Contents for SAJ R5 Series
- Page 1 Series - 1 -...
- Page 2 Series Preface Thank you for choosing SAJ solar inverter. We are pleased to provide you first-class products and exceptional service. This manual includes information for installation, operation, maintenance, trouble shooting and safety. Please follow the instructions of this manual so that we can ensure delivery of our professional guidance and wholehearted service.
-
Page 3: Table Of Contents
Series Content PREFACE ..........- 1 - CHAPTER 1 SAFETY PRECAUTIONS ....- 4 - ........- 4 - 1.1 S COPE OF PPLICATION ........- 4 - 1.2 S AFETY NSTRUCTIONS ........... - 4 - 1.3 T ARGET ROUP CHAPTER 2 PREPARATION ...... - Page 4 ........- 49 - LEANING CHAPTER 9 RECYCLING AND DISPOSAL ..... - 50 - CHAPTER 10 CONTACT SAJ ......- 50 - SAJ WARRANTY POLICY IN AUSTRALIA ..... - 51 - WARRANTY CARD ........- 56 - - 3 -...
-
Page 5: Chapter 1 Safety Precautions
Series Chapter 1 Safety Precautions 1.1 Scope of Application This User Manual describes instructions and detailed procedures for installing, operating, maintaining, and troubleshooting of the following SAJ on-grid inverters: R5-3K-T2-AUS R5-4K-T2-AUS; R5-5K-T2-AUS; R5-6K-T2-AUS; R5-8K-T2-AUS; R5-9K-T2-AUS; R5-10K-T2-AUS; R5-15K-T2-AUS; R5-17K-T2-AUS; R5-20K-T2-AUS; Please keep this manual all time available in case of emergency. -
Page 6: Chapter 2 Preparation
· Do not stay close to the inverter while there are severe weather conditions including storm, lighting, etc. · Before opening the housing, the SAJ inverter must be disconnected from the grid and PV generator; you must wait for at least five minutes to let the energy storage capacitors completely discharged after disconnecting from power source. - Page 7 Series CAUTION · The solar inverter will become hot during operation. Please do not touch the heat sink or peripheral surface during or shortly after operation. · Risk of damage due to improper modifications. NOTICE · Public utility only. · The solar inverter is designed to feed AC power directly to the public utility power grid; do not connect AC output of the inverter to any private AC equipment.
-
Page 8: Explanations Of Symbols
Series 2.2 Explanations of Symbols Symbol Description Dangerous electrical voltage This device is directly connected to public grid, thus all work to the inverter shall only be carried out by qualified personnel. Danger to life due to high electrical voltage! There might be residual currents in inverter because of large capacitors. -
Page 9: Chapter 3 Product Information
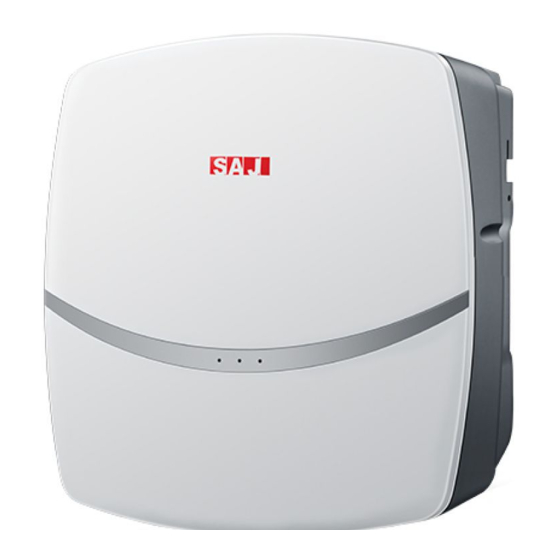
The R5 inverter converts the DC generated by solar panels into AC which is in accordance with the requirements of public grid and send the AC into the grid, Figure 3.1 shows the structural diagram of the typical application system of R5 inverter. Figure 3.1 R5 series application Name Description Remarks... -
Page 10: Specification For Product Model
③ T means three phase; 2 represents the inverter has the function of dual MPPT. ④AUS For Australia 3.3 Overview of products The dimensions of R5 series products is shown in Figure 3.2. Figure 3.2 Dimensions of R5-3K/4K/5K/6K/8K/9K/10K-T2-AUS Figure 3.3 Dimensions of R5-15/17K/20K-T2-AUS... -
Page 11: Datasheet
Series 3.4 Datasheet R5-3K/4K/5K/6K-T2-AUS Type R5-3K-T2-AUS R5-4K-T2-AUS R5-5K-T2-AUS R5-6K-T2-AUS Input (DC) Max. PV Array Power [Wp]@STC 4500 6000 7500 9000 Max. DC Voltage[V] MPPT Voltage range [V] 160-550 Nominal DC Voltage[V] Start Voltage[V] Min. DC Voltage[V] Max. DC Input Current [A] 12.5/12.5 Max. - Page 12 Series DCI Monitoring Integrated GFCI Monitoring Integrated Grid Monitoring Integrated AC Short Circuit Current Protection Integrated AC Grounding Detection Integrated DC Surge Protection Integrated AC Surge Protection Integrated Thermal Protection Integrated String Current Detection Integrated Anti-island Protection Monitoring Interface AC Connection Plug-in connector DC Connection Human Machine Interface...
- Page 13 Series R5-8K/9K/10K-T2-AUS Type R5-8K-T2-AUS R5-9K-T2-AUS R5-10K-T2-AUS Input (DC) Max. PV Array Power [Wp]@STC 12000 13500 15000 Max. DC Voltage [V] MPPT Voltage Range [V] 160-550 Nominal DC Voltage [V] Start Voltage [V] Min. DC Voltage [V] Max. DC Input Current [A] 11/22 Max.
- Page 14 Series DCI Monitoring Integrated GFCI Monitoring Integrated Grid Monitoring Integrated AC Short Circuit Current Protection Integrated AC Grounding Detection Integrated DC Surge Protection Integrated AC Surge Protection Integrated Thermal Protection Integrated String Current Detection Integrated Anti-island Protection Monitoring Interface AC Connection Plug-in connector DC Connection Human Machine Interface...
- Page 15 Series R5-15K/17K/20K-T2-AUS Type R5-15K-T2-AUS R5-17K-T2-AUS R5-20K-T2-AUS Input (DC) Max. PV Array Power [Wp]@STC 22500 25500 30000 Max. DC Voltage [V] 1100 MPPT Voltage Range [V] 180-950 Nominal DC Voltage [V] Start Voltage [V] Min. DC Voltage [V] Max. DC Input Current [A] 25/25 Max.
- Page 16 Series GFCI Monitoring Integrated Grid Monitoring Integrated AC Short Circuit Current Protection Integrated AC Grounding Detection Integrated DC Surge Protection Integrated AC Surge Protection Integrated Thermal Protection Integrated String Current Detection Integrated Anti-island Protection Monitoring Interface AC Connection Plug-in connector DC Connection Human Machine Interface LED+(Bluetooth/Wi-Fi+APP)
-
Page 17: Chapter 4 Instructions For Installation
4.2 Pre-installation Check 4.2.1 Check the Package Although SAJ’s inverters have surpassed stringent testing and are checked before they leave the factory, it is uncertain that the inverters may suffer damages during transportation. Please check the package for any obvious signs of damage, and if... -
Page 18: The Determination Of The Installation Method And Position
Series 4.3 The Determination of the Installation Method and Position 4.3.1 Mounting Method Figure 4.1 Mounting method ① The equipment employs natural convection cooling, and it can be installed indoor or outdoor. ② Please install the equipment under the guidance of Figure 4.1. Vertical installation on floor level is recommended. -
Page 19: Mounting Procedure
Series sufficient air exchange. Ensure additional ventilation, when necessary. To make sure the installation spot is suitably ventilated, if multiple SAJ on-grid solar inverters are installed together, the following safety clearance in Figure 4.2 shall be followed for proper ventilation conditions. - Page 20 Series 17.6 3-16*8 Figure 4.4 Dimensions of rear panel of R5-15K/17K/20K-T2-AUS 4.4.2 Drill Holes and Place the Expansion Tubes Follow the given guides, drill 3 holes in the wall (in conformity with position marked in Figure 4.5 and 4.6), and then place expansion tubes in the holes using a rubber mallet.
- Page 21 Series 4.4.3 Mount the Screws and the Rear Panel The panels should be mounted in the mounting position by screws as shown in Figure 4.7. Figure 4.7 Mount the rear panel 4.4.4 Mount the Inverter Carefully mount the inverter to the rear panel as shown in Figure 4.8 and 4.9, Make sure that the rear part of the equipment is closely mounted to the rear panel.
- Page 22 Series Fig. 4.9 Fasten the inverter and hanging panel with screws 4.4.5 Install Anti-theft Lock As shown in figure 4.10 and 4.11, anti-theft lock could be added to the inverter and hanging panel. Diameter of the lock hole is φ6.0mm and anti-theft lock of which the diameter of lock hook is φ5.0mm is recommended.
- Page 23 Series Figure 4.11 Install anti-theft lock of R5-15K/17K/20K-T2-AUS - 22 -...
-
Page 24: Chapter 5 Electrical Connection
Series Chapter 5 Electrical Connection 5.1 Safety Instruction for Hot-line Job Electrical connection must only be operated on by professional technicians. Please keep in mind that the inverter is a bi-power supply equipment. Before connection, necessary protective equipment must be employed by technicians, including insulating gloves, insulating shoes and safety helmet. -
Page 25: Specifications For Electrical Interface
Series 5.2 Specifications for Electrical Interface Figure 5.1 Electrical interface of R5-3K/4K/5K/6K-T2-AUS Figure 5.2 Electrical interface of R5-8K/9K/10K-T2-AUS - 24 -... - Page 26 Series Code Name DC Switch(Optional) Decompression Valves DC Input RS232 Communication (GPRS/ Wi-Fi /4G) Ground Connection RS485 Communication AC Output Table 5.1 Specifications for interface Figure 5.3 Electrical interface of R5-15K/17K/20K-T2-AUS - 25 -...
-
Page 27: Ac Connection
Series Code Name DC Switch Decompression Valves DC Input RS232 Communication(GPRS/ Wi-Fi /4G) RS485 Communication Ground Connection AC Output Table 5.2 Specifications for interface 5.3 AC Connection Cross-sectional area of cables(mm² ) External diameter(mm) Scope Recommended value 6.0-10.0 5.3~6.7 Table 5.3 Recommended power grid connecting cable specification If the grid-connection distance is too far, please select an AC cable with larger diameter as per the actual condition. - Page 28 Series This inverter complies with IEC 62109-2 clause 13.9 for earth fault alarm monitoring. If an Earth Fault Alarm occurs, the second LED indicator will be lit up and error code <31 Insulation Error Master> will be displayed on the screen of inverter Wi-Fi communication module until the error being solved and inverter functioning properly.
- Page 29 Series Figure 5.8 Connect the inverter 5.3.2 R5-15K~20K-T2-AUS AC side electrical connection of the inverter. After penetrating the external hex head screw through OT Ground terminal of the grounding line, screw in the grounding port of inverter enclosure in clockwise direction and make sure it is screwed up tightly. Fig.
- Page 30 Series Fig. 5.10 Connecting the cable 3. After fixing the cover at the AC output wire terminal with screws, tighten up the AC waterproof nut. Fig. 5.11 Tighten up AC interface protective cover and the locker 5.3.3 External ac circuit breaker and Residual Current Device Please install a 4P circuit breaker to ensure the inverter is able to disconnect from grid safely.
- Page 31 Series The integrated leakage current detector of inverter is able to detect the real time external current leakage. When a leakage current detected exceeds the limitation the inverter will be disconnected from grid quickly, if an external leakage current device is connected, the action current should be 300mA or higher. Inverter type Recommended breaker specification R5-3K/3.6K/4K/5K/6K-T2-AUS...
- Page 32 Series NOTICE · Please place the connector separately after unpacking in order to avoid confusion for connection of cables. · Please connect the positive connector to the positive side of the solar panels, and connect the negative connector to the negative side of the solar side. Be sure to connect them in right position.
- Page 33 Series insulated enclosure and make them tight. 7. Connect the positive and negative connectors into positive and negative DC input terminals of the inverter, a “click” sound should be heard when the contact cable assembly is seated correctly. 1. Connection port Figure 5.15 Connect the inverter NOTICE ·...
-
Page 34: Communication Connection
Series 5.5 Communication Connection R5 inverter is standardly equipped with a RS485 interface, a DRM interface and a RS232 interface. Figure5.16 RS485 pin and DRM pin Pin Number Description Function White-orange Orange GND_W White-green +7V_W Blue White-blue Green White-brown RS485-A Brown RS485-B Table 5.6 RS485 pin port definition... - Page 35 RS-232 RX Receive data Ground wire Table 5.8 USB pin port definition 1. USB interface could be externally connected with eSolar GPRS/4G module, for operation in details please refer to eSolar GPRS/4G module Quick Installation https://www.saj-electric.com/ Guide in - 34 -...
-
Page 36: Start Up And Shut Down
Series 2. USB interface could be externally connected with eSolar WiFi module, for operation in details please refer to eSolar WiFi module Quick Installation Guide in https://www.saj-electric.com/. 5.6 Start up and Shut down 5.6.1 Start up the inverter 1. Follow the installation standard from previous chapter strictly to connect the photovoltaic panels and AC power grid to inverter. -
Page 37: Chapter 6 Debugging Instructions
Series Chapter 6 Debugging Instructions 6.1 Introduction of Human-computer Interface Figure 6.1 Human-computer interface A-Power indicator light B-System status light C-Communication lamp Indicator Description LED lamps state lamp Yellow Always light on The inverter is just on power. Flicker: 1 s/time The inverter is in the initialization or waiting state. Green Always light on The inverter is in normal on-grid state. -
Page 38: Monitoring Operation
Series 6.2 Monitoring Operation ● There is no LCD display screen in R5 series products and they could be monitored through eSolar APP. ● This equipment is standardly equipped with a USB interface which could transfer GPRS/4G module (with built-in Bluetooth) and Wi-Fi module to monitor running state of the equipment. - Page 39 Series Connection setting iOS system operation steps 1. Choose “setting” →choose “Bluetooth””→ open 2. Log in APP → choose “My” interface → choose “Bluetooth” “Remote control” → choose connection way as “Bluetooth ” 3.Choose “next step” → search for equipment → 4.
- Page 40 Series Connection setting Android system operation steps 1. Choose “setting” → choose “Bluetooth”→ open 2. Log in APP → choose “My” interface → choose “Bluetooth” “Remote control” → choose connection way as “Bluetooth ” 3.Choose “next step” → search for equipment → 4.
- Page 41 Series Equipment information Connection way, running state, basic information, running information, Power information and events information of the communication of the inverter could be checked. 1. Click “Basic info” Inverter model, Module SN code, Module firmware version, Communication board firmware version, Main board firmware version, Slave board firmware version could be checked.
- Page 42 Series Fig. 6.4 Running information 3. Click “Power info” Current power, today energy, monthly energy, yearly energy, total energy could be checked. Device info Bluetooth:R5-4K-T2:00001 R5T2043G1815E00001 Basic info Event info Running info Power info Read More Current power Today Energy Monthly Energy Yearly Energy Total Energy...
- Page 43 Series 4. Click “Event info” Time of the events, events sequence number (referring to fault codes details in Chapter 7 Fault Codes and Common Troubleshooting) and events content of the faults of the inverter could be checked. Fig. 6.6 Events information Connecting way 2 —...
- Page 44 Series Connection setting Please refer to the eSolar WiFi module operating manual for more details in operation. Equipment information Connection way, running state, basic information, running information, Power information and events information of the communication of the inverter could be checked.
-
Page 45: Setting Reactive Power Control
Series 6.2.3 Remote monitoring 1. Connect the internet via the eSolar GPRS/4G module, and upload the inverter data onto the server and customers could monitor running information of the inverter remotely via the eSolar Web Portal or their mobile customer terminals. 2. - Page 46 Series Figure 6.9 Curve for a Volt-Var control mode (AS4777 Series) Setting procedure: 1.AS4777 grid compliance has been set during production, please select corresponding grid compliance according to state regulation during installation. You can choose a state regulation compliance with your local grid via eSolar WiFi-D module or eSolar O&M APP.
-
Page 47: Chapter 7 Fault Code And Troubleshooting
Series Chapter 7 Fault Code and Troubleshooting Error Code Explanation Relay Error Master Storer Error Master High Temperature Master Low Temperature Master Interior Communication Error Master GFCI Devices Error Master DCI Devices Error Master Current Sensor Error Master L1/L2/L3 Over Voltage Master 09/11/13 L1/L2L3 Low Voltage Master 10/12/14... - Page 48 Check whether the radiator is blocked, whether the inverter is High Temperature in too high or too low temperature, if the above mentioned is Error in normal, please contact your distributor or call SAJ technical support. If this error occurs frequently, please contact your distributor GFCI Device Error or call SAJ technical support.
- Page 49 Error inverter and the grid, if the above mentioned are in normal, please contact your distributor or call SAJ technical support. Check the insulation resistance of the positive side and negative side of the solar panel; check whether the inverter is GFCI Error in wet environment;...
-
Page 50: Chapter 8 Routine Maintenance
Series Fault Information Troubleshooting Check the settings of the solar panel. SAJ designer can help Over Bus Voltage you. If the above mentioned are in normal, please contact your distributor or call SAJ technical support. If this error always exists, please contact your distributor or Overcurrent call SAJ technical support. -
Page 51: Chapter 9 Recycling And Disposal
Chapter 10 Contact SAJ Guangzhou Sanjing Electric Co., Ltd. SAJ Innovation Park, No.9, Lizhishan Road, Guangzhou Science City, Guangdong, P.R.China. Web: http: //www.saj-electric.com Technical Support & Service... -
Page 52: Saj Warranty Policy In Australia
1.1 Standard Warranty Period Guangzhou Sanjing Electric, Co., Ltd (“SAJ”) grants a standard warranty period of 66 months (5.5 years) for the R5 series, Sununo Plus series, Suntrio Plus series, Sunfree hybrid series, AC-coupled inverters, starting from the date of shipment from SAJ factory or 60 months (5 years) starting from the date of purchased invoice marked (whichever is longer). - Page 53 1.2 Extension of Warranty The purchaser of SAJ inverters (R5 series, Sununo Plus series, Suntrio Plus series, Sunfree hybrid series and AC-coupled inverters) should extend the warranty period in 18 months from the date of settlement or 30 months from the date of shipment from SAJ by providing the serial number of the unit and purchased receipt (whichever is shorter).
- Page 54 You will not receive a new certificate, as your entitlement is documented at SAJ. While the original model stop producing or out of stock, SAJ will provide new model type of inverter or an equivalent value product.
- Page 55 (hardware or software) and debugging the faulty product. ■ Logistic fee: Cost of delivery, tariff and other derived expense when defective products are sent from user to SAJ or/and repaired products are sent from SAJ to user. 1.6 Exclusion of Liability Any defect caused by the following circumstances will not be covered by the manufacturer’s warranty (the Dealers or Distributors are responsible and authorized...
- Page 56 Any out-of-pocket costs incurred by Installer/Distributor or compensation from electricity production loss are not borne by SAJ in the standard warranty; For further information on SAJ warranty regulation and reliability, please visit our website: www.saj-electric.com.
-
Page 57: Warranty Card
Series Warranty Card The installer should fill in the second form while installing the inverter. For warranty claim, please complete the below forms and send this page to SAJ attached with the Customer’s invoice. For customer to fill in Name:... - Page 58 Series For installer to fill in Modules used: Modules per string: No. of string: Installation company: Contractor license number: Company: City: Country: Zip: Tel: Fax: E-mail: Signature: Date: - 57 -...
- Page 59 Series - 58 -...
Need help?
Do you have a question about the R5 Series and is the answer not in the manual?
Questions and answers