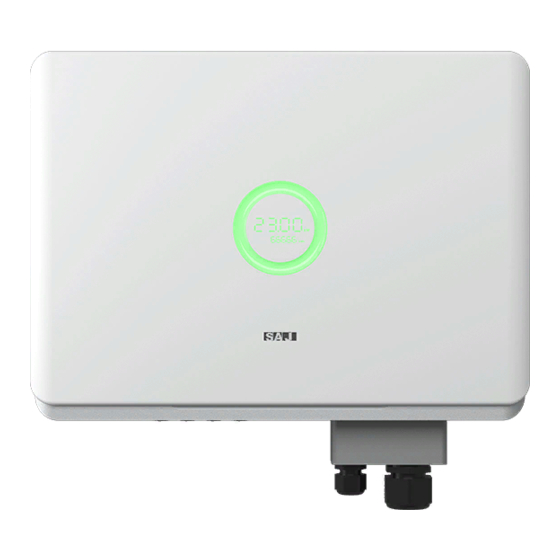
SAJ R6 Series User Manual
Rooftop solar inverter
Hide thumbs
Also See for R6 Series:
- User manual (58 pages) ,
- User manual (32 pages) ,
- User manual (24 pages)
Table of Contents
Advertisement
Quick Links
Advertisement
Table of Contents

Summary of Contents for SAJ R6 Series
- Page 1 V1.0 R6-15~50K-T2/T3/T4-32...
-
Page 3: Table Of Contents
4. ELECTRICAL CONNECTION----------21 1. SAFETY PRECAUTIONS ----------01 4.1 Safety Instruction -----22 1.1 Scope of Application-----02 4.2 Speci cations for Electrical Inte ace-----22 1.2 Safety-----02 4.3 AC Connection-----24 1.2.1 Safety Instruction-----02 4.4 DC Side Connection-----26 1.2.2 Explanations of Symbols-----03 4.5 Communication Connection-----28 1.2.3 Safety Instructions-----04 5. - Page 4 R6-15K-T2-32, R6-17K-T2-32, R6-20K-T2-32, R6-22K-T2-32, R6-25K-T2-32 R6-25K-T3-32, R6-30K-T3-32, R6-33K-T3-32, R6-36K-T3-32, R6-36K-T4-32 R6-40K-T4-32, R6-50K-T4-32...
- Page 7 Figure 2.4 Dimensions of R6-36K/40K/50K-T4-32...
- Page 8 25000 25000 36.2 37.9 409*558*234.5 22.5...
- Page 9 R6-25/30K/33K/36K-T3-32, R6- 36K/40K/50K-T4-32 Model Model R6-25K-T3-32 R6-30K-T3-32 R6-33K-T3-32 R6-36K-T3-32 R6-36K-T4-32 R6-40K-T4-32 R6-50K-T4-32 R6-25K-T3-32 R6-30K-T3-32 R6-33K-T3-32 R6-36K-T3-32 R6-36K-T4-32 R6-40K-T4-32 R6-50K-T4-32 Input (DC) Anti-islanding Protection Max. PV Array Power [Wp]@STC 37500 45000 49500 54000 54000 60000 75000 AFCI Protection Optional Max. Input Voltage [V] 1100 Inte ace AC Connection...
-
Page 10: Safety Instructions
3.2.1 Check the Package Although SAJ’s inve ers have thoroughly tested and checked before delive , it is unce ain that the inve ers may su er damages during transpo ation. Please check the package for any obvious signs of damage, and if such evidence is present,... -
Page 11: Installation Method And Position
3.2.2 Scope of Delive Please contact after sales if there is missing or damaged components. Rear Panel*1 Rear Panel*1 (R6-15-25K-T2-32) (R6-25-36K-T3-32) Inve er*1 AC waterproof cover*1 (R6-36-50K-T4-32) PV connector Screw-secured bracket* M4*12 screw*8 (R6-15-25K-T2-32*4) Big gasket* Terminals*5 (R6-15-25K-T2-32) (R6-25-36K-T3-32*6) M6*50 (R6-36-50K-T4-32*8)... -
Page 12: Mounting Procedure
Installation Environment Requirements The installation environment must be free of in ammable or explosive materials. Install the device away from heat source. Do not install the device at a place where the temperature changes extremely. Keep the device away from children. Do not install the device at daily working or living arears, including but not limited to the following areas: bedroom, lounge, living room, study, toilet, bathroom, theater and attic. - Page 13 R6-36K/40K/50K-T4-32...
- Page 15 R6-36K/ R6-36K/40K/50K-T4-32...
- Page 16 External AC Circuit Breaker and Residual Current Device Please install a 4P circuit breaker to ensure the inve er is able to disconnect from grid safely. The inve er is integrated with a RCMU, however, an external RCD is needed to protect the system from tripping, either type A or type AC RCD is compatible with the inve er.
-
Page 19: Local Connection
Step 3: Enter password “123456” Step 4: Click on “Bluetooth” and activate the Bluetooth function on your phone, then click on ● R6 series products could be monitored through eSolar APP. “Next” ● This equipment is standardly equipped with a USB inte ace which could transfer Step 5: Choose your inve er according to your inve er SN's tail numbers AIO3/4G module and Wi-Fi module to monitor running state of the equipment. -
Page 20: Account Login
5.2.3 Account Login Step 1: Log in to eSAJ Home, if you do not have an account, please register rst. Step 2: Go to the “Tool” inte ace and select “Remote Con guration” Step 3: Click on “Bluetooth” and activate the Bluetooth function on your phone, then click on “Next”... -
Page 21: Inve Er Setting Review
5.2.4 Inve er Setting Review After commissioning, the device info including device basic info, running info and event info can be viewed. Count and grid code can be viewed from initial setting. 5.2.5 Remote Monitoring Connect the internet via the eSolar/4G/WiFi module, and upload the inve er data onto the se er and customers could monitor running information of the inve er remotely via the eSolar Web Po al or their mobile customer terminals. -
Page 22: Expo Limit Setting
5.3.1 Enter the main page of local connection and click on Expo limitation setting, enter the Expo Limit Setting APP Setting password “201561”. Main Mete Solar inve er On-grid Load There are two methods to control the expo limit, the two methods are alternative to each other. Method1: Expo limitation setting is to control the e xpo elec tricity to the grid. -
Page 23: Self-Test
40 minutes. After the self-test is completed, you can save the test repo . If self-test is Self-test failed, please contact with SAJ or your inve er supplier. Italian Standard CEI0-21 requires a self-test function for all inve er that connected to utility grid. -
Page 24: Setting Reactive Power Control
Fixed Reactive Power Mode Setting Reactive Power Control (For Australia) 5.5.1 Setup Fixed Power Factor Mode & Fixed Reactive Power Mode Fixed Power Factor Mode Step 1: Select Inductive Adjustment Var or Capacitive Var according to your local grid regulation. The power range is from -60%Pn ~ 60%Pn. - Page 25 Setting procedure: 5.5.2 This inve er complies with AS/NZS 4777. 2020 for power quality response modes. The 1.AS4777 grid compliance has been set during production, please select corresponding Watt and Setup V- inve er satis es di erent regions of DNSPs' grid connection rules requirements for volt- grid compliance according to state regulation during installation.
- Page 26 Troubleshooting Code Fault Information Code Fault Information Master Self -Test Failed Master Relay Error Master HW Inv Current High Master EEPROM Error Master AC SPD Error Master Temperature High Error Master DC SPD Error Master Temperature Low Error Master Grid NE Voltage Error Lost Communica tion M<->S Master Fan1 Error GFCI Device Error...
- Page 27 Code Fault Information Authority expires DRM0 Error Master Arc Error Master SW PV Current High Please contact your supplier for troubleshooting and remedy...


Need help?
Do you have a question about the R6 Series and is the answer not in the manual?
Questions and answers