
Subscribe to Our Youtube Channel
Related Manuals for Forever Redwood ANNAPOLIS


Summary of Contents for Forever Redwood ANNAPOLIS
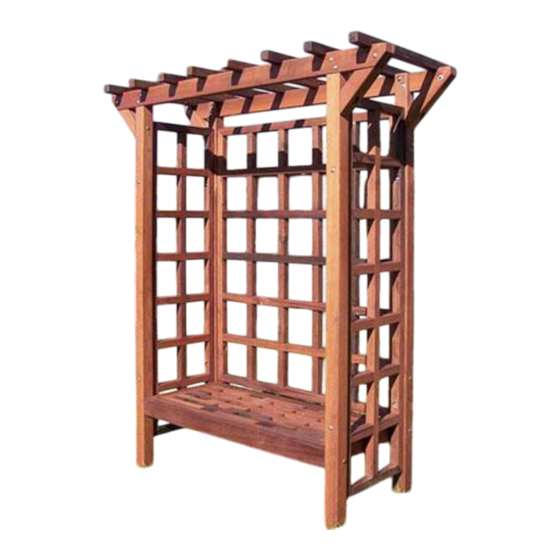
- Page 1 866.332.2403 (Toll Free); 7am-7pm Pacific Time, Monday-Saturday Assembly instructions for: ANNAPOLIS GARDEN ARBORS Annapolis Garden Arbor www.foreverredwood.com...
- Page 2 C & D) Supports ( E, F, G and H) Trellis Walls (I & Trellis wall rear Arched Roof timbers (L & M) Slats (N, O, P, Q, R, S, T & U) Lighthouse Bench (W) Annapolis Garden Arbor www.foreverredwood.com...
- Page 3 ( 5/16” washer and nut and lightly tighten. two holes marked “2”). Tap the bolt all the way into the wood to set it. Then add a washer and nut and lightly tighten. Annapolis Garden Arbor www.foreverredwood.com...
- Page 4 3” 1 bolt 1 bolt x 5” 5/16” x 5” 5/16” Repeat the same Steps, with the other posts, supports and roof timber. When you finish with these steps, you continue assembly the trellis walls. Annapolis Garden Arbor www.foreverredwood.com...
- Page 5 Repeat steps 5 y 6 in the other posts and trellis walls STEP 7: N, O, P, Q, R, S, t & U Attach parts (Slats) to parts L & M (roof timbers), with 16 Deck Screws (8” x 3”) (two deck screws for each one) Annapolis Garden Arbor www.foreverredwood.com...
- Page 6 STEP 8: Attach W (Lighthouse bench) to parts A and B (post), with two bolts (5/16”x 4 ½”) washers and nuts. Repeat the same Step Two Bolts x 4 ½”) /16” Washers and nuts Annapolis Garden Arbor www.foreverredwood.com...
Need help?
Do you have a question about the ANNAPOLIS and is the answer not in the manual?
Questions and answers