Advertisement
Quick Links
Advertisement

Subscribe to Our Youtube Channel
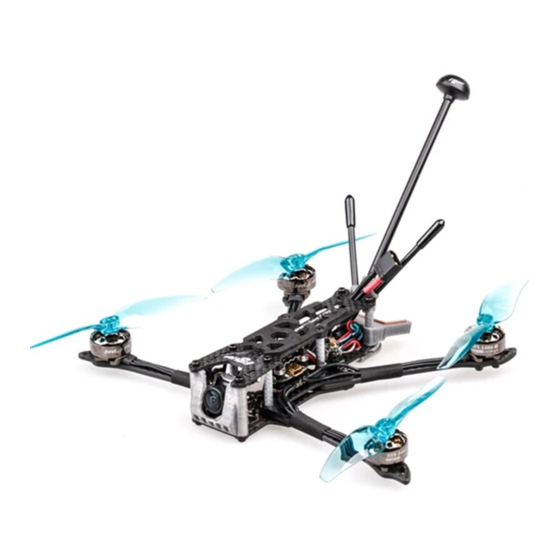
Summary of Contents for Flywoo EXPLORER LR 4
- Page 1 FLYWOO LR4 QUAD ANALOG V1.0 EXPLORER LR 4 Manual Analog Version...
- Page 2 7" long-range quad until it is below 250g take-off weight. With the support of an awesome community on Facebook and Instagram as well as a massive development effort by Flywoo, this concept has seen a lot of improvements that are now all implemented in the Explorer LR!
- Page 3 ” ------Dave_C 2/ Configuration and wiring diagram description EXplorer LR 4 Vista / Nebula pro BNF Specification : Goku F411 V2.1 nano stack 16x16 Dave_C & Nin 1404 V2 2750kv motors Goku M8N mini gps v2.0 Flywoo Finder v1.0...
- Page 4 FLYWOO LR4 QUAD ANALOG V1.0 FPV beginners and long-range enthusiasts! It is recommended installing side carbon fiber plate to increase the strength and stability of the Arm. SOFTSERIAL1 TX is mapped to PIN B06 CLI: RESOURCE SERIAL_TX 11 B06 UART1: TBS/R9M/XM+/DSMX/SBUS receiver...
- Page 5 FLYWOO LR4 QUAD ANALOG V1.0 Frequency table: https://flywoo.net/pages/manual...
- Page 6 FLYWOO LR4 QUAD ANALOG V1.0 3/ Receiver binding TBS NANO 915: When the USB is connected, the green light of the receiver flashes, and then bind according to the picture operation. https://www.youtube.com/watch?v=-iNkVcOLITM&ab_channel=Danimal3D R9MM FCC ACCESS OTA: Make sure your remote control supports ACCESS protocol, then follow the link to register and bind https://www.youtube.com/watch?v=az5hDdNBcjg&t=9s&ab_channel=FrSkyRC...
- Page 7 FLYWOO LR4 QUAD ANALOG V1.0 3/ To write the firmware of the R9MM receiver, you need to remove the R9MM receiver, and then write the firmware by connecting to the S.PORT port. 4/ After both R9M TX and R9MM RX are written into the ACCST firmware.
- Page 8 FLYWOO LR4 QUAD ANALOG V1.0 3-1/ Then set the corresponding serial port and receiver protocol to ensure the normal output of each channel of the receiver. 4/ Mode setting: Set the ARM switch and flight mode switch, AUX* corresponds to the remote control...
- Page 9 FLYWOO LR4 QUAD ANALOG V1.0 5/ Motor test: Unload the propeller, test the rotation direction of the motor, turn on the safety switch, and test the rotation of the motors one by one.
- Page 10 FLYWOO LR4 QUAD ANALOG V1.0 6/ GPS rescue mode 1/ When GPS finds 5 satellites and locks, it will display latitude/longitude/altitude/distance information.
- Page 11 FLYWOO LR4 QUAD ANALOG V1.0 2/ GPS rescue can only be turned on when the flight distance data exceeds 100 meters, otherwise it will fall directly. 3/ After the GPS rescue is turned on, DRONE will turn around and rise gradually and return to the home location.
- Page 12 FLYWOO LR4 QUAD ANALOG V1.0 7/ Bluetooth function...
- Page 13 FLYWOO LR4 QUAD ANALOG V1.0 8/ Finder BUZZER function The buzzer has two modes of operation: 1. It is compatible with the functions of the traditional active buzzer and synchronized with the flight control. 2. When the flight control is normally connected, if the main battery in the flight is powered off, it can still automatically emit 100 dB of drip sound after 30 seconds of power failure, and the LED will emit white light.
- Page 14 FLYWOO LR4 QUAD ANALOG V1.0 2/ BF Configurator will display to enter DFU mode. If it does not enter DFU mode, it may be that the driver is not installed. The driver can be installed using IMPULSE RC software Driver software: https://impulserc.blob.core.windows.net/utilities/ImpulseRC_Driver_Fixer.exe...
- Page 15 FLYWOO LR4 QUAD ANALOG V1.0 commands, Factory CLI LINK: https://flywoo.net/pages/manual 5/ If the command is not restarted after writing the command, please write SAVE and press Enter to save, and the FC will restart 6/ Then all functions of FC return to normal.


Need help?
Do you have a question about the EXPLORER LR 4 and is the answer not in the manual?
Questions and answers