Table of Contents
Advertisement
Quick Links
QUARTZ INVERTER
INSTALLATION MANUAL
WARNING
The information contained in the manual is intended for use by a qualified service technician
familiar with safety procedures and equipped with the proper tools and test instruments
Installation or repairs made by unqualified persons can result in hazards to you and others.
Failure to carefully read and follow all instructions in this manual can result in equipment
malfunction, property damage, personal injury and/or death.
This service is only for service engineer to use.
©2015 Innovair Corporation. All Rights Reserved.
QIN415H2V31
QIN618H2V31
QIN721H2V31
QIN1129H2V31
INVERTER MINI SPLIT SYSTEM
www.innovair.com
Advertisement
Table of Contents

Subscribe to Our Youtube Channel
Related Manuals for innovair QIN618H2V31


Summary of Contents for innovair QIN618H2V31
- Page 1 Failure to carefully read and follow all instructions in this manual can result in equipment malfunction, property damage, personal injury and/or death. This service is only for service engineer to use. ©2015 Innovair Corporation. All Rights Reserved. www.innovair.com...
-
Page 2: Table Of Contents
9.2 Outdoor unit error display ......................28 9.3 Diagnosis and Solution ........................ 28 10 Disassembly Instructions ................Error! Bookmark not defined. 10.1 Indoor unit ................... Error! Bookmark not defined. 10.2 Outdoor unit ................Error! Bookmark not defined. ©2015 Innovair Corporation. All Rights Reserved. www.innovair.com... -
Page 3: Precaution
Be caution when unpacking and from product, turn the breaker off or installing the product. disconnect the power supply cable. Sharp edges could cause injury, be There is risk of electric shock or fire. ©2015 Innovair Corporation. All Rights Reserved. www.innovair.com... - Page 4 A bad connection may cause water leakage. is operated. Keep level even when installing the Do not drink the water drained from ©2015 Innovair Corporation. All Rights Reserved. www.innovair.com...
-
Page 5: Part Names And Functions
Do not use the remote of the batteries have leaked. 2. Part Names And Functions 2.1 Model Names of Indoor/Outdoor units Voltage Capacity Innovair Indoor units 208-230V QIN415H2V31 208-230V QIN618H2V31 208-230V QIN721H2V31 208-230V QIN1129H2V31 ©2015 Innovair Corporation. All Rights Reserved. www.innovair.com... -
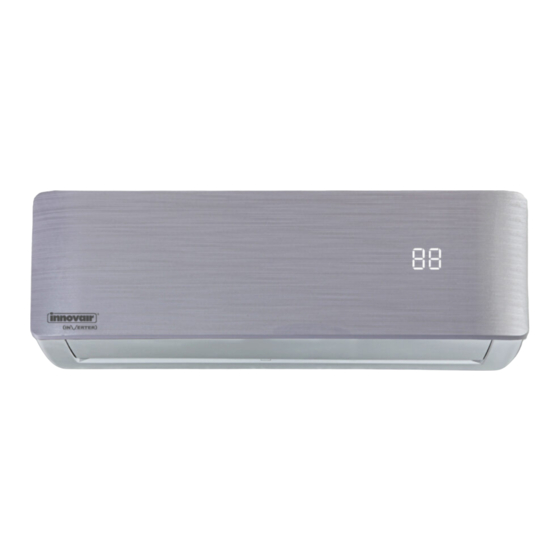
Page 6: Part Names Of Indoor/Outdoor Units
2.2 Part names of Indoor/Outdoor units ©2015 Innovair Corporation. All Rights Reserved. www.innovair.com... -
Page 7: Dimension
3. Dimension 3.1 Indoor Unit Model WxDxH (mm) WxDxH (inch) Mounted plate QIN415H2V31 802x189x297 31.57x7.44x11.69 QIN618H2V31 QIN721H2V31 1080x226x335 42.52x8.90x13.19 QIN1129H2V31 ©2015 Innovair Corporation. All Rights Reserved. www.innovair.com... - Page 8 For Mounted plate A, For Mounted plate B, For Mounted plate C, ©2015 Innovair Corporation. All Rights Reserved. www.innovair.com...
- Page 9 For Mounted plate D, For Mounted plate E, ©2015 Innovair Corporation. All Rights Reserved. www.innovair.com...
-
Page 10: Outdoor Unit
32.40 (inch) 20.87 (inch) 11.42(inch) 845(mm) 363(mm) 702(mm) 874(mm) 549(mm) 325(mm) QIN721H2V31 33.27(inch) 14.29(inch) 27.64(inch) 34.41 (inch) 21.61 (inch) 12.80 (inch) 946(mm) 420(mm) 810(mm) 1030(mm) 673(mm) 403(mm) QIN1129H2V31 37.24(inch) 16.54(inch) 31.89(inch) 40.55(inch) 26.50(inch) 15.87(inch) ©2015 Innovair Corporation. All Rights Reserved. www.innovair.com... - Page 11 HEAT EXCHANGE HEAT (EVAPORATOR) T4 Ambient T1 Room temp. EXCHANGE temp. sensor sensor (CONDENSER) T2 Evaporator temp. sensor GAS SIDE 4-WAY VALVE Accumulator 3-WAY VALVE T5 Discharge temp. sensor COOLING Compressor HEATING ©2015 Innovair Corporation. All Rights Reserved. www.innovair.com...
-
Page 12: Wiring Diagram
● Cooling or heating efficiency drops. ● Moisture in the refrigerant circuit may freeze and block capillary tubing. ● Water may lead to corrosion of parts in the refrigerant system. Therefore, the indoor units and the pipes ©2015 Innovair Corporation. All Rights Reserved. www.innovair.com... - Page 13 0.3Mpa(43.5Psi) to 0.5 the vacuum pump. Confirm that the gauge Mpa(72.5Psi). needle does not move (approximately 5 6). Disconnect the charge set and the charging minutes after turning off the vacuum pump). ©2015 Innovair Corporation. All Rights Reserved. www.innovair.com...
-
Page 14: Adding The Refrigerant After Running The System For Many Years
0.3Mpa(43.5Psi) to 0.5 Mpa(72.5Psi). pressure of the low side), disconnect the Disconnect the charge set, and tighten the 2- charge hose from the 3-way valve’s service port way and 3-way valve’s stem nuts. ©2015 Innovair Corporation. All Rights Reserved. www.innovair.com... -
Page 15: Re-Installation While The Outdoor Unit Need To Be Repaired
1). Connect the charge hose to the charging port cap cylinder, open the 2-way valve and the 3-way Be sure to use a torque wrench to tighten the valve service port cap to a torque 18N.m. ©2015 Innovair Corporation. All Rights Reserved. www.innovair.com... - Page 16 6). Mounted the valve stem caps and the service port. Use torque wrench to tighten the service port cap to a torque of 18N.m. Be sure to check for gas leakage. ©2015 Innovair Corporation. All Rights Reserved. www.innovair.com...
-
Page 17: Operation Characteristics
Please set the vertical air flow louver to its maximum angle (vertically to the floor), and set HIGH fan mode. 3. The optimum performance will be achieved during this operating temperature zone. ©2015 Innovair Corporation. All Rights Reserved. www.innovair.com... -
Page 18: Electronic Function
Swing, Turbo or Silence feature is cancelled. Dispalys ‘ ’ under deforsting operation. Dispalys ‘ ’ when anti-cold air feature is activated under heating mode. 8.3 Main Protection Dispalys ‘ ’ during self clean operation (if ©2015 Innovair Corporation. All Rights Reserved. www.innovair.com... -
Page 19: Operation Modes And Functions
8.4 Operation Modes and Functions 8.4.1 Fan mode 8.4.2.3 Indoor fan running rules ( 1) Outdoor fan and compressor stop. In cooling mode, indoor fan runs all the time and (2) Temperature setting function is disabled, ©2015 Innovair Corporation. All Rights Reserved. www.innovair.com... - Page 20 ---T3> TP3+5 for 5 seconds, the compressor will L+(L+=L+D) stop until T3< TP3-3. L(L=L) L-(L-=L-D) 8.4.2.5 Evaporator temperature protection Auto fan action in heating mode: When Evaporator temperature temp.is less than setting value, the compressor will stop. ©2015 Innovair Corporation. All Rights Reserved. www.innovair.com...
- Page 21 This mode can be chosen with remote controller 8.4.7.3 Timer off. The machine will turn off and the setting temperature can be changed automatically when reaching the setting time. ©2015 Innovair Corporation. All Rights Reserved. www.innovair.com...
- Page 22 (not including swing function) automatically after 3 minutes when power returns. 8.4.14 Follow me (optional) If the memorization condition is forced cooling If the indoor PCB receives the signal which ©2015 Innovair Corporation. All Rights Reserved. www.innovair.com...
- Page 23 Indoor fan speed Indoor fan speed Outdoor fan speed Outdoor fan speed EXV opening angle EXV opening angle Compressor continuous running time Compressor continuous running time Causes of compressor stop. Causes of compressor ©2015 Innovair Corporation. All Rights Reserved. www.innovair.com...
- Page 24 200-2550RPM. multiply 10. The unit is RPM. 0-FF Actual EXV opening EXV opening value=Display value angle turns to decimal value and then ©2015 Innovair Corporation. All Rights Reserved. www.innovair.com...
- Page 25 If the actual value exceeds the continuous range, it will display the maximum running time value or minimum value. Causes of 0-99 For the detailed Decimal display compressor meaning, please stop. consult with engineer Reserve 0-FF ©2015 Innovair Corporation. All Rights Reserved. www.innovair.com...
-
Page 26: Troubleshooting
For other models, please connect discharge resistance (approx.100Ω 40W) or soldering iron (plug) between +, - terminals of the electrolytic capacitor on the contrary side of the outdoor PCB. Note: The picture above is only for reference. The plug of your side may be different. ©2015 Innovair Corporation. All Rights Reserved. www.innovair.com... -
Page 27: Indoor Unit Error Display
2) If the OUTDOOR temperature is higher than -22c for 10 minutes and compressor stop for 1 hour OR outdoor temperature is higher than -5C for 10 minutes, then the unit will return to work. ©2015 Innovair Corporation. All Rights Reserved. www.innovair.com... -
Page 28: Outdoor Unit Error Display
For the location of EEPROM chip, please refer to the below photos. Outdoor PCB Indoor PCB Note: The two photos above are only for reference, it’s may be not same totally with the ones on your side. ©2015 Innovair Corporation. All Rights Reserved. www.innovair.com... -
Page 29: Indoor Unit
Replace the indoor main PCB. Replace the indoor main PCB. * Vs is the voltage between S and N ( for 115V 2014 models) *Vs is the voltage between 2 and 3 ( for 2015 models) ©2015 Innovair Corporation. All Rights Reserved. www.innovair.com... - Page 30 Use a multimeter to test the resistance of the reactor which does not connect with capacitor. The normal value should be around zero ohm. Otherwise, the reactor must have malfunction and need to be replaced. ©2015 Innovair Corporation. All Rights Reserved. www.innovair.com...
- Page 31 Trouble shooting: Check if the connections and Correct the connections. Turn on the power supply is normal? unit when the power supply is good. Indoor main PCB is defective. Replace indoor main PCB. ©2015 Innovair Corporation. All Rights Reserved. www.innovair.com...
- Page 32 Rotate the fan by hand. it solved Check the wiring of fan Correct the connections. motor Measure the voltage for the fan motor from the main Replace the main PCB Replace the fan motor ©2015 Innovair Corporation. All Rights Reserved. www.innovair.com...
- Page 33 Power on and set the unit running in fan mode at high fan speed. After running for 15 seconds, measure the voltage of pin1 and pin2. If the value of the voltage is less than 100V(208~240V power supply)or 50V(115V power supply), the PCB must has problems and need to be replaced. ©2015 Innovair Corporation. All Rights Reserved. www.innovair.com...
- Page 34 ● PCB faulty Trouble shooting: ● Check the connection between temperature Correct the connection sensor and PCB. Measure the resistance Repalce the sensor value of the sensor Replace indoor or outdoor main PCB ©2015 Innovair Corporation. All Rights Reserved. www.innovair.com...
- Page 35 Check cool air blowing out Check if T2 sensor from indoor air outlet Replace indoor PCB. Check leakage of system Repair the leakage and recharge the refrigerant. check blockIng of system and clear the blocking ©2015 Innovair Corporation. All Rights Reserved. www.innovair.com...
- Page 36 Clear the blockage Check the compressor Replace the compressor resistance values Check the connections and Correct the connections or wires replace the wires. Check the reactor Replace outdoor main PCB Replace the outdoor unit ©2015 Innovair Corporation. All Rights Reserved. www.innovair.com...
-
Page 37: Outdoor Unit
Please refer to the solution of 【Fan Check the outdoor fan and the Speed Has Been Out Of Control】 outdoor unit ventilation malfunction Check the compressor resistance Replace the compressor. values Replace the outdoor main PCB ©2015 Innovair Corporation. All Rights Reserved. www.innovair.com... - Page 38 For example: Note: The photos below are only for reference, it’s may be not same totally with the ones on your side. ©2015 Innovair Corporation. All Rights Reserved. www.innovair.com...
- Page 39 ©2015 Innovair Corporation. All Rights Reserved. www.innovair.com...
- Page 40 ©2015 Innovair Corporation. All Rights Reserved. www.innovair.com...
- Page 41 Replace the IPM board and N Check the reactor Replace outdoor main PCB Replace the reactor Remark: Measure the DC voltage between P and N port. The normal value should be around 310V. ©2015 Innovair Corporation. All Rights Reserved. www.innovair.com...
- Page 42 Check the overload Correct the connection. of compressor protector Measure the resistance between the two ports of Replace the OLP. Check refrigerant system the OLP. Is it zero? Replace the outdoor control PCB. ©2015 Innovair Corporation. All Rights Reserved. www.innovair.com...
- Page 43 Please refer to the solution of 【Fan Check the outdoor fan and the Speed Has Been Out Of Control】 outdoor unit ventilation malfunction Check the compressor resistance Replace the compressor. values Replace the outdoor main PCB ©2015 Innovair Corporation. All Rights Reserved. www.innovair.com...
- Page 44 Disconnect the temperature sensor from PCB, measure the resistance value with a tester. Temperature sensors. Room temp.(T1) sensor, Indoor coil temp.(T2) sensor, Outdoor coil temp.(T3) sensor, Outdoor ambient temp.(T4) sensor, Compressor discharge temp.(T5) sensor. Measure the resistance value of each winding by using the multi-meter. ©2015 Innovair Corporation. All Rights Reserved. www.innovair.com...
- Page 45 0.27078 18.7177 3.19183 0.80132 0.26408 17.8005 3.07075 0.77709 0.25757 16.9341 2.95896 0.75373 0.25125 16.1156 2.84421 0.73119 0.24512 15.3418 2.73823 0.70944 0.23916 14.6181 2.63682 0.68844 0.23338 13.918 2.53973 0.66818 0.22776 13.2631 2.44677 0.64862 0.22231 ©2015 Innovair Corporation. All Rights Reserved. www.innovair.com...
- Page 46 20.46 5.157 1.674 109.8 19.69 1.632 104.6 18.96 4.849 99.69 18.26 4.703 95.05 17.58 4.562 90.66 16.94 4.426 86.49 16.32 4.294 82.54 15.73 4.167 78.79 15.16 4.045 75.24 14.62 3.927 71.86 14.09 3.812 ©2015 Innovair Corporation. All Rights Reserved. www.innovair.com...
- Page 47 219.2 53.6 109.4 165.2 276.8 55.4 111.2 222.8 278.6 57.2 168.8 224.6 280.4 114.8 170.6 226.4 282.2 60.8 116.6 172.4 228.2 62.6 118.4 174.2 285.8 64.4 120.2 231.8 287.6 66.2 177.8 233.6 289.4 ©2015 Innovair Corporation. All Rights Reserved. www.innovair.com...
- Page 48 Measure the resistance value of each winding by using the tester. Position Resistance Value ASN98D22UFZ ASM135D23UFZ ATF235D22UMT ATF250D22UMT Blue - Red 0.75 Ω Blue - Black 1.57Ω 1.75 Ω 0.75 Ω Red - Blue ©2015 Innovair Corporation. All Rights Reserved. www.innovair.com...
- Page 49 4: Indoor outdoor Fan Motor Measure the resistance value of each winding by using the tester. Model YKT-32-6-202L YKT-32-6-3L YKT-48-6-206 YKT-63-6-200L Brand Tongde Welling Welling Welling Ω 88.5 Black – Red Main Ω Blue –Black ©2015 Innovair Corporation. All Rights Reserved. www.innovair.com...
- Page 50 70/59 0.82 0.78 0.81 0.86 1.01 75/63 0.86 0.83 0.87 0.91 1.07 80/67 0.93 0.89 0.91 0.96 1.12 12.0 10.0 70/59 75/63 80/67 75 (23.89) 85 (29.44) 95 (35) 105 (40.56) 115 (46.11) ©2015 Innovair Corporation. All Rights Reserved. www.innovair.com...
- Page 51 (-8.33/-10.56) 3.03 2.85 2.53 2.28 2.08 3.25 3.00 2.66 2.54 2.33 3.38 3.15 2.78 2.63 2.49 40.0 35.0 30.0 25.0 20.0 15.0 10.0 57/53 47/43 37/33 27/23 17/13 (13.89/11.67) (8.33/6.11) (2.78/0.56) (-2.78/-5) (-8.33/-10.56) ©2015 Innovair Corporation. All Rights Reserved. www.innovair.com...
- Page 52 The design and speci cations are subject to change without prior notice for product improvement. Consult with the sales agency or manufacturer for details. ©2015 Innovair Corporation. All Rights Reserved. www.innovair.com...
Need help?
Do you have a question about the QIN618H2V31 and is the answer not in the manual?
Questions and answers