Advertisement
Quick Links
Before attempting to connect or operate this product, please read these instructions completely.
PRODUCT INSTRUCTIONS:
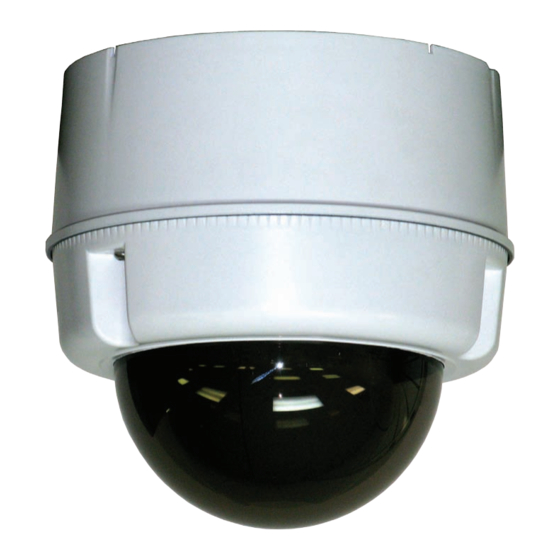
Installation and Operation Instructions for the following model:
JK-SM5C-0 and JK-SM5C-1
Outdoor and Indoor Housing
Manufactured for:
TOSHIBA
by
10-23-2012
81-IN4508R1
Advertisement

Subscribe to Our Youtube Channel
Summary of Contents for Moog Videolarm Toshiba JK-SM5C-0
- Page 1 Before attempting to connect or operate this product, please read these instructions completely. PRODUCT INSTRUCTIONS: Installation and Operation Instructions for the following model: JK-SM5C-0 and JK-SM5C-1 Outdoor and Indoor Housing Manufactured for: TOSHIBA 10-23-2012 81-IN4508R1...
- Page 2 In the event of a breach of the above warranty, Moog Videolarm shall, at its option, repair or replace said product. This is Moog Videolarm’s sole obligation under this warranty. In no event shall Moog Videolarm be liable for any incidental or consequential damages, as defi...
-
Page 3: Electrical Specifications
Electrical Specifications Contents of Box JK-SM5C-O Power 24VAC Class 2 Only JK-SM5T-O JK-SM5C-I JK-SM5T-I 24 VAC Accessories: Heater/ Blower: 40 Watts Camera Power: SEE CAMERA MANUAL Tools Required: Phillips Head Screwdriver ⅝” Allen Wrench English 24 VAC Accesorios: Calentador: 40 watts, Soplador: 40 Watts Energía De la Cámara fotográfica: SEE CAMERA MANUAL Las Herramientas Requirieron: Destornillador Principal Plano Del ⅝”... - Page 4 FOR WALL APPLICATION PACKETS Spacer Packet (1) Mounting Plate Seal wall mount on pendent pipe with teflon tape • Montaje de la pared del sello en la pipa pendiente con la cinta del Teflon • Bâti de mur de joint sur la pipe en suspens avec la bande de teflon •...
- Page 5 Add teflon tape to PMSM5 and thread Remove plug with ⅝” Allen hex tool ( provided) on to adapter • Agregue la cinta del Teflon a PMSM5 y rosque • Quite el enchufe con la llave Allen del ⅝” (provoded) encendido al adaptador •...
- Page 6 FEED cable through wall mount and PMSM5 Tighten cable gland; align notch and boss with mating and into housing boss in housing top (indicated with red dot) • Cable de la ALIMENTACIÓN con el montaje de la • Apriete la glándula de cable; alinee la muesca y el jefe con el jefe de acoplamiento en la tapa de la cubierta (indicada con el punto rojo) pared y PMSM5 y en la cubierta •...
- Page 7 Finish assembly with Pendant or Wall mount (not supplied) • Asamblea del final con el montaje pendiente o de la pared (not supplied) • Finition avec le bâti en suspens ou de mur (not supplied) • Ende mit Pendent oder Wandeinfassung (not supplied) •...
- Page 8 FOR SURFACE MOUNT APPLICATIONS WARNING: Ensure drill is level to avoid damage to the circuit board Drill out (3) mounting holes as shown for # 10 Mount securely to ceiling or mounting hardware (not supplied) surface using the appropriate hardware •...
- Page 9 Housing is designed to mount to 4 ” Drill out appropriate (2) mounting holes electrical box. Mount box securely to ceiling structure • Taladre (2) los agujeros de montaje apropiados • La cubierta se diseña para montar a 4 ” caja eléctrica. Caja del montaje con seguridad a la estructura del techo •...
- Page 10 Toshiba IKWB21A CAMERA ½" Secure camera quick release Tighten hardware and Install (4) ½” spacers to mounting plate with #8 hardware complete wiring center bosses provided • Pletina segura del lanzamiento rápido de la cámara • Instale (4) espaciadores del ½ los” para •...
- Page 11 FOR CONNECTING HEATER AND BLOWER POWER 24VAC power for Heater blower connect to Connect power to (2) input terminals labled “IN” • la energía 24VAC para el soplador del calentador • Conecte la energía con (2) los terminales entrados conecta con el PWB etiquetados “EN”...
- Page 12 An anti glare ring is privided for use with IK-WB21A camera. Press ring around lens as shown. (A drop of Cyanoacrylate adhesive can be used if desired) • Un anillo antideslumbrante privided para el uso con la cámara de IK-WB21A. Presione el anillo alrededor de la lente como se muestra.
- Page 13 NOTE: To change the power input plug (from female to male connector) cut off existing power plug. • NOTA: Para cambiar el enchufe de la entrada de energía (de hembra al conectador masculino) corte el enchufe de energía existente • NOTE : Pour changer la prise de puissance fournie (de la femelle au connecteur masculin) découpez la prise de puissance existante •...
- Page 14 Install security screw, if desired Attach lanyard loop to hook • Instale el tornillo de la seguridad, si está deseado • Ate el lazo del acollador al gancho • Installez la vis de sécurité, si désiré • Attachez la boucle de lanière au crochet •...
-
Page 15: Replacement Parts List
Replacement Parts List Item Part Comments JK-SM5C-0 Number Number Replace Trim Ring Assembly RP0SM5TR Dome and Gasket RPDC5 Housing RP0SM5HG RP95FSP01 1” NPT Plug RP0SM5HB Heater / Blower Unit Heater Bracket RP0SM5BKT Accessory PCB RP0SM5PCB...


Need help?
Do you have a question about the Toshiba JK-SM5C-0 and is the answer not in the manual?
Questions and answers