Advertisement
Quick Links
Advertisement

Related Manuals for York Fitness RB420


Summary of Contents for York Fitness RB420
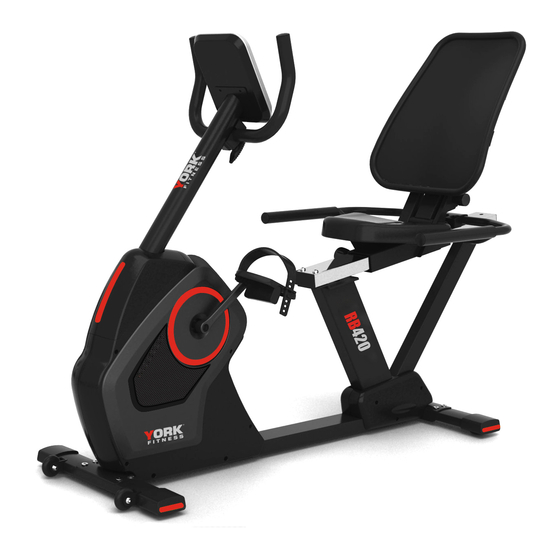
- Page 1 Owner’s Manual RB420 Recumbent Bike Item #YRK53121A...
-
Page 2: Table Of Contents
Table of Contents Safety Information Congratulations on purchasing your exercise equipment from Exploded Diagram Parts List Pre-assembly List Assembly Instructions You have chosen a high quality, safe and innovative piece of equipment as your training partner and we are certain it will keep you motivated on the way to achieving your Console Instructions personal fitness goals. -
Page 3: Safety Information
Always use the correct adjustment • Due to our continuous policy of product development, pin / fixing. York Fitness reserves the right to change • Always check that any pins / fixings are tight and specifications without notice. secure before use and after adjustment. -
Page 4: Exploded Diagram
Exploded Diagram www.yorkfitness.com.au... -
Page 5: Parts List
PARTS LIST Q’ty Description Unit Console set Console Screw HANDLEBAR POST ASSEMBLING Handlebar post set Cable wire (upper) Heart rate cable (upper) Screw Flat washer Handlebar set Handlebar Foam grip End cap Axle set Axle Pulley Hex. screw Bushing Main Frame set Main frame Ring Bearing... - Page 6 Bearing One way bearing Bearing Axle for flywheel Flat washer Pulley Bearing F-10 Star washer F-11 Plastic bushing F-12 Bearing F-13 Plastic bushing Magnetic set Magnetic set Hex. screw Spring washer Flat washer gear box set Cable wire (lower) Idler set Idler Idler wheel Wave washer...
- Page 7 J-12 Handle J-13 Screw J-14 Nylon nut J-15 Flat washer J-16 Screw J-17 Screw Seat slider set Seat slider Nylon nut Spring washer Flat washer Bushing Saddle wheel set Hex. screw Bushing Knob for pad slider K-10 Support for saddle K-11 Spring washer K-12...
- Page 8 Back pad set Back pad Flat washer Screw Seat handlebar set Seat handlebar Foam grip for seat handlebar Cover for seat handlebar Screw Hand pulse End cap Screw Hand pulse wire Front stabilizer set Front stabilizer Front foot cap-L Screw Transportation wheel Nylon nut Flat washer...
- Page 9 Flat washer Hex. screw Screw T-10 Screw T-11 Screwdriver T-12 Hex.wrench T-13 Bushing wrench Chain cover set Chain cover-L Chain cover-R Screw Screw SR03 T-5 Spring Washer 7(2) T-2 Regular Washer 8* 19*2t(8) T-1 Allen Bolt M8*P1.25*20L(8) T-3 Metal cover (1) T-6 Allen Bolt M7*P1.0*30MM (2) T-9 Allen Bolt T-4 Regular Washer 7(2)
- Page 10 SR03 T-5 Spring Washer 7(2) T-2 Regular Washer 8* 19*2t(8) T-1 Allen Bolt M8*P1.25*20L(8) T-3 Metal cover (1) T-6 Allen Bolt M7*P1.0*30MM (2) T-9 Allen Bolt T-4 Regular Washer 7(2) T-7 Regular Washer M8xP1.25x12mm (2) 8* 16*2t(6) T-10 allen bolt M8*P1.25* 35L (2) Screwdriver (1) Box Spanner(1) T-8 Allen Bolt...
- Page 11 Assembly Stage #1 1) Securely fasten the Front stabilizer (P) to the Main frame (E) by using 2 Flat washers (T-2), 2 Allen screws (T-1). 2) Securely fasten the Rear stabilizer (Q) to the Main frame (E) by using 2 Flat washers (T-2), 2 Allen screws (T-1).
- Page 12 Assembly Stage #2 1) Please remove the Allen bolt (B-4) and flat washers (B-5) from the main frame (E). 2) Remove the preinstalled Cover for handlebar post (R-2) from the mast mounting area of the main frame. 3) Connect the Heart rate cable (upper) (B-3) to the Heart rate cable (lower) (E-11). 4) Connect the Cable wire (upper) (B-2) to the Cable wire (lower) (H-1).
- Page 13 Assembly Stage #3 1) Secure the Handlebar (C) to the bracket which is welded on the handlebar post (B) by using1 Mounting clamp (T-3), 2 Flat washer (T-4), 2 Spring washer (T-5), and 2 Screw (T-6). 2) Put the Cover for handlebar (R-3) onto the handlebar. www.yorkfitness.com.au...
- Page 14 Assembly Stage #4 1) Tight the Swing handle (K-23) to the Seat slider (K-1) with Screwdriver. www.yorkfitness.com.au...
- Page 15 Assembly Stage #5 1) Assemble the Saddle (R-1) to the Seat slider (K-1) with 4 Screws (T-8) and 4 Flat washers (T-7). 2) Attach the Seat handlebar (O) to rear mounting plate of Seat Slider using 2 Screws (T-9), 4 Flat washers (T-7), and 2 Screws (T-10).
- Page 16 Assembly Stage #6 1) Slide Back pad (N-1) down on to Back pad slider (M-1) The Back pad (N-1) can be adjusted in different angles. Tighten the two Nuts under the Seat using a screwdriver. In addition, the Slider can be adjusted in horizontal level by losing the Knob ( L-3) www.yorkfitness.com.au...
- Page 17 Assembly Stage #7 1) Please remove the Screw (A-2) from the main frame (E). 2) Connect Cable wire (upper) (B-2) and Heart rate cable (upper) (B-3) to the back of the Computer (A-1). 3) Install the Computer (A-1) to the computer panel which is welded on the top of the handlebar post (B). Fix the computer with 4 screws (A-2).
-
Page 18: Console Instructions
Console Instructions DISPLAY FUNCTIONS ITEM DESCRIPTION Count up – No preset target, Time will count up from 00:00 to maximum 99:59 with each increment being 1 minute. TIME Count down – If training with preset Time, Time will count down from reset to 00:00.Each preset increment or decrement is 1 minute between 00:00 to 99:00. - Page 19 KEY FUNCTIONS ITEM DESCRIPTION Increase resistance level Up (Encoder) Setting selection. Decrease resistance level Down (Encoder) Setting selection. Mode / Enter Confirm setting or selection. Hold on pressing for 2 seconds, computer will reboot and start from user setting. Reset Reverse to main menu during presetting workout value or stop mode.
- Page 20 OPERATION POWER ON Plug in power supply, computer will power on and display all segments on LCD for 2 seconds (Drawing 1). Drawing 1 WORKOUT SELECTION Use UP or DOWN (Encoder) to select workout Manual (Drawing2) → Program (Drawing 3) → User Program (Drawing 4) →...
- Page 21 MANUAL MODE Press START in main menu may start workout in manual mode. 1) Use UP / DOWN (Encoder) to select workout program, choose Manual and MODE / ENTER to get into. 2) Use UP or DOWN (Encoder) to preset TIME (Drawing 7), DISTANCE (Drawing 8), CALORIES (Drawing 9), PULSE (Drawing 10) and press MODE / ENTER to confirm.
- Page 22 PROGRAM MODE 1) Use UP / DOWN (Encoder) to select workout program, choose Beginner mode and press MODE / ENTER to get into. 2) Use UP / DOWN (Encoder) to select program 1~12 and press MODE / ENTER (Drawing 12) to get into.
- Page 23 WATT MODE UP / DOWN (Encoder) MODE / ENTER 1) Use to select workout program, choose WATT and press to get into. UP or DOWN (Encoder) 2) Use to preset WATT target. (Drawing 16) UP or DOWN (Encoder) 3) Use to preset TIME.
-
Page 24: Warranty
Please read and retain this manual as it will assist with identification for parts and service. ----------------------------------------------------------------------------------------------- ------------------------------------------------------------ BOYLES FITNESS warrants the York RB420 Recumbent Bike to be free from defects in material and workmanship under normal use and service conditions. - Page 25 BFE Warranty Policy – January 1 , 2019 1. When purchased from an authorised BFE distributor the BFE warranty shall guarantee that all framework and components of your product are free from faulty manufacture. All faulty framework and components will be repaired or replaced as set out in this policy.
- Page 26 BFE will have the option to repair or replace any product which requires attention under the warranty. NOTE: Lifetime* refers to the warranty coverage of the units expected service life. NOT the lifetime of the purchaser. Servicing/Spare Parts: As with any mechanical equipment general maintenance should be performed on a regular basis by an authorised retailer or service technician.
Need help?
Do you have a question about the RB420 and is the answer not in the manual?
Questions and answers