Friedrich VRP Series Service & Parts Manual
Hide thumbs
Also See for VRP Series:
- Installation & operation manual (41 pages) ,
- Service and parts manual (95 pages) ,
- Service manual (65 pages)

Related Manuals for Friedrich VRP Series


Summary of Contents for Friedrich VRP Series
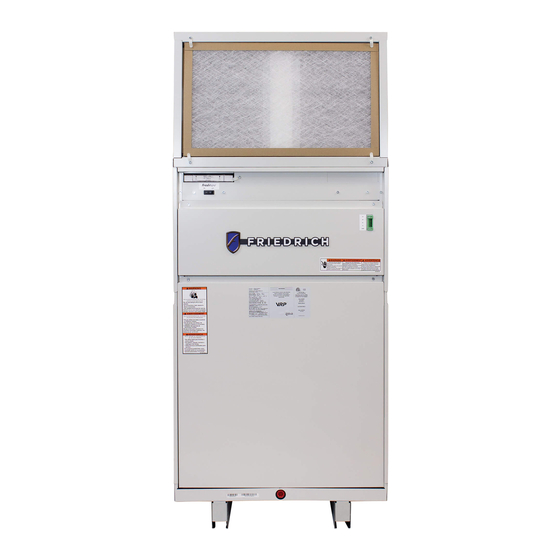
- Page 1 Model Revision Voltage VRP12K 12,000 VRP12R 12,000 95511401_00...
-
Page 2: Table Of Contents
TABLE OF CONTENTS INTRODUCTION‑ Part Load Performance‑ VRP® Variable Speed System vs. Fixed‑speed System‑ FreshAire™ Conditioned Fresh Air‑ Reheat Coil - Augments VRP’s Dehumidification Capability- Important Safety Information‑ Personal Injury Or Death Hazards‑ Model and Serial Number Identification Guides- SPECIFICATIONS‑ Cooling Performance‑... - Page 3 TABLE OF CONTENTS Wall Controller Installation 12 & 24k‑ Return Air Door Installation12 & 24k‑ FreshAire System Set‑up and Operation‑ Final Installation Checklist‑ TROUBLESHOOTING- VRP Troubleshooting Map‑ Required Tools‑ Required Skills‑ Troubleshooting by Rule Out Methodology‑ Diagnostic Codes‑ Check For Power‑ Diagnostic Code (Temperature Based)‑...
- Page 4 12k E Models (Unit Assembly)‑ 12K E Models Basepan‑ 12K E Models (230v Electrical Controls)‑ 12K E Models (265v Electrical Controls)‑ Accessories‑ ACCESSORIES‑ Wall Controller/ Thermostat‑ Installation Accessories and Descriptions- ‑ APPENDIX Thermistor Values‑ CUSTOMER SATISFACTION and QUALITY ASSURANCE‑ FRIEDRICH AUTHORIZED PARTS DEPOTS‑...
-
Page 5: Introduction
In sum, The Friedrich VRP offers a significant value to all parties involved in the design and construction of a new building. Because of the simpler and more straightforward nature of the packaged design, and the ability t o potentially downsize or eliminate additional make up air and humidity control equipment, the VRP reduces much of the headache and complexity facing the design engineer. -
Page 6: Part Load Performance
INTRODUCTION Part Load Performance Exceptional Efficiencies with VRP®: Partial load conditions prevail for the majority of the time. VRP’s Precision Inverter® compressor can operate down to 40% of rated capacity or up to 120% matching the unit’s output to the actual demand of the space and, therefore, only consumes the energy that is required. -
Page 7: Vrp® Variable Speed System Vs. Fixed-Speed System
INTRODUCTION VRP® Variable Speed System vs. Fixed-speed System Low Ambient Heat Pump Performance: Variable speed technology enables VRP units to supply continuous hot air in heat pump mode even at low outdoor ambient temperatures. This reduces strip heat usage resulting in exceptional savings with VRP units when compared with Figure 103(Cost Savings) Precise Temperature &... -
Page 8: Freshaire™ Conditioned Fresh Air
INTRODUCTION FreshAire™ Conditioned Fresh Air FreshAire is a dedicated fresh air system that brings in up to 70 CFM of outdoor air into the VRP® unit. The FreshAire system uses one fan (up to 35 CFM) or two fans (up to 70 CFM) (depending on outdoor air CFM volume requirements) to bring in fresh outside air into the the unit. -
Page 9: Reheat Coil - Augments Vrp's Dehumidification Capability
INTRODUCTION Reheat Coil - Augments VRP’s Dehumidification Capability Temperature differences are not the only source of discomfort in a living space. Humidity also plays a big role — especially in climates that tend to be both hot and humid. The air conditioning industry’s focus on humidity issues has elevated the importance of dehumidification. -
Page 10: Important Safety Information
INTRODUCTION Important Safety Information The information in this manual is intended for use by a qualified technician who is familiar with the safety procedures required for installation and repair, and who is equipped with the proper tools and test instruments required to service this product. - Page 11 DO NOT OPERATE EQUIPMENT DURING ACTIVE STAGES OF CONSTRUCTION To ensure proper operation, Friedrich requires that all equipment is not operated during active construction phases. This includes active stages of completing framing, drywalling, spackling, sanding, painting, flooring, and moulding in the equipment’s designated conditioning space.
-
Page 12: Personal Injury Or Death Hazards
INTRODUCTION Personal Injury Or Death Hazards WARNING AVERTISSEMENT ADVERTENCIA Do not remove, disable or Ne pas supprime, désactiver ou No eliminar, desactivar o pasar SAFETY bypass this unit’s safety contourner cette l´unité des por alto los dispositivos de devices. Doing so may cause dispositifs de sécurité, faire vous seguridad de la unidad. -
Page 13: Model And Serial Number Identification Guides
INTRODUCTION Model and Serial Number Identification Guides Figure 107 (Model Identification Guide) 17 12 M 00001 YEAR OF MANUFACTURE NUMERIC SEQUENCE 17 = 2017 18 = 2018 FIRST UNIT OF EACH MONTH = 00001 19 = 2019 20 = 2020 21 = 2021 22 = 2022 MONTH OF MANUFACTURE 01 = JANUARY... -
Page 14: Specifications
SPECIFICATIONS Cooling Performance Model VRP12K / VRP12R Cooling Performance Data (Cooling Standards: 95°F DB/75°F WB outdoor, 80°F DB/67°F WB indoor) Voltage 230/208 Cooling Btu (Rated) 11,500 Cooling Btu (Min. – Max) 5,400– 16,000 Outdoor Operating 55 – 115 Range (°F) Power (W) SEER 17.4... -
Page 15: 12K/24K Extended Cooling Performance Data
6565 7155 7740 8330 8915 85˚ 90˚ 6250 6815 7370 7930 8490 5940 6470 7000 7530 8060 95˚ 100˚ 5620 6125 6630 7135 7640 5305 5785 6260 6735 7215 105˚ 4990 5440 5890 6340 6790 110˚ SPECIFICATIONS 115˚ 4675 5095 5520 5940 6365... -
Page 16: And 24K Extended Heating Performance Data
Model: Capacity Input Amps Capacity Input Amps Capacity Input Amps Model: Indoor Temperature Dry Bulb (F) VRP12 (Btu/h) (Btu/h) (Btu/h) VRP07 (˚F) 60˚ 70˚ 80˚ (˚F) Capacity Input Amps Capacity Input Amps Capacity Input Amps 7551 7100 6609 1014 17˚ (Btu/h) (Btu/h) (Btu/h) -
Page 17: Air Flow Data -12K And 24K
0.017 0.11 CAUTION: If the Friedrich designed plenum and louver combinations are not used, the louver/duct design must be evaluated to insure the total pressure drop does not exceed the maximum allowable limits. Figure 204 (12K and 24K Air Flow Data) -
Page 18: Electrical Data
SPECIFICATIONS Electrical Data Voltage Heater Heating Heater ID Blower MOP / Model Watts Amps Amps Blower MOCP Amps VRP12K 2500 8530 11.2 0.34 0.42 14.0 2030 6980 10.2 0.38 0.42 3400 11601 15.1 0.34 0.42 18.9 2780 9480 13.8 0.38 0.42 5000 17060... -
Page 19: 12K And 24K Unit Dimensional Data
SPECIFICATIONS Dimensions 12k and 24k Unit Dimensional Data VRP Dimensional Data 12K DUCT FLANGE VRP Dimensional Data 24K Model VRP12K VRP12R VRP24K VRP24R Dimensions (W x D x H) 26 1/8" x 25 1/8" x 52" 26 1/8" x 25 1/8" x 62" Shipping Dimensions (W x D x H) 28 1/8"... -
Page 20: 12K And 24K Unit Installation Dimensional Data
SPECIFICATIONS 12k and 24k Unit Installation Dimensional Data Typical Closet Closet Wall Plenum Access Panel VRP Chassis Louver and hinge (24k shown) Model VRP12K VRP12R VRP24K VRP24R Outside Wall- Cut Out Dimensions Dimensions (W x H) " x 32 " For VRPXWPA-8 or VRPXWPA-14 Plenum Dimensions (W x H) "... -
Page 21: 12K And 24K Accessories Dimensional Data-Louvers & Return Access Door
SPECIFICATIONS 12k and 24k Accessories Dimensional Data-Louvers & Return Access Door 12K Louvered Grille 24K Louvered Grille 24K LOUVERED GRI LL E 12K LOUVERED GRILLE 1 1/8 in 29 1/8 in 1 1/8 in 30 ○ 29 1/8 in 2 3/4 in 30 ○... -
Page 22: 12K And 24K Accessories Dimensional Data - Wall Plenums
28 3/4 in. 7 1/2 in. 7 1/2 in. 1 1/2 in. high " 6 3/4 in. • The use of a Friedrich wall 27 5/8 in. plenum is required for 19 in. installation. Refer to this 33 3/8 in. 32 in. -
Page 23: Operation
OPERATION Sequence Of Operations Cooling Sequence: The wall thermostat provides the temperature set point as well as the current dry bulb temperature and relative humidity. Upon a call for cooling, the compressor modulates based on the difference between room temperature and set point. As cooling demand decreases the compressor will modulate to a minimum speed. -
Page 24: Freshaire Control
OPERATION FreshAire Control • To engage the FreshAire system, flip the switch into the ‘ON’ position. FRESH AIR CONTROL FIGURE 301 (... -
Page 25: Component Identification
OPERATION Component Identification • Indoor Coil • Indoor Blower • Outdoor Coil • Outdoor Fan • Compressor • Electric Heater • Electronic Expansion Valve (EEV) • 4-Way Reversing Valve • Reheat Solenoid • FreshAire Fan • Pressure Switches • Condensate Base Pan Heaters (optional) COMPONENT IDENTIFICATION FIGURE 302 (... -
Page 26: Indoor Coil 12 & 24K
OPERATION Component Identification Indoor Coil 12 & 24k 12k (1 ton) 24k (2 ton) Slab coil “A” frame coil Monitored by 2 thermistors COMPONENT IDENTIFICATION-INDOOR COIL FIGURE 303 (... -
Page 27: Indoor Blower
OPERATION Component Identification Indoor Blower • BLDC • Counter Clockwise Impeller • 600-1300 RPM COMPONENT IDENTIFICATION-INDOOR BLOWER FIGURE 304 (... -
Page 28: Outdoor Coil
OPERATION Component Identification Outdoor Coil • Monitored by 1 thermistor COMPONENT IDENTIFICATION-OUTDOOR COIL FIGURE 305 (... -
Page 29: Outdoor Fan
OPERATION Component Identification Outdoor Fan • BLDC • Variable Speed= 600-1000 RPM COMPONENT IDENTIFICATION-OUTDOOR FAN FIGURE 306 (... -
Page 30: Compressor
OPERATION Component Identification Compressor • 12k (1 Ton) • Inverter Rotary • Single Rotor • 24k (2 Ton) • Inverter Rotary • Dual Rotor COMPONENT IDENTIFICATION-COMPRESSOR FIGURE 307 (... -
Page 31: Electric Heater
OPERATION Component Identification Electric Heater • 2.5 / 3.4 / 5.0 / 7.5 / 10.0 Kilowatt variations • Located directly behind the indoor coil and in front of the indoor blower COMPONENT IDENTIFICATION-ELECTRIC HEATER FIGURE 308 (... -
Page 32: Electronic Expansion Valve
OPERATION Component Identification Electronic Expansion Valve • Three sizes • • • • Used to control superheat • Controlled by magnetic pulse COMPONENT IDENTIFICATION-ELECTRONIC EXPANSION VALVE FIGURE 309 (... -
Page 33: 4-Way Reversing Valve
OPERATION Component Identification 4-Way Reversing Valve • 208/230v • Reversing valve assembly COMPONENT IDENTIFICATION-4-WAY REVERSING VALVE FIGURE 310 (... -
Page 34: Remaining Components (Side View)
OPERATION Component Identification Remaining Components (Side View) FreshAire Fan* Reheat Exit Solenoid* In-series Low Pressure Switch High Pressure Switch *if equipped COMPONENT IDENTIFICATION-REMAINING COMPONENTS FIGURE 311 (... -
Page 35: Vrp Control Boards
OPERATION Component Identification VRP Control Boards COMPONENT IDENTIFICATION-VRP CONTROL BOARDS FIGURE 312 (... -
Page 36: Main Controller
OPERATION Component Identification Main Controller • Relay and Control Logic (VRP Brain) • Diagnostic Logic • Communicates with: • Wall Controller (WC) • Heater Board • Driver Board • Handles/Controls: • Electronic Expansion Valve (EEV) • Pressure Switches • Indoor Blower •... -
Page 37: Compressor Control
OPERATION Component Identification Compressor Control • The rate of change of the space conditions is assessed periodically and the compressor frequency is changed accordingly. • Unless diagnostically conflicted, the compressor will operate in some capacity any time there is a cooling or heat pump demand. -
Page 38: Eev Control
OPERATION Component Identification EEV Control • The Electronic Expansion Valve is used to maintain superheat during both cooling and heat pump operation. • Superheat (cooling) = Compressor Suction (T3) – IDC Cool Inlet (T1) • Superheat (heat pump) = Compressor Suction (T3) – ODC Heat Inlet (T7) •... -
Page 39: Reheat Control
OPERATION Component Identification Reheat Control • The VRP models, when equipped with Evaporator Coil the reheat option, increase room dehumidification capability. • The reheat option has a coil installed Reheat Coil downstream of the main indoor evaporator coil. • When activated, a portion of the compressor discharge gas is routed through the reheat coil. -
Page 40: Installation
Please carefully read and follow the installation insrtructions and safety warnings detailed in this manual. All applicable na- tional and local mechanical and electrical codes should be followed and take precedence over any Friedrich requirements or reccomenedations regarding installation applications detailed in this manual. -
Page 41: Vrp Required Minimum Clearances
72” must be kept. FENCE MAJOR OBSTRUCTIONS The the example pictured above is for reference only and does not represent all possible installations. Please contact Friedrich Air Conditioning for information regarding effects of other installation arrangements. INSTALLATION CLEARANCE FIGURE 401 (... -
Page 42: Installation Orientations 12&24K
INSTALLATION Installation Orientations Installation Orientations 12&24k OUTSIDE GRILL OUTSIDE WALL Min. ” Min. ” 25 1/8” 31 1/8” ( Min. Required Inside Closet Dimension ) Min. ” Required 26 1/8” Access Door Cut Out = ” 32” ( Min. Required Inside Closet Dimension ) Front Installation-Top View OUTSIDE GRILL OUTSIDE WALL... -
Page 43: Exterior Wall Opening Dimensions 12 &24K
INSTALLATION Exterior Wall Opening Dimensions 12 &24k Exterior Wall Opening Dimensions Exterior Wall Rough Opening Dimensions Unit Width Heigth Compact 28 1/8" 32 1/4" (VRPXWPA-*) Standard 28 1/8" 42 1/4" (VRPXWPB-*) Compact (A) configuration is for 12000 BTU units only. Standard (B) configuration is for 24000 BTU and 12000 BTU units. -
Page 44: Interior(Closet) Wall Opening Dimensions 12 & 24K
INSTALLATION Interior (Closet) Wall Opening Dimensions Interior(Closet) Wall Opening Dimensions 12 & 24k Return Air Access Door Wall Cut-Out 30” 69¾” NOTE: To maintain ease of removal and serviceability, if the unit is installed on a platform ensure that the total height of the unit from the floor does not exceed the height of the interior rough opening. -
Page 45: Preliminary Plumbing
INSTALLATION Preliminary Plumbing Preliminary Plumbing Standard (Front Install) The image to the right shows the installation closet for the standard (Front Install) configuration (where the wall plenum is opposite the service access door). A drainage system is required, and should provide a “P-trap”... -
Page 46: Wall Plenum Installation 12 & 24K
INSTALLATION Wall Plenum Installation Wall Plenum Installation 12 & 24k Parts included in Plenum kit: Outside Plenum (Part A) Divider (Part C) Inside Plenum (Part B) Baffle (Part D) Field Supplied Parts: Sealant, attachment screws, and flashing Flashing are field supplied. Silicone sealant is recommended. Sealant VRPXWPA-8, VRPXWPB-8 adjust for walls up to 4”- 8”... - Page 47 INSTALLATION Wall Plenum Installation Wall Plenum Installation 12 & 24k Step 1 - Outside Wall Plenum Half Note: The wall plenum is not designed to carry any structural load. A load bearing header must be built above the rough opening. 1) Prepare the rough opening.
- Page 48 INSTALLATION Wall Plenum Installation Wall Plenum Installation 12 & 24k Step 2 - Inside Wall Plenum Half Caulk all 8 Flange Corners and Unused Holes Detail A 1) Apply sealant to all 4 flange corners and unused holes. See Detail A. 2) Place the baffle (Part D) on the approprate baffle mounting tabs located on the inner perimeter of the inside plenum half based on unit size (Compact/Standard).
- Page 49 INSTALLATION Wall Plenum Installation Wall Plenum Installation 12 & 24k Step 3 - Inside Wall Plenum (cont.) Detail B Note: Do not place any screws, fasteners, or penetrating holes through the top or bottom of the plenum assembly. 1) Drill pilot holes on the interior of the inside plenum half (Part B) as show in Detail B. Pilot holes should be located approxiamtely 4”...
-
Page 50: Louver Installation
INSTALLATION Installation of the louver PRIOR to Wall Plenum Installation Hold the louver up to the Outside Wall Plenum Part A and line up the louver top with the very top edge of the 3/4” flange. Line up Louver Installation the Wall Plenum holes with the threaded holes in the louver, install and tighten the 8 screws. -
Page 51: Final Wall Plenum And Architectual Louver Installation
INSTALLATION Final Wall Plenum and Architectural Louver Installation Final Wall Plenum And Architectual Louver Installation Plenum Divider Extension Plate Installed Plenum Divider Extension Plate (Baffle) into Full Plenum Assembly Ensure that the weather strip is undamaged and provides a continuous seal around the inner perimeter of the plenum. -
Page 52: Unit Installation
INSTALLATION Unit Installation Unit Installation Unit Placement Prior to Installation (Front-Install Configuration) All louver, plenum, rough plumbing, and rough wiring steps must be complete prior to final installation of the air conditioning chassis. (Unit Installation FIGURE 411... -
Page 53: Final Unit Installation Overview
INSTALLATION Final Unit Installation Overview Final Unit Installation Overview Unit Final Placement - Front Install Ensure that power if off at the junction box feeding power to the air conditioner until all process steps are completed. Move the unit from the shipping base and onto the installation site. Insert the unit’s rear extension into the wall plenum. -
Page 54: Side Configuration Installation
INSTALLATION Side Configuration Installation Side Configuration Installation Left Install VRP Unit Left Install VRP Unit Prepared for Installation in Closet (Fully Installed) For side-install applications, place the unit adjacent to the closet and slide it in. Then, slide the unit backwardward into the plenum. -
Page 55: Unit Drain Installation
INSTALLATION Final Drain Installation Unit Drain Installation Unit Drain Installation ” ” ” NOTE: Failure to follow the following procedures may result in serious property damage. A field supplied secondary condensate pan may be required. Check with local codes. In case of drainage system blockage, the unit base will allow excess water to flow out of the unit through the plenum and the architectural louver. -
Page 56: Ductwork Installation
INSTALLATION Ductwork Installation Ductwork Installation Supply air duct connection is the responsibility of the installer and should be installed per industry best practices. Sheet metal or duct board may be used for the transition from the discharge to 10” or larger diameter flexible ducting. -
Page 57: Wall Controller Installation 12 & 24K
INSTALLATION Wall Controller Installation 12 & 24k Wall Controller Installation Proper Wiring of VRP unit to Wall Controller Use shielded and stranded CAT 6 cable with twisted pairs to wire the wall controller. Use the wire colors with the corresponding terminals on the wall controller to the VRP unit as shown in the table below. Table shows which wire pairs go with which screw terminal. - Page 58 Wall Controller Installation INSTALLATION Wall Controller Installation 12 & 24k Electrical Installation Electrical Installation Remove and discard hole knock-out from the side of the unit (Detail A) Remove and discard hole knock-out from the side of the unit (Detail A) Remove the Electrical Access Panel (Detail B) to expose the Incoming Power Terminal Block (Detail C, see below)
- Page 59 INSTALLATION Electrical Installation Electrical Installation Electrical Installation 12 & 24k Remove and discard hole knock-out from the side of the unit (Detail A) Remove and discard hole knock-out from the side of the unit (Detail A) Remove the Electrical Access Panel (Detail B) to Remove the electrical access panel to expose the incoming expose the Incoming Power Terminal Block Ppwer terminal block (Detail C, see below)
-
Page 60: Return Air Door Installation12 & 24K
INSTALLATION Return Air Door Installation Return Air Door Installation12 & 24k Option 1 Option 2 The door panel is supported along one edge by the provided hinge. The opposite edge has a latch which secures the panel to the adjacent framed structure. The kit contains hinge bracket for mounting the door with the return air openings low (shown in option 1) or high (shown in Option 2) on the door. -
Page 61: Freshaire System Set-Up And Operation
INSTALLATION FreshAire™ System Set-Up and Operation FreshAire System Set-up and Operation FreshAire™ System Set-Up and Operation DETA IL If equipped with the FreshAire™ System, the unit will come with a FreshAire filter and blank-off plate. Detail A Remove the blank-off plate prior to turning the unit on. If equipped with the FreshAire™... -
Page 62: Final Installation Checklist
Authorized single (F option) outdoor air fan and filter, or dual Friedrich Warranty Service Company in the area (D option) outdoor air fans and filters. for future reference if necessary. -
Page 63: Troubleshooting
TROUBLESHOOTING VRP Troubleshooting Map Review Design Check Application Verify Installation Troubleshoot System Figure 501 (Troubleshooting Map) -
Page 64: Required Tools
TROUBLESHOOTING Required Tools Meters = Need to Read • s t l – Test Leads: • Volts D/C – 600 • Needle Point • Ohms – 10k Megaohms. • 1000V/20A Rated 410a Gauge Manifold Figure 502 (Troubleshooting Tools) -
Page 65: Required Skills
TROUBLESHOOTING Required Skills 1. Patience – Revolutionary digital communicating technology has replaced older analog components. 2. Patience – Needle point leads will save you time when backprobing molex connectors. 3. Patience – Know who to call when you need help. 4. -
Page 66: Diagnostic Codes
TROUBLESHOOTING Diagnostic Codes Diag Description Diagnostic Check point Solution Return Air sensor (T8) is open or shorted Indoor Coil Cool Inlet sensor (T1) is open or shorted Outdoor Coil Heat Inlet sensor 1. An open or shorted sensor is (T7) is open or shorted detected by the A/D conversion Discharge Air sensor (T9) value residing at the upper or lower... - Page 67 TROUBLESHOOTING Diagnostic Codes Diag Description Diagnostic Check point Solution 1. Ensure that the IDB is connected properly and is operational. 1. Lower than usual IDB speeds. 2. Check that there is no blockage in the The Indoor Coil at sensor T1’s location duct work.
- Page 68 TROUBLESHOOTING Diagnostic Codes Diag Description Diagnostic Check point Solution 1. The Compressor has run at low frequency ( less than 35 Hz) for 200 con‑ Compressor Lubrication secutive minutes and requires lubrication 2. Monitors if the FMC has not provisioned Provisioned is defined as both switch and Unit Not Provisioned Replace with provisioned the FMC...
- Page 69 TROUBLESHOOTING Diagnostic Codes Diag Description Diagnostic Check point Solution Compressor Start Failure Compressor speed synchronization issue "1. Check compressor wires for damage. for 10 consecutive seconds. 2. Verify connection of the compressor wires. 3. Replace motor board. 4. Replace compressor." Compressor Current Limiter The total compressor current exceeds a "This error should automatically correct...
-
Page 70: Check For Power
TROUBLESHOOTING Check For Power 1. If the wall controller does not light up, ensure the unit has power. 2. Check the electrical circuit breaker. 3. Check the units disconnect. 4. Check power at L1 and L2. -
Page 71: Diagnostic Code (Temperature Based)
TROUBLESHOOTING Diagnostic Code (Temperature Based) Temperature Based: Thermistors (sensors) modify VDC and is interpreted through the FMC. Errors indicate a possible issue with the sensor, FMC, or the sensor has detected an abnormal condition (or an out of parameter value). Solution: Sensor error, FMC error, or abnormal condition. -
Page 72: R-410A Sealed System Repair
R-410A SEALED SYSTEM REPAIR The following is a list of important considerations when working with R‑410A equipment WARNING R‑410A pressure is approximately 60% higher than R‑22 pressure. Refrigeration system under high pressure 2. R‑410A cylinders must not be allowed to exceed 125 F, they may leak or rupture. -
Page 73: Refrigerant Charging
R-410A SEALED SYSTEM REPAIR Refrigerant Charging WARNING RISK OF ELECTRIC SHOCK Unplug and/or disconnect all electrical power to the unit before performing inspections, maintenances or service. Failure to do so could result in electric shock, serious injury or death. WARNING Refrigeration system under high pressure service this equipment. -
Page 74: Undercharged Refrigerant Systems
R-410A SEALED SYSTEM REPAIR Undercharged Refrigerant Systems An undercharged system will result in poor performance (low pressures, etc.) in both the heating and cooling cycle. Whenever you service a unit with an undercharge of refrigerant, always suspect a leak. The leak must be repaired before charging the unit. -
Page 75: Overcharged Refrigerant Systems
R-410A SEALED SYSTEM REPAIR Overcharged Refrigerant Systems Compressor amps will be near normal or higher. Noncondensables can also cause these symptoms. To confirm, remove some of the charge, if conditions improve, system may be overcharged. If conditions don’t improve, Noncondensables are indicated. Whenever an overcharged system is indicated, always make sure that the problem is not caused by air flow problems. -
Page 76: Restricted Refrigerant System
R-410A SEALED SYSTEM REPAIR Restricted Refrigerant System Troubleshooting a restricted refrigerant system can be difficult. The following procedures are the more common problems and solutions to these problems. There are two types of refrigerant restrictions: Partial restrictions and complete restrictions. A partial restriction allows some of the refrigerant to circulate through the system. -
Page 77: Sealed System Method Of Charging/ Repairs
R-410A SEALED SYSTEM REPAIR Sealed System Method of Charging/ Repairs WARNING CAUTION BURN HAZARD FREEZE HAZARD Proper safety procedures must be followed, Proper safety procedures must be followed, and proper protective clothing must be worn and proper protective clothing must be worn when working with a torch. -
Page 78: Compressor Replacement
R-410A SEALED SYSTEM REPAIR Compressor replacement 1. Be certain to perform all necessary electrical and refrigeration tests to be sure the compressor is actually defective before WARNING replacing. ELECTRIC SHOCK HAZARD Disconnect power to the unit before 2. Recover all refrigerant from the system though the process servicing. -
Page 79: Compressor Replacement -Special Procedure In Case Of Compressor Burnout
R-410A SEALED SYSTEM REPAIR Compressor Replacement -Special Procedure in Case of Compressor Burnout 1. Recover all refrigerant and oil from the system. WARNING 2. Remove compressor,and EEV. 3. Flush evaporator, condenser and all connecting tubing with dry HIGH PRESSURE HAZARD nitrogen or equivalent. -
Page 80: Replace The Reversing Valve
R-410A SEALED SYSTEM REPAIR Replace The Reversing Valve WARNING HIGH PRESSURE HAZARD NOTICE Sealed Refrigeration System contains refrigerant and oil under high pressure. FIRE HAZARD Proper safety procedures must be followed, and proper protective clothing must be worn electically unsafe conditions which could cause moderate when working with refrigerants. -
Page 81: Replace The Condensor Coil 12K/24K
R-410A SEALED SYSTEM REPAIR Replace The Condensor Coil 12k/24k 1. Remove unit from the closet. 2. Ensure no charge is left in the system, evacuating according to EPA standards. 3. Remove the lower left panel. 4. Remove six mount screws on rear of condenser coil. 5. -
Page 82: Replace The Evaporator Coil 12K/24K
R-410A SEALED SYSTEM REPAIR Replace The Evaporator Coil 12k/24k 1. Remove unit from closet. 2. Ensure no charge in the system, evacuating according to EPA standards. 3. Remove top panel. 4. Remove duct collar. 5. Remove left side upper panel. NOTE: The 24k units utilize 2 evaporator coils and 2 reheat coils if applicable. -
Page 83: Replace The Evaporator Coil Drain Pan
R-410A SEALED SYSTEM REPAIR Replace The Evaporator Coil Drain Pan 1. Remove unit from the closet. 2. Remove top panel. 3. Remove filter. 4. Remove left and right upper side panels 5. Carefully lift coil up a few inches and support to avoid damage to tubing. 6. -
Page 84: Component Testing
COMPONENT TESTING Electronic Expansion Valve (EEV) WARNING WARNING BURN HAZARD CUT/SEVER HAZARD Proper safety procedures must be followed, Be careful with the sharp edges and corners. Wear protective clothing and gloves, etc. and proper protective clothing must be worn when working with a torch. Failure to do so could result in serious injury. -
Page 85: Reversing Valve Description And Operation
COMPONENT TESTING Reversing Valve Description And Operation The Reversing Valve controls the direction of refrigerant flow to the indoor and outdoor coils. It consists of a pressure‑operated, main valve and a pilot valve actuated by a solenoid plunger. The solenoid is energized during the heating cycle only. -
Page 86: Testing The Reversing Valve Solenoid Coil
COMPONENT TESTING Testing The Reversing Valve Solenoid Coil WARNING ELECTRIC SHOCK HAZARD Disconnect power to the unit before servicing. Failure to follow this warning could result in serious injury or death. The solenoid coil is an electromagnetic type coil mounted on the reversing valve and is energized during the operation of the compressor in the heating cycle. -
Page 87: Checking The Reversing Valve
COMPONENT TESTING Checking The Reversing Valve WARNING HIGH PRESSURE HAZARD Sealed Refrigeration System contains refrigerant and oil under high pressure. Proper safety procedures must be followed, and proper protective clothing must be worn when working with refrigerants. Failure to follow these procedures could result in serious injury or death. -
Page 88: Testing The Reheat Valve Solenoid Coils
COMPONENT TESTING Testing The Reheat Valve Solenoid Coils Check the Reheat Valve: 1. Turn off high voltage electrical power to unit. 2. Disconnect yellow wire from Reheat Solenoid relay and red wire from L2 Terminal block. 3. Check for electrical continuity through the coil. If you do not have continuity replace the coil. -
Page 89: Touch Test Chart : To Service Reversing Valves
COMPONENT TESTING Touch Test Chart : To Service Reversing Valves NORMAL FUNCTION OF VALVE NOTES: VALVE OPERATING * TEMPERATURE OF VALVE BODY CONDITION ** WARMER THAN VALVE BODY POSSIBLE CAUSES CORRECTIONS Cool Normal Cooling Cool *TVB as (2) as (1) Cool Normal Heating Cool... -
Page 90: Compressor Checks
COMPONENT TESTING Compressor checks WARNING WARNING BURN HAZARD ELECTRIC SHOCK HAZARD Proper safety procedures must be followed, Disconnect power to the unit before and proper protective clothing must be worn servicing. Failure to follow this warning when working with a torch. could result in serious injury or death. -
Page 91: Check The Outdoor Fan 12K
COMPONENT TESTING Check the Outdoor Fan 12k Caution: Wait for 2 minutes after removing power from the unit to allow capacitors to discharge before handling the Inverter Board, disconnecting leads or connectors, or taking ohm readings. 1. Remove Power from the Unit. 2. -
Page 92: Replace The Outdoor Fan 12K
COMPONENT TESTING Replace the Outdoor Fan 12k Caution: Wait for 2 minutes after removing power from the unit to allow capacitors to discharge before handling the MCS board, disconnecting leads or connectors, or taking ohm readings. 1. Remove unit from closet. 2. -
Page 93: Check The Indoor Fan
COMPONENT TESTING Check the Indoor Fan 1. Check termnials at terminal block for secure connection/ broken terminals. 3. Check for 10 vdc at green and brown wires at white molex connector for indoor fan motor next fmc board. 4. If line voltage is present at terminal block, but 10vdc is not present at white connecor, indoor fan motor is bad. 5. -
Page 94: Replace The Indoor Fan 12K/24K
COMPONENT TESTING Replace the Indoor Fan 12k/24k 1. Remove unit from closet. 2. Unplug yellow and white molex connectors. Unlock connector by pulling down on red tab and squeezing connector. 3. Remove wires from clips back to fan 4. Remove duct collar by removing screws 5. -
Page 95: Check The Heating Elements
COMPONENT TESTING Check the Heating Elements Figure 611 (Heating Elements) THERMAL DISC COIL 1 COIL 2 COIL 3 THERMAL DISC FUSE LIMITER 265V 10 KW MULTI 5000KW 2500 KW 2500 KW OPEN 165°F OPEN 240°F CLOSE 135°F 12.35 OHMS +‑5% 24.71 OHMS +‑... -
Page 96: Replace The Heating Elements
COMPONENT TESTING Replace the Heating Elements 1. Remove duct work as neccesary to gain access to top panel. 2. Remove top panel. 3. Disconnect input wires (2 places) 4. Remove Mounting screws (4 places). 5. Lift heater element assembly straight up and out of unit. Figure 612 (Heating Elements) -
Page 97: Driver Board Pin Out
COMPONENTS TESTING Driver Board Pin out Figure 613 (Driver Board) 1. Check power in L1 and L2. 2. Communication to Rs‑485 board. 3. Power and signal out. 4. Compressor UVW out. 5. Remove power from the unit and allow two minutes for capacitors to discharge before attempting to take continuity readings. -
Page 98: Driver Board Replacement
COMPONENTS TESTING Driver Board Replacement 1. Remove power from the unit and wait 2 minutes for capacitor bleed off before removing leads or handling the Driver board. 2. Remove front panel. 3. Disconnect electrical connections and tag wires. 4. Remove 4 9/64 allen head bolts. 5. -
Page 99: Check Rs-485 Converterboard
COMPONENT TESTING Check RS-485 ConverterBoard 1. Check for 12vdc vdc coming in from power supply board. 2. Check for V+ and V‑ signals going to Driver Board. 12 VDC + In 12 VDC- In V- To driver Board V+ to Driver Board Figure 615 (RS-485 Board) -
Page 100: Fmc Board Pin Out
COMPONENTS TESTING Fmc Board Pin Out Return IC Coil Supply ID Coil Inlet Wall Controller Heat Cond RS 485 RS485 - Y Board RS485 - Z RS485 -A RS485 - B RS232 - TX Heater Board RS232 - RX Reheat Relay Power Low Pressure Switch High pressure Switch Outdoor... -
Page 101: Fmc Board Replacement
COMPONENTS TESTING FMC Board Replacement Note: When ordering the part, the model and serial number must be supplied for flashing of board. 1. Disconnect all electrical connections, tag and identify wires. 2. Carefully compress pcb standoffs and remove board. 3. Install new board. Figure 617 (FMC Board) -
Page 102: Heater Board Pin Out
COMPONENTS TESTING Heater Board Pin Out 12VDC+ in 12 VDC- in L1 in Heater Reversing Valve Element L1 Out Reversing Valve L2 in L1 in L2 Heater L2 In Element Out Figure 618 (Heater Board) 1. Check for 12 vdc between VCC 1 and ground. 2.Check for line voltage at L1 and L2, reversing valve L1 and L2, 3. -
Page 103: Heater Board Replacement
COMPONENTS TESTING Heater Board Replacement 1. Ensure power is removed from the unit. 2. Disconnect all wires and identify. 3.Remove board by carefully compressing standoffs. 4. Install new board. Figure 619 (Heater Board) -
Page 104: Thermistor Locations
COMPONENTS TESTING Thermistor Locations T8 (Return Air Sensor) The T8 (Return Air Sensor) is located behind the Air Filter. Figure 620 (Thermistor Locations) -
Page 105: T1 (Evaporator Coil In Sensor)
COMPONENTS TESTING Thermistor Locations T1 (Evaporator Coil In Sensor) T5 (Evaporator Coil Out Sensor) To access the evaporator coil sensors remove the top panel and right side upper panel. The top sensor is T5 ( Evap. Coil Out) The lower sensor is T1 ( Evap. Coil In.) Figure 621 (Thermistor Locations) -
Page 106: T9 (Discharge Air Sensor)
COMPONENTS TESTING Thermistor Locations T9 (Discharge Air Sensor) The T9 discharge air sensor is located inside the blower housing. Figure 622 (Thermistor Locations) -
Page 107: T2 (Liquid Heat)
COMPONENTS TESTING Thermistor Locations T2 (Liquid Heat) T6 (Liquid Cool) The T2 and T6 Sensors are located in the outdoor section attached to the EEV ( Electronic Expansion Valve). The pipe going into the bottom of the EEV is T2 (Liquid Heat). The one on the pipe leaving the side of the EEV is T6 (Liquid Cool). -
Page 108: T10 (Outdoor Ambient Air Sensor)
COMPONENTS TESTING Thermistor Locations T10 (Outdoor Ambient Air Sensor) The T10 (Outdoor Ambient Air Sensor) is located in the outdoor section, mounted on the bottom of the indoor blower housing. Figure 624 (Thermistor Locations) -
Page 109: T7 (Cond. Coil Sensor)
COMPONENTS TESTING Thermistor Locations T7 (Cond. Coil Sensor) T7 (Cond. Coil Sensor is attached to the outdoor coil on the right hand side. This sensor is attached to the coil roughly halfway down on one of the return bends. Figure 625 (Thermistor Locations) -
Page 110: T4 (Comp. Discharge)
COMPONENTS TESTING Thermistor Locations T4 (Comp. Discharge). The T4 (Comp. Discharge) is attached to the compressor discharge line. Figure 626 (Thermistor Locations) -
Page 111: T3 (Comp. Suction)
COMPONENTS TESTING Thermistor Locations T3 (Comp. Suction). The T3 (Comp. Suction) is attached to the compressor suction line. Figure 627 (Thermistor Locations) -
Page 112: Thermistor Part Numbers
COMPONENTS TESTING Thermistor Part numbers VPH and VRP revision –A/B models used a sensor pack for the indoor and outdoor sensors. VRP revision –C and newer all use single sensors. THe Single sensors are compatible with the sensor pack. The sensor packs are no longer available and all VRP/VPH models will use the single sensors going forward. The part numbers for the individual sensors are listed here. -
Page 113: Replace Transformer
COMPONENTS TESTING Replace Transformer 1. Remove Unit from closet if unit has front install configuration. 2. Remove right side panel. 3. Remove 4 screws from transformer box. 4. Trace wiring back to fuse block located on the bottom of the control box. 5. -
Page 114: Check High And Low Pressure Limit Switches
COMPONENTS TESTING Check High and Low Pressure Limit Switches 1. Ensure power is removed from the unit. 2. At fmc board disconnect the (J8) and(J7) wires. 3. The switches are wired together in series and if either switch is faulty you will get an error code 14. 4. -
Page 115: Check Basepan Heater
COMPONENTS TESTING Check Basepan Heater CONDENSER BASEPAN HEATER T-STAT 1. Remove power from unit. 2. Check fuses for continuity. Replace fuses as required. 3. Check Basepan inline TSTAT. Open On Rise (Normally Closed)Open Temperature: 50°F ± 5°F Close Temperature: 32°F ± 11°F Strip back heatshrink and check that switch is closed if below 32 degrees and open if above 50 degrees 4. -
Page 116: Updating Vrp Firmware
UPDATING VRP FIRMWARE FMC Manual Update Process - Remove SD Card from FMC load on a PC or Laptop NOTE: Ensure Power is OFF! You will need an SD Card Reader to complete this step... -
Page 117: Fmc Update Process - Delete Current Files Or Format Sd Card
UPDATING VRP FIRMWARE FMC Update Process – Delete Current Files or Format SD Card... -
Page 118: Fmc Update Process - Unzip Files To Blank Or Formatted Sd Card
UPDATING VRP FIRMWARE FMC Update Process – Unzip Files to Blank or Formatted SD Card “xx” will be replaced by two numbers, indicating the software version. Example: 3.2.0.55 – Version 55 Open FMC Zip Folder Select all Files Copy to your SD Card Drive... -
Page 119: Fmc Update Process - Verify Files On Sd Card Drive
UPDATING VRP FIRMWARE FMC Update Process – Verify Files on SD Card Drive FMC Update Process – Loading new Firmware Insert SD Card into FMC and apply power. The FMC Firmware load will confirm by showing three green downward cascading LEDs:... -
Page 120: Wiring Diagrams
WIRING DIAGRAMS 12K BTU (E MODELS) (208/230V 2.5, 3.4, & 5.0 KW) Figure 801 (Wiring Diagram) -
Page 121: Btu (E Models) (265V 2.5, 3.4, & 5.0 Kw)
WIRING DIAGRAMS 12K BTU (E MODELS) (265V 2.5, 3.4, & 5.0 kW) Figure 802 (Wiring Diagram) -
Page 122: Parts Catalog
PARTS CATALOG 12k E Models (Unit Assembly) Figure 901... - Page 123 PARTS CATALOG Figure 902 12k E Models (Refigeration Without Reheat) 34.1 33.1...
- Page 124 PARTS CATALOG Figure 903 12k E Models (Refigeration With Reheat) 35 36 34.1 33.1...
- Page 125 PARTS CATALOG 12k E Models (Blower Module) Figure 904...
- Page 126 PARTS CATALOG 12k E Models (Outdoor Fan) Figure 905...
- Page 127 PARTS CATALOG 12k Main Diagram E Models ITEM Manuf. ID PART PART DESCRIPTION USED ON MODEL NUMBER 100020 80083565 ASSY SOUND INSUL LEFT COND 12K PREPAINTED 080150 80080198 FLANGE DISCHARGE VPI PREPAINTED 080160 80080197 FLANGE DISCHARGE VPI PREPAINTED 010224 80083669 BRACKET FILTER HOLDER PREPAINTED 080130...
- Page 128 PARTS CATALOG 12k Main Diagram E Models ITEM Manuf. ID PART PART DESCRIPTION USED ON MODEL NUMBER 030120‑02 25018305 REVERSING VALVE BODY 030230 25063605 REVERSING VALVE SOLENOID 230V COIL 030230 25063705 REVERSING VALVE SOLENOID 265V COIL 080030 80081308 ASSY INSUL REAR EVAP VRP PREPAINTED 080110 80081521...
- Page 129 PARTS CATALOG Figure 906 12k E Model Fresh Air...
- Page 130 PARTS CATALOG 12k E Model Fresh Air ITEM op-find PART PART DESCRIPTION USED ON MODEL NUMBER 100041 80083140 FRESH AIR FILTER MERV 8 6X6X1 FRESH AIR 050050 80083434 GASKET OUTDOOR AIR FILTER FRESH AIR 050010 80530100 ASSY FRESH AIR BOX VRP FRESH AIR 050030 80083490...
- Page 131 PARTS CATALOG Figure 907 12K E Models Basepan Non- Illustrated Parts Heat Shield- aluminum Tape...
-
Page 132: 12K E Models Basepan
PARTS CATALOG 12k E Models Basepan ITEM op-find PART PART DESCRIPTION USED ON MODEL NUMBER 010030 80083672 BASEPAN VRP PREPAINTED 010273 80080144 HEATER TUBE SERVICE KIT VR‑BH‑K, VR‑BH‑R 010240 80080104 COND./SLINGER DRAIN PAN VR BH‑S 010272 80080260 DRAIN PAN SUMP LOOP VR‑BH‑K, VR‑BH‑R SLOTTED VRP12/24 010260... -
Page 133: E Models (230V Electrical Controls)
PARTS CATALOG Figure 908 12K E Models (230v Electrical Controls) Non-Illustrated Parts SENSOR EVAP COIL OUT ORG SENSOR RETURN AIR TEMP WHT SENSOR EVAP COIL IN GRN SENSOR DISCHARGE AIR YEL SENSOR COMPRESSOR DISCHARGE BLK SENSOR COMPRESSOR SUCTION BLU SENSOR HEATING LIQUID BRW SENSOR COOLING LIQUID ORG SENSOR CONDENSER OUT PNK SENSOR AMBIENT RED... - Page 134 PART DESCRIPTION USED ON MODEL NUMBER 060010 80083814 CONTROL BOX 060171 80080227 HEATER BOARD STAND OFF 060070 63900141 PCBA, FRIEDRICH HEATER CONTROLLER (FHC) 060120 80083723 BLOCK TERM 3 POLES X 6QC TAB#2‑ 010279 80083438 FUSE HOLDER BASEPAN HEAT 010281 80060030 FUSE 3AB 1.0A, 400VDC, TIME DELAY...
-
Page 135: E Models (265V Electrical Controls)
PARTS CATALOG 12K E Models (265v Electrical Controls) Figure 909 Non-Illustrated Parts SENSOR EVAP COIL OUT ORG SENSOR RETURN AIR TEMP WHT SENSOR EVAP COIL IN GRN SENSOR DISCHARGE AIR YEL SENSOR COMPRESSOR DISCHARGE BLK SENSOR COMPRESSOR SUCTION BLU SENSOR HEATING LIQUID BRW SENSOR COOLING LIQUID ORG SENSOR CONDENSER OUT PNK SENSOR AMBIENT RED... - Page 136 USED ON MODEL NUMBER 060010 80083814 CONTROL BOX 060171 80080227 HEATER BOARD STAND OFF 060070 63900141 PCBA, FRIEDRICH HEATER CONTROLLER (FHC) 060120 80083723 BLOCK TERM 3 POLES X 6QC TAB#2‑ 010279 80083438 FUSE HOLDER (BASEPAN HEAT) BASEPAN HEAT 010281 80060030 FUSE 3AB 1.0A, 400VDC, TIME DELAY...
-
Page 137: Accessories
PARTS CATALOG Accessories ITEM PART NUMBER PART DESCRIPTION USED ON MODEL VRPXWPA‑8 Wall Plenum with VRPXALA for 4” to 8” thick wall VRP12 VRPXWPB‑8 Wall Plenum with VRPXALB for 4” to 8” thick wall VRP12, VRP24 VRPXWPA‑14 Wall Plenum for with VRPXALA for 8” to 14” thick VRP12 wall VRPXWPB‑14... -
Page 138: Accessories
ACCESSORIES Wall Controller/ Thermostat VRP Wall Controller / Thermostat Options Friedrich offers two types of control options for VRP units: - Standard Wall Controller (Wired), VRPXWCT - Energy Management Wall Controller with an Occupancy Sensor - Wired, VRPXEMRT2 - Wireless, VRPXEMWRT2... -
Page 139: Installation Accessories And Descriptions
ACCESSORIES Installation Accessories and Descriptions Installation Accessories and Descriptions Louvers Accessory Description Compatible Model(s) VPAL2 VRP07 Architectural louver - 30˚ Blade angle VRSC2 Architectural louver - 30˚ Blade angle - Custom color (Special order) VRP07 VRPXALA VRP12 Architectural louver - 30˚ Blade angle VRPXSCA Architectural louver - 30˚... - Page 140 ACCESSORIES Installation Accessories and Descriptions Installation Accessories and Descriptions Wall Controllers and Accessories Accessory Description Compatible Model(s) VRPXWCT Wired standard VRP wall controller VRPXEMRT2 Wired energy management wall controller VRPXEMWRT2 Wireless (to the unit) energy management controller VRPXEMRT2LC Wired energy management wall controller with lighting control (Requires EMROS) VRPXEMRT2HC Wired energy management wall controller with Hilton Connect Room (RTM) compatibility EMOCT...
-
Page 141: Appendix
APPENDIX Thermistor Values RESISTANCE TEMP RESISTENCE (K Ohms) TOLERANCE % All thermistors in the VRP units CENTR have a 10k ohm Resistence at 77° F. 210.889 225.548 240.224 6.50 6.51 178.952 190.889 202.825 6.25 6.25 The chart below shows the value vs. 151.591 161.325 171.059... - Page 142 FRIEDRICH will repair or replace, at its option, any defective part without charge for the part. Replacement parts are warranted for the remainder of the original warranty period.
-
Page 143: Customer Satisfaction And Quality Assurance
CUSTOMER SATISFACTION and QUALITY ASSURANCE Friedrich is a conscientious manufacturer, concerned about customer satisfaction, product quality, and controlling warranty costs. As an Authorized Service Provider you play a vital role in these areas. By adhering to the policies and procedures you provide us with vital information on each warranty repair you complete. This information is used to identify product failure trends, initiate corrective action, and improve product quality, thereby further reducing warranty expenses while increasing customer satisfaction levels.
Need help?
Do you have a question about the VRP Series and is the answer not in the manual?
Questions and answers