Advertisement
Table of Contents
- 1 Table of Contents
- 2 Safety and Warnings
- 3 Introducing Your Dishwasher
- 4 Detergent and Rinse Aid
- 5 Loading the Dishwasher
- 6 Using the Dishwasher
- 7 Wash Cycle Table
- 8 Energy-Saving and Environmental Tips
- 9 Maintaining Your Dishwasher
- 10 Cleaning and Special Maintenance
- 11 Troubleshooting
- 12 Installation
- 13 Manufacturer's Warranty
- 14 Customer Care
- Download this manual
Advertisement
Table of Contents

Related Manuals for Elba EDW125WH1


Summary of Contents for Elba EDW125WH1
- Page 1 Dishwasher EDW125X1 EDW125WH1 User Guide and Installation Instructions Code: 0120504920B...
-
Page 2: Table Of Contents
Contents Safety and warnings ...2 Introducing your dishwasher ...3 Detergent and rinse aid ...5 Loading the dishwasher ...6 Using the dishwasher ...8 Wash cycle table ...9 Energy-saving and environmental tips ...10 Maintaining your dishwasher...10 Cleaning and special maintenance ...11 Troubleshooting ...12 Installation ...13... -
Page 3: Safety And Warnings
Do not install this appliance outdoors, even if a roof covers the area. Do not lean or sit on the door when it is open, as it may overturn the dishwasher. The door should not be left in the open position as this presents a tripping hazard. -
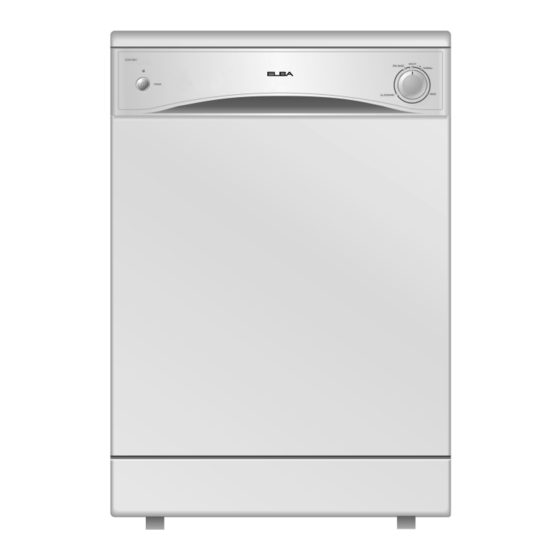
Page 4: Introducing Your Dishwasher
Introducing your dishwasher Specifications Width Depth Height Capacity Mains water pressure Power voltage Total absorbed power Control panel Power button Power light 60 cm 60 cm 85 cm 12 standard place settings 0.03 - 0.6 MPa 220-240 V~ 50 Hz... - Page 5 Interior view Upper rack Rack height adjuster Top spray arm Lower rack Bottom spray arm Washing filter Detergent and rinse aid dispenser...
-
Page 6: Detergent And Rinse Aid
Dishwasher detergents are strongly alkaline. They can be extremely dangerous if swallowed. Avoid contact with the skin and eyes and keep children away from the dishwasher when the door is open. Check that the detergent dispenser is empty after completion of the wash cycle. -
Page 7: Loading The Dishwasher
Loading the dishwasher Before placing the dishes in the dishwasher, remove the larger food particles to prevent the filter from becoming clogged. If the pots and pans have baked-on food that is extremely hard to remove, soak them before washing. - Page 8 Adjusting the upper rack To adjust the height of the upper rack, rotate the caps located on the end of the rack guide rails to the side, remove the rack completely and refit using the alternate set of wheels (see Fig. A). Adjust the upper rack to the higher level to allow more height in the lower rack for large items Cutlery basket...
-
Page 9: Using The Dishwasher
If this is the case, the detergent dispenser must be refilled (See “Detergent and rinse aid”). Press the Power button, and the light will turn off. Rotate the dial in a clockwise direction to the desired cycle setting. Turn the dishwasher back on using the Power button. Fig C. Stop marks... -
Page 10: Wash Cycle Table
Wash cycle table Cycle Types of load Heavy Very dirty dishes, pots and pans. (Not to be used with delicate items.) Normal Normal load of dirty dishes, pots (AS/NZS 2007) and pans. Standard daily cycle. Rinse For dishes that only require a rinse and dry. -
Page 11: Energy-Saving And Environmental Tips
Do not lay the dishwasher on its right-hand side Never lift the dishwasher by the door handle Cleaning the door seals. One of the reasons that odours form in the dishwasher is that food gets trapped in these seals. Periodic cleaning with a sponge will prevent this. -
Page 12: Cleaning And Special Maintenance
(made up of the semicircular filter "A" and the fine filter "B" in Fig. E) at least once a month, using a soft brush. To reassemble, insert the entire assembly into the dishwasher, locate it correctly in its seat and press downwards. -
Page 13: Troubleshooting
Troubleshooting If the dishwasher does not function or does not function correctly, check the following before calling for assistance. Problem The dishwasher does not start. The dishwasher does not fill with water. The dishwasher does not drain. The dishes are not clean. -
Page 14: Installation
2. Level the dishwasher by screwing the feet in or out. The dishwasher should not be inclined more than 2 degrees, to ensure proper performance. - Page 15 When connecting the drain hose to a sink trap with a drain hose spigot, it is important that the drain hose is supported to the height of the bench (see Diagram 3). Ensure the drain spigot has a minimum hole size of 15 mm and that it has been drilled out. 5.
- Page 16 Minimum cabinet clearances Note: ensure that any bare wood surrounding the dishwasher is sealed with an oil-based paint or moisture-proof polyurethane, to prevent possible steam damage.
-
Page 17: Manufacturer's Warranty
Manufacturer’s Warranty You automatically receive a 2 year Manufacturer’s Warranty with the purchase of this Product covering parts and labour for servicing within the country of purchase. Fisher & Paykel undertakes to: Repair or, at its option, replace without cost to the owner either for material or labour any part of the Product, the serial number of which appears on the Product, which is found to be defective within TWO YEARS of the date of purchase. -
Page 18: Customer Care
Customer Care Check the things you can do yourself. Refer to your User Guide and check: your appliance is correctly installed you are familiar with its normal operation If after checking these points you still need assistance please refer to the following: If you need assistance...* Call your Fisher &... - Page 19 Under our policy of continuous product improvement, these specifications may change at any time. You should therefore check with your Dealer to ensure this booklet correctly describes the product currently available. www.fisherpaykel.com Elba Dishwasher user guide Published: 10/2006 Part No. 599349 A...
Need help?
Do you have a question about the EDW125WH1 and is the answer not in the manual?
Questions and answers