Table of Contents
Advertisement
Quick Links
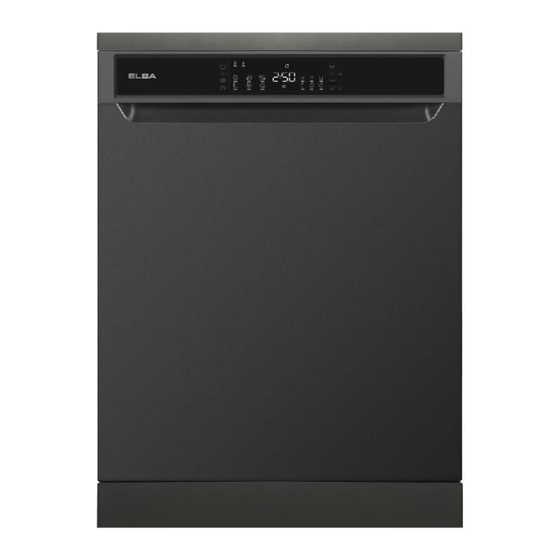
DISHWASHER
MODEL: EDW-M1368D(BS)
Owner's Manual
Please read this manual carefully before
operating your set.
Retain it for future reference.
Record model number and serial number
of the set.
See the label attached on the set and
quote this information to your dealer
when you require service.
For The Warranty Terms & Conditions, Please Refer To Warranty Certificate
Advertisement
Table of Contents

Related Manuals for Elba EDW-M1368D(BS)


Summary of Contents for Elba EDW-M1368D(BS)
- Page 1 DISHWASHER MODEL: EDW-M1368D(BS) Owner’s Manual Please read this manual carefully before operating your set. Retain it for future reference. Record model number and serial number of the set. See the label attached on the set and quote this information to your dealer when you require service.
-
Page 2: Table Of Contents
CONTENTS SAFETY PRECAUTIONS …………..………………………………………………………………………………………….1-3 INSTALLATION ………………………………………………………………………………………………………………………4-5 PRODUCT OVERVIEW ……………………………………………………………………………………………………………….6 BEFORE USING THE APPLIANCE …………………………………………………………………………………………7-10 LOADING YOUR DISWASHER ………………………………………………………………………………………….11-13 5.1 ALTERNATIVE BASKET LOADS……………………………………………………………………………………………14-15 CONTROL PANEL DESCRIPTIONS …………………………………………………………………………………….15-18 6.1 CHANGING A PROGRAM………………………………………………………………………………………………..…... 18 6.2 CANCELLING A PROGRAM……………………………………………………………………………………………………..19 6.3 SWITCHING THE MACHINE OFF……………………………………………………………………………………………..19 6.4 BUZZER SOUND………………………………………………………………………………………………………………….. -
Page 3: Safety Precautions
REMOVE ALL PACKING MATERIALS FROM THIS PRODUCT BEFORE USING IT. THIS APPLIANCE MUST BE INSTALLED IN LEVEL. PLEASE ENSURE THE ELECTRICITY SUPPLY TO THIS APPLIANCE IS DISCONNECTED BEFORE INSTALLING. Please read this instruction carefully. It is advisable to keep this instruction manual in a safe place for future reference. - Page 4 INSTALLATION WARNINGS • Choose a suitable and safe place to install your machine. • Only original spare parts should be used with the machine. Unplug the machine before installation. Your machine must only be installed by an authorised service agent. Installation by anyone other than an authorised agent may cause your warranty to be void.
- Page 5 For models with the automatic door-opening system, when the Energy Save option is active, the door will open at the end of a program. To prevent damage to your dishwasher, do not attempt to close the door for one minute after it has opened. For effective drying, keep the door open for 30 minutes after a programme has ended.
-
Page 6: Installation
2. INSTALLATION MACHINE POSITIONING • When positioning the machine, place it in an area where dishes can be easily loaded and unloaded. Do not put the machine in an area where the ambient temperature falls below 0°C. • Read all warnings located on the packaging before removing the packaging and positioning the machine. - Page 7 DRAIN HOSE Connect the water drain hose directly to water drain hole or to the sink outlet spigot. This connection should be minimum 50 cm and maximum 110 cm from floor. IMPORTANT: Items will not wash properly if a drain hose longer than 4m is used. ELECTRICAL CONNECTIONE WARNING: Your machine is set to operate at 220-240 V~.
-
Page 8: Product Overview
3. PRODUCT OVERVIEW 1. Top panel 2. Upper basket 3. Upper spray arm 4. Lower basket 5. Lower spray arm 6. Metal Filters 7. Rating plate 8. Control panel 9. Detergent and rinse-aid dispenser 10. Salt dispenser 11. Upper Basket Track Latch 12. -
Page 9: Before Using The Appliance
4. BEFORE USING THE APPLIANCE Preparing your dishwasher for first use • Make sure the electricity and supply water specifications match the values indicated in the installation instructions for the machine. • Remove all packaging material inside the machine. • Set the water softener level. •... - Page 10 Only add water to the salt compartment on first use. • Use softener salt specifically produced for use in dishwashers. • When you start your dishwasher, the salt compartment is filled with water, therefore put the softener salt in prior to starting your machine. •...
- Page 11 • Press the program button “ ” to set the desired level. Each press of the program button increases the level. Once level 6 has been reached, the next press returns the level to 1. • The last selected water hardness level is stored in the memory by turning the machine off with the On/Off button “...
- Page 12 Rinse-aid usage • The rinse aid helps to dry the dishes without streaks and stains. Rinse-aid is required for stain-free utensils and clear glasses. The rinse aid is automatically released during the hot rinse phase. • If rinse aid dosage setting set too low, whitish stains remains on dishes and dishes do not dry and washed clean.
-
Page 13: Loading Your Diswasher
5. LOADING YOUR DISHWASHER For best results, follow these loading guidelines. Loading the household dishwasher up to the capacity indicated by the manufacturer will contribute to energy and water savings. Manual pre-rinsing of tableware items leads to increased water and energy consumption and is not recommended You can place cups, glasses, stemware, small plates, bowls, etc. - Page 14 Upper Basket 1. Height adjustment Turn the Rail Stop Clips, at the ends of the rails, to the sides to open them (as shown in the image below), then pull out and remove the basket. Change the position of the wheels, then reinstall the basket to the rail, making sure to close the Rail Stop Clips.
- Page 15 3. Height Adjustable Rack The foldable racks in the upper basket enable the placement of large items such as pots and pans. Each section can be folded separately. The foldable racks can be either raised up or folded down. 4. Lower Basket Two Folding Racks The folding racks on the lower basket allow for the placement of larger items, such as pots and pans.
-
Page 16: Alternative Basket Loads
5.1 ALTERNATIVE BASKET LOADS: LOWER BASKET UPPER BASKET INCORRECT LOADS Incorrect loading can cause poor washing and drying performance. Please follow the recommendations for a good performance result. -
Page 17: Control Panel Descriptions
Unsuitable items for dishwashing • Cigarette ashes, candle leftovers, polish, paint, chemical substances, iron-alloy materials. • Forks, spoons and knives with wooden, bone, ivory or nacre coated handles; glued items, items soiled with abrasive, acidic or base chemicals. Temperature-sensitive plastics, copper or tin coated containers. •... - Page 18 On/Off Button Switch the machine on by pressing the On/Off button “ ”. The On/Off “ ” indicator lights as long as the machine is on. If any button is not pressed, the machine turns off automatically after 15 minutes. Program Selection Button Select a suitable program by pressing Program Selection button “...
- Page 19 Salt Indicator When there is insufficient softening salt, the salt lack warning indicator “ ” turns on and you should fill up the salt chamber. Tablet Select the Auxiliary Function button “ ” when using combined detergent that contains salt and rinse aid and extra functions. Press the Select button “ ”, the indicator for the tablet indicator “...
-
Page 20: Changing A Program
NOTE: Child lock “ ” is activated/deactivated by pressing Select button “ ” for about 3 seconds. When it is activated, all indicator blink and “CL” is shown on remaining time indicator once. When it is deactivated, all indicator and “CL” blink twice. NOTE: To save any program as favourite program, press Program button “... -
Page 21: Cancelling A Program
6.2 Cancelling a Program If you would like to cancel a program when it is running. 1. Press the Start/Pause button “ ” for 3 seconds. During cancellation, the indicator blinks. The machine discharges the water inside it in about 30 seconds. 2. -
Page 22: Buzzer Sound
6.4 Buzzer Sound To change the buzzer sound level, follow the below steps: 1. Open the door and press Auxiliary Function button “ ” and Select button “ ” simultaneously for 3 seconds. 2. When sound setting is recognized, buzzer gives a long sound and machine will display last set level, from “S0”... -
Page 23: Program Table
7. PROGRAM TABLE • The program duration may change according to the amount of dishes, the water temperature, the ambient temperature and selected additional functions. • Values given for programmes other than the eco programme are indicative only. • Smart Eco program is suitable to clean normally soiled tableware, that for this use, it is the most efficient programme in terms of its combined energy and water consumption. -
Page 24: Cleaning And Maintenance
8. CLEANING AND MAINTENANCE Cleaning your dishwasher is important to maintain the machine’s service life. Make sure that the water softening setting (If available) is done correctly and correct amount of detergent is used to prevent limescale accumulation. Refill the salt compartment when the salt sensor light comes on. - Page 25 Spray arms Make sure that the spray holes are not clogged and that no food waste or foreign object is stuck to the spray arms. If there is any clogging, remove the spray arms and clean them under water. To remove the upper spray arm undo the nut holding it in position by turning it clockwise and pulling it downwards.
-
Page 26: Troubleshooting
9. TROUBLESHOOTING FAULT POSSIBLE CAUSE TROUBLESHOOTING Use the correct amount of detergent, as instructed in the Not enough detergent used. program table. Rinse aid dosage and/or Increase rinse aid and/or water water softener setting set too softener level. White stains remain low. -
Page 27: Error Code
ERROR CODE ERROR POSSIBLE FAULT WHAT TO DO CODE Make sure the water inlet tap is open and water is flowing. Separate the inlet hose from the tap and Water inlet system failure clean the filter of the hose. Contact for service if the error continues. Pressure system failure Contact for service. -
Page 28: Technical Specification
TECHNICAL SPECIFICATION Model EDW-M1368D(BS) Capacity 13 Place Settings Voltage 220–240V~ Frequency 50Hz Total Power 1,900W Rated Current Water Supply Pressure Max: 1 (Mpa). Min: 0.03 (Mpa) Product Dimension (mm) 598 (W) x 850 (H) x 598 (D) Carton Dimension (mm) 644 (W) x 881 (H) x 661 (D) Net / Gross Weight 39.8 KGS / 41.8 KGS...
Need help?
Do you have a question about the EDW-M1368D(BS) and is the answer not in the manual?
Questions and answers