Advertisement
Quick Links
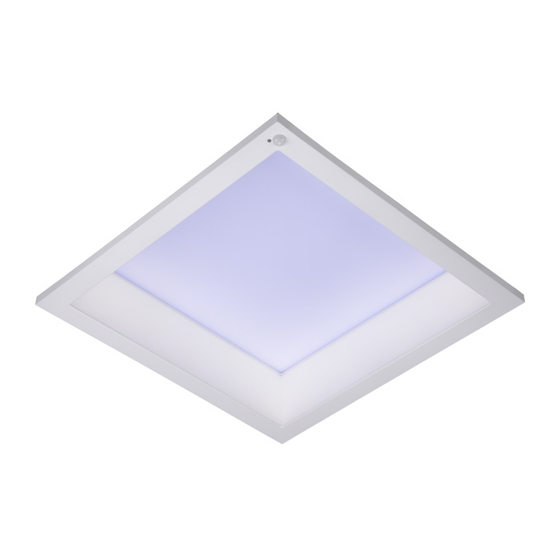
Cadiant Dynamic Skylight Quick Start Guide
Last Modified on 01/24/2022 9:08 am EST
INTRODUCTION
Use these instructions to set up:
A single or multiple Cadiant™ Dynamic Skylights
Other new SmartCast fixtures (CR Series troffers, etc.) in the same space to be associated with the
Cadiant™ fixtures
The SmartCast Wireless Gateway and SmartCast Touchscreen used to control the fixtures
®
PREPARATIONS
Should you have existing SmartCast fixtures, please ensure that you have installed the latest software update
before proceeding.
1 1
At this point, the following devices should be installed
and powered on:
Cadiant™ Dynamic Skylight - one or multiple
®
SmartCast Touchscreen
®
SmartCast Wireless Gateway with WiFi (SWG-WiFi)
Other SmartCast luminaires to be grouped
(optional)
SmartCast Wall Controller (dimmer) (optional)
®
Also required: SmartCast Configuration Tool
2 2
Locate the SWG-WiFi before beginning
Locate the SWG-WiFi before beginning
commissioning. You'll need a line of sight to the device
commissioning.
®
®
®
®
®
Advertisement

Subscribe to Our Youtube Channel
Related Manuals for CREE LIGHTING Cadiant


Summary of Contents for CREE LIGHTING Cadiant
- Page 1 Last Modified on 01/24/2022 9:08 am EST INTRODUCTION Use these instructions to set up: A single or multiple Cadiant™ Dynamic Skylights Other new SmartCast fixtures (CR Series troffers, etc.) in the same space to be associated with the ® Cadiant™ fixtures The SmartCast Wireless Gateway and SmartCast Touchscreen used to control the fixtures ®...
- Page 2 commissioning. commissioning. You’ll need a line of sight to the device to properly commission it with the Configuration Tool. The SWG-WiFi may be attached to the ceiling grid, installed above the ceiling, or wall-mounted. Locate the SSID number and password for the Locate the SSID number and password for the ®...
- Page 3 POWER ON POWER ON the Configuration Tool. Wait for the Configuration Tool to read: The display will indicate that the Configuration Tool is ready to begin OneButton™ Setup. ® Press OK OK to begin commissioning the SmartCast network. However, if the Configuration Tool finds existing networks, the display will read: Use the Configuration tool direction arrows to highlight Set Up New...
- Page 4 2. Sensor Self-calibration for daylight harvesting 3. Learning about the spaces in which they are installed 4. Automatic grouping of the devices based on where they are installed This process ranges from a few minutes up to one hour depending on the number of devices being set up. Please do not proceed until the device states that OneButton™...
- Page 5 On the Main Menu of the Configuration Tool, use the arrow keys to select Advanced Advanced and press the OK button. On the Advanced menu, use the arrow keys to select Add Gateway Add Gateway , then press the OK OK button.
- Page 6 screen. Point the Configuration Tool at the SmartCast Wireless Gateway until the flashing blue LED becomes a steady green. The Configuration Tool will shine a green flashlight beam in the direction it is pointed to aid in targeting the SWG-WiFi. (This may take up to 10 seconds.) At this point, the Configuration Tool display will indicate that the SWG has been added to the network.
- Page 7 The Touchscreen display will change to the screen on the right. The Touchscreen display will show available SmartCast Wireless Gateways with WiFi. Find the ® matching SSID per the label on the back of the SmartCast Wireless Gateway with WiFi (recorded in ®...
- Page 8 The Touchscreen display will return to the Connect to Gateway Connect to Gateway screen. The Touchscreen display will ask you to choose you time zone. Select the desired time zone. The selection will then appear above the Continue Continue button. If the selection is correct, press Continue.
- Page 9 For Username, enter admin admin (lowercase). For Password, enter the same password used in Step 4 of this section. This is the password found on the label on the backside of the SWG. Once the password has been typed, press "Done" "Done"...
- Page 10 ® The SmartCast Touchscreen will then display all the lighting spaces in the lighting network available to the SmartCast Wireless Gateway you ® have logged into. It will ask you to select those lighting spaces you want to control with the Touchscreen. (You can change these spaces in the Advanced menu.) To identify the fixtures in spaces you want to identify the fixtures in spaces you want to...
- Page 11 Press Get Started Get Started to continue to the home screen. The Touchscreen will retrieve the default ® scenes stored on the SmartCast Wireless Gateway with WiFi that you are logged into. Your Cadiant fixtures, other associated SmartCast ® ®...
- Page 12 fixtures, SmartCast Wireless Gateway and ® SmartCast Touchscreen are now ready to use. ® To test the system, select a scene and verify that the lights adjust appropriately. STEP 4: ACTIVATE DYNAMIC PROFILE To enable a zone to operate with a dynamic profile, start by pressing "Get Started Get Started"...
- Page 13 Press the "Dynamic Lighting Dynamic Lighting" tab. Select the desired profile and press the pencil pencil icon icon edit button. Press the Zones Zones tab.
- Page 14 7. Select the zones and press Save and Activate Save and Activate. OPTIONAL STEP 5: RENAME ZONES To change the name of a zone, start by pressing "Get Started Get Started" on the main screen. Next press on the "Settings Settings"...
- Page 15 Enter the admin PIN admin PIN that you created when you set up the tablet. Press the "Zones Zones" tab. Press the zone that you wish to rename. In this example we will tap on the "Big" zone "Big" zone to change its name.
- Page 16 name to change this zone's name. Enter the new zone name using the onscreen keyboard and press "Done" "Done". Press "Save Zone Name" "Save Zone Name" to save the new name and see the changed name at the top of the zone display.
- Page 17 Press the back arrow butto back arrow button in the upper left part of the screen and see the tab with the new zone name. Press the back arrow button back arrow button again to see the new name in its tab on the Zones Zones page.
- Page 18 To create a demo, start by pressing "Get Started Started" on the main screen. Next press on the "Settings Settings" icon on the lower right hand of the screen. Enter the admin PIN admin PIN that you created when you set up the tablet.
- Page 19 Rename the new dynamic profile "demo". Select the "demo" profile and press the pencil pencil icon icon edit button. Press the Zones Zones tab. Select the zones and press Save and Activate Save and Activate. From the Home page, press the "eyeball" icon on the lower right side of the ribbon bar to start the Demo mode.
Need help?
Do you have a question about the Cadiant and is the answer not in the manual?
Questions and answers