Table of Contents
Advertisement
Available languages
Available languages
Quick Links
Advertisement
Chapters
Table of Contents

Related Manuals for Fancom ITM-iF


Summary of Contents for Fancom ITM-iF
- Page 1 ITM-iF MANUAL HANDLEIDING ANLEITUNG...
- Page 2 N.B.: The original, authentic version of this manual is the English version produced by Fancom B.V. or one of its daughter companies (referred to further as Fancom). Any modifications introduced to this manual by third parties have neither been checked nor approved by Fancom. Modifications are taken by Fancom to include translations into languages other than English and the insertion and/or deletion of text and/or illustrations to/from the original contents.
-
Page 3: Table Of Contents
Safety instructions and warnings ....................2 Possibilities ..............................3 ProFlow/NatuFlow .......................... 3 Remote I/O-module ........................3 Installing the ITM-iF ............................ 4 Mounting the ITM-iF........................4 Connecting the ITM-iF ........................4 Testing the ITM-iF .......................... 8 Using the ITM-iF ............................9 Setting the knob .......................... -
Page 4: General Introduction
Warning indicating danger to humans or animals. Electrical shock hazard. Danger to humans and animals. Example of a practical application of the described functionality. Calculation example. Fancom helpdesk For any questions and support, please contact the local Fancom Sales & Service Center. -
Page 5: Safety Instructions And Warnings
Make sure that the ITM-iF is well and properly grounded according to the guidelines. Never place the ITM-iF in a place where the weather has direct influence (not in the sun, not in places where the temperature can rise sharply etc.). -
Page 6: Possibilities
Set the type of control required using dipswitch 6, 7 and 8. ProFlow/NatuFlow The ITM-iF controls the ventilation in a section by measuring the air flow (DSR feedback signal) and by controlling the I-fan and the valve of the ATM unit. -
Page 7: Installing The Itm-If
Mount the ITM-iF on a flat surface. Make sure that the gland nuts are at the bottom of the ITM-iF. Seal all gland nuts after connection of the ITM-iF to prevent entry of dust, aggressive gases and/or humidity Connecting the ITM-iF Connecting as an I/O network module Set an I/O-address using dipswitches 1 thru 5. - Page 8 Settings I/O address Control type DIP 1 DIP 2 DIP 3 DIP 4 DIP 5 DIP 6 DIP 7 DIP 8 Control type adrr. CentralFlow (ATM with DSR) AT(M) without DSR NatuFlow / ProFlow direct (analog output direct with DSR-feedback) NatuFlow / ProFlow direct with inverted manual operation (analog output 10-0V direct...
- Page 9 Item DIP Switch Control Central Flow (PROLOW ENDSTATION) • Central flow to control ATM unit (Vortex damper and measuring fan DSR). Only with Lumina 20/21 and Lumina 17 controller. AT without DSR (PROFLOW DIRECT) • Direct control. [%] in = [%] out, using with control AT unit, (vortex damper without measuring fan DSR).
- Page 10 • No DSR readout or calibration on the controller with 10-0V. When control is 10-0V, calibration only possible on ITM-iF itself by dipswitch 9 and 10 (see manual). • When ITM-iF controlled by Lumina 37 or Lumina 38 on I/O-Net then there is no read out of the DSR feedback on those controllers.
-
Page 11: Testing The Itm-If
“ITM-iF address” . 2 The ITM-iF can be connected to a PFB+battery. If the 24Vac power supply fails, it automatically switches over to 24Vdc. In that case the analog outputs of the ITM-iF are controlled on 5V. Relays are not controlled. -
Page 12: Using The Itm-If
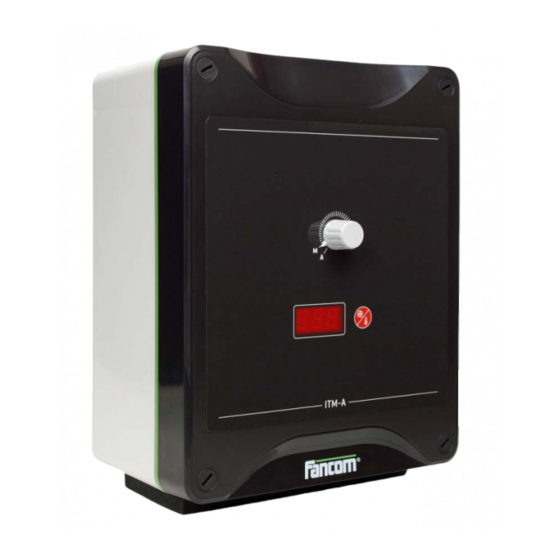
Using the ITM-iF Setting the knob The knob on the front of the ITM-iF is used to set the ATM-unit to: • Automatic (A) or • Manual (M) Display A key is positioned on the front panel. If this key is pressed, the following will be displayed alternately: •... -
Page 13: Adjusting The Itm-If
Adjusting the ITM-iF General Before the ITM-iF can be used, the Triac, the maximum number of revolutions and the control input should first be adjusted, depending on the setting. The position of the dipswitches is important for this adjustment (see table below). -
Page 14: Adjusting The Maximum Revolutions
(L2) is off. This means that the 1% is to be adjusted. Confirm the 1% adjustment by pressing the knob. The green led (L2) flashes. The green led (L2) will go off after five seconds. The ITM-iF has completed the 1% adjustment. - Page 15 (L2) is off. This means that the 99% will be adjusted. Confirm the 99% adjustment by pressing the knob. The green led (L2) flashes. The ITM-iF has completed adjustment after five seconds. The status of the adjustment can now be shown. - Green led on Adjustment successful.
-
Page 16: Alarms
Alarms Alarm indication Led 1 and Led 2 flash simultaneously. Backup alarm Led 1 and Led 2 flash alternately. Memory alarm... -
Page 17: Technical Specifications
Technical specifications Power supply Mains voltage 24Vac (-10%, +10%) Mains frequency 50/60Hz Maximum power consumption Fuse electronics see connection diagram Inputs Analog In Voltage 0-10Vdc Temperature sensor type S7 -9.9°C to +99.9°C DSR-feedback 4 pulses per revolution max. frequency: 200Hz Knob Adjust ventilation between 0 –... -
Page 18: Connection Diagram
Connection diagram VL POWER BOARD Temperature (type S7) / Analog control Control vortex damper DSR sensor RL1/RL2 Relays PWM2A Control I-fan... -
Page 19: Appendix: Eg Declaration Of Conformity
Appendix: EG declaration of conformity Manufacturer: Fancom B.V. Address: Industrieterrein 34 City: Panningen (the Netherlands) Hereby declares that the: ITM-iF Complies with the provisions of the: EMC directive 2004/108/EC Emission according to NEN-EN-IEC 61326-1: 2013 Immunity according to NEN-EN-IEC 61326-1: 2013... - Page 20 N.B.: De originele, authentieke versie van deze handleiding is de door Fancom B.V. of door een van haar dochterondernemingen (verder aangeduid als Fancom) geproduceerde Engelstalige versie. Achteraf door derden aangebrachte wijzigingen in deze handleiding zijn door Fancom noch gecontroleerd, noch goedgekeurd. Onder wijzigingen verstaat Fancom o.a.
- Page 21 Fancom-helpdesk ........................... 1 Veiligheidsinstructies en waarschuwingen ..................2 Mogelijkheden ............................. 3 ProFlow/NatuFlow .......................... 3 Externe I/O-module......................... 3 De ITM-iF installeren ........................... 4 De ITM-iF monteren........................4 De ITM-iF aansluiten ........................4 De ITM-iF testen ..........................8 De ITM-iF gebruiken ........................... 9 De knop instellen ..........................
-
Page 22: Algemene Inleiding
Kans op gevaarlijke elektrische schokken. Gevaar voor mens of dier. Voorbeeld van een concrete toepassing van de beschreven functionaliteit. Voorbeeld van een berekening. Fancom-helpdesk Voor ondersteuning en antwoord op eventuele vragen kunt u het lokale Fancom Sales & Service Centre raadplegen. -
Page 23: Veiligheidsinstructies En Waarschuwingen
Zorg ervoor dat de ITM-iF volgens de voorschriften goed en degelijk geaard is. Plaats de ITM-iF altijd buiten directe weersinvloeden (dus niet in de zon, niet op plekken waar de temperatuur sterk kan oplopen etc.). Controleer de ITM-iF van tijd tot tijd op eventuele beschadigingen. Meld eventuele beschadigingen direct aan uw installateur. -
Page 24: Mogelijkheden
Stel het vereiste type regeling in met DIP-schakelaars 6, 7 en 8. ProFlow/NatuFlow De ITM-iF regelt de ventilatie in een bedrijfsdeel door de luchtstroom te meten (RTTM-signaal) en de I-fan en de klep van de ATM-eenheid te regelen. De ITM-iF kan worden gebruikt als:... -
Page 25: De Itm-If Installeren
Monteer de ITM-iF op een vlak oppervlak. Zorg ervoor dat de wartels zich aan de onderkant van de ITM-iF bevinden. Dicht alle wartels na het aansluiten af om te voorkomen dat er stof, agressief gas en/of vocht in de ITM-iF binnendringt. - Page 26 Instellingen I/O-adres Type regeling I/O-a DIP 1 DIP 2 DIP 3 DIP 4 DIP 5 DIP 6 DIP 7 DIP 8 Type regeling CentralFlow (ATM met RTTM) AT(M) zonder RTTM NatuFlow/ProFlow direct (directe analoge uitgang met RTTM) NatuFlow/ProFlow met geïnverteerde directe handbediening (directe analoge uitgang 10–0 V met RTTM)
- Page 27 Item DIP-schakelaar Regeling CentralFlow (PROFLOW-EINDSTATION) • CentralFlow regelt ATM-eenheid (smoorklep en RTTM van meetwaaier). Alleen met regelcomputer Lumina 20/21 en Lumina 17. AT zonder RTTM (PROFLOW DIRECT) • Directe regeling. [%] in = [%] uit met regeling AT-eenheid (smoorklep zonder RTTM van meetwaaier).
- Page 28 DIP-schakelaars 9 en 10 op de ITM-iF zelf (zie handleiding). • Wanneer de ITM-iF via het I/O-net wordt geregeld door een Lumina 37- of Lumina 38-regelcomputer, wordt de RTTM-waarde niet uitgelezen door deze regelcomputers. Dit is alleen mogelijk met ITM-iF-regeling via I/O-net met Lumina 21 of Lumina 17.
-
Page 29: De Itm-If Testen
'Adres ITM-iF' . 2 De ITM-iF kan worden verbonden met een PFB+-accu. Als de 24Vac-voeding uitvalt, schakelt het apparaat automatisch over naar 24 Vdc. In dat geval worden de analoge uitgangen van de ITM-iF geregeld met 5 V. Relais worden niet geregeld. -
Page 30: De Itm-If Gebruiken
De ITM-iF gebruiken De knop instellen Met de knop aan de voorzijde van de ITM-iF kunt u de ATM-eenheid instellen op: • Automatisch (A) of • Handmatig (M) Display Het frontpaneel is voorzien van een toets. Als deze toets wordt ingedrukt, wordt het volgende afwisselend weergegeven: •... -
Page 31: De Itm-If Afregelen
Afregeling niet geslaagd. Voer de afregeling opnieuw uit. Smoorklep regeling De ITM-iF regelt ook de analoge uitgang voor regeling of afregeling van de smoorklep. Het signaal van de analoge uitgang is 1% bij afregeling van de 1%-waarde. Verzet DIP-schakelaars 9 en 10 na afregeling naar ON en draai de schakelaar naar A. -
Page 32: Het Maximumaantal Omwentelingen Afstellen
LED (L2) is uit. Dit betekent dat de 1%-waarde kan worden ingesteld. Bevestig de 1%-waarde door op de knop te drukken. De groene LED (L2) knippert. Na vijf seconden gaat de groene LED (L2) uit. De afregeling van de 1%-waarde van de ITM-iF is voltooid. - Page 33 LED (L2) is uit. Dit betekent dat de 99%-waarde kan worden ingesteld. Bevestig de 99%-waarde door op de knop te drukken. De groene LED (L2) knippert. Na vijf seconden is de afregeling van de ITM-iF voltooid. De status van de afregeling wordt nu getoond. - Groene LED aan Afregeling geslaagd.
-
Page 34: Alarmen
Alarmen Alarmindicatie LED 1 en LED 2 knipperen gelijktijdig. Back-upalarm LED 1 en LED 2 knipperen afwisselend. Geheugenalarm... -
Page 35: Technische Gegevens
Technische gegevens Voeding Netspanning 24 Vac (-10%, +10%) Netfrequentie 50/60 Hz Maximaal opgenomen vermogen 5 VA Zekeringselektronica zie aansluitschema Ingangen Analoge ingang Spanning 0–10 Vdc Temperatuurvoeler type S7 -9,9 °C tot +99,9 °C RTTM 4 pulsen per omwenteling Max. frequentie: 200 Hz Knop Afregelen ventilatie van 0–100% Uitgangen... -
Page 36: Aansluitschema
Aansluitschema VOEDINGSKAART VL Temperatuur (type S7) / Analoge regeling Regeling smoorklep RTTM-sensor RL1/RL2 Relais PWM2A Regeling I-fan... -
Page 37: Bijlage: Eg-Verklaring Van Overeenstemming
Bijlage: EG-verklaring van overeenstemming Fabrikant: Fancom B.V. Adres: Industrieterrein 34 Plaats: Panningen (the Netherlands) Verklaart hiermee dat de: ITM-iF Voldoet aan de bepalingen van de: EMC-richtlijn 2004/108/EG Emissienorm conform NEN-EN-IEC 61326-1: 2013 Immuniteitsnorm conform NEN-EN-IEC 61326-1: 2013 Plaats: Panningen Datum: 01-04-2014... - Page 38 Änderungen in dieser Anleitung wurden von Fancom weder geprüft noch genehmigt. Unter Änderungen versteht Fancom u. a. das Übersetzen in eine andere Sprache als das Englische sowie das Ergänzen und/oder Entfernen von Texten und/oder Abbildungen aus dem Original. Fancom übernimmt keinerlei Haftung für Schäden jeglicher Art, Verletzungen und Garantieforderungen sowie andere Forderungen im Zusammenhang mit derartigen Änderungen, soweit diese Änderungen dazu führen, dass der Inhalt von der von Fancom erstellten englischen...
- Page 39 Fancom Helpdesk ........................... 1 Sicherheitshinweise und Warnungen ..................... 2 Möglichkeiten .............................. 3 ProFlow/NatuFlow .......................... 3 Entferntes I/O-Modul........................3 Installation des ITM-iF ..........................4 Den ITM-iF montieren ........................4 Den ITM-iF anschließen ......................... 4 Den ITM-iF testen ........................... 8 Verwendung des ITM-iF ..........................9 Knopf einstellen ..........................
-
Page 40: Allgemeine Einleitung
Warnung vor einer Gefahr für Menschen oder Tiere. Gefahr von elektrischem Schlag. Gefahr für Mensch und Tier. Beispiel für eine praktische Anwendung der beschriebenen Funktion. Berechnungsbeispiel. Fancom Helpdesk Wenden Sie sich bei Fragen und für Hilfe an das Fancom Sales & Service Centre in Ihrer Nähe. -
Page 41: Sicherheitshinweise Und Warnungen
Schäden verursachen. Stellen Sie sicher, dass der ITM-iF entsprechend den Vorschriften gut und sicher geerdet ist. Platzieren Sie den ITM-iF nicht an Stellen, an denen er unmittelbaren Wettereinflüssen ausgesetzt ist (in der Sonne oder an Stellen mit stark ansteigender Temperatur usw.). -
Page 42: Möglichkeiten
Typ der erforderlichen Regelung über DIP-Schalter 6, 7 und 8 einstellen. ProFlow/NatuFlow ITM-iF regelt die Lüftung in einem Bereich durch die Messung der Luftströmung (RDRM-Signal) und die Regelung des iFans und des Ventils der ATM-Einheit. Der ITM-iF kann wie folgt verwendet werden: Energiesparendes mechanisches Lüftungssystem (keine Möglichkeit zur Umschaltung auf natürliche Lüftung) -
Page 43: Installation Des Itm-If
Anschluss als herkömmliche Endstation Legen Sie die E/A-Adresse über DIP-Schalter 1 bis 5 auf 0 fest. Entfernen Sie die Jumper TEMP, damit der ITM-iF mit einer analogen Regelung (10-0 V DC) verwendet werden kann. Wählen Sie den Typ der Regelung über DIP-Schalter 6, 7 und 8 aus. - Page 44 Einstellungen E/A-Adresse Regelungstyp E/A- DIP 2 DIP 3 DIP 4 DIP 5 DIP 6 DIP 7 DIP 8 Regelungstyp Adr. CentralFlow (ATM mit RDRM) AT(M) ohne RDRM NatuFlow/ProFlow direkt (Analogausgang direkt mit RDRM) NatuFlow/ProFlow direkt mit invertierter Handbedienung (Analogausgang 10-0 V direkt mit RDRM) Energiesparend mechanisch Energiesparend mech.
- Page 45 Item DIP-Schalter Steuerung Central Flow (PROLOW-ENDSTATION) • Central Flow zur Regelung der ATM-Einheit (Drosselklappe und Dosierlüfter-RDRM). Nur bei Lumina 20/21 und Lumina 17-Regelcomputer. AT ohne RDRM (PROFLOW DIREKT) • Direkte Regelung. [%] ein = [%] aus, mit Regelungs-AT-Einheit, (Drosselklappe ohne Dosierlüfter-RDRM).
- Page 46 37, Lumina 38 verwenden • Keine RDRM-Anzeige oder Kalibrierung beim Regelcomputer mit 10-0 V. Bei der 10-0-V-Regelung ist die Kalibrierung nur bei ITM-iF selbst über die DIP-Schalter 9 und 10 möglich (siehe Bedienungsanleitung). • Wenn ITM-iF über Lumina 37 oder F38 im I/O-Netzwerk geregelt wird, wird bei diesen Regelcomputern kein RDRM angezeigt.
-
Page 47: Den Itm-If Testen
Direkter Analogausgang 2 “ITM-iF-Adresse”. 2 ITM-iF kann an ein PFB+-Akku angeschlossen werden. Bei einem Ausfall der 24-V-AC-Spannungsversorgung wird automatisch auf 24 V DC umgeschaltet. In diesem Fall werden die Analogausgänge von ITM-iF mit 5 V geregelt. Relais werden nicht geregelt. -
Page 48: Verwendung Des Itm-If
Verwendung des ITM-iF Knopf einstellen Über den Knopf auf der Vorderseite des ITM-iF kann die ATM-Einheit auf Folgendes eingestellt werden: • Automatisch (A) oder • Manuell (M) Display Auf der Vorderseite befindet sich eine Taste. Wenn diese Taste gedrückt wird, wird abwechselnd Folgendes angezeigt: •... -
Page 49: Einstellung Des Itm-If
Einstellung des ITM-iF Allgemeine Bevor ITM-iF verwendet werden kann, sollten je nach Einstellung zunächst die Triac, die max. Anzahl an Umdrehungen und der Regeleingang eingestellt werden. Die Position der DIP-Schalter ist für diese Einstellung wichtig (siehe nachfolgende Tabelle). Einstellung von:... -
Page 50: Max. Umdrehungen Einstellen
LED (L2) ist aus. Dies bedeutet, dass 1 % eingestellt werden muss. Bestätigen Sie die 1-%-Einstellung durch Drücken des Knopfs. Die grüne LED (L2) blinkt. Die grüne LED (L2) geht nach fünf Sekunden aus. Der ITM-iF hat die 1-%-Einstellung abgeschlossen. - Page 51 LED (L2) ist aus. Dies bedeutet, dass 99 % eingestellt wird. Bestätigen Sie die 99-%-Einstellung durch Drücken des Knopfs. Die grüne LED (L2) blinkt. Die Einstellung von ITM-iF ist nach fünf Sekunden abgeschlossen. Der Einstellungsstatus kann jetzt angezeigt werden.
-
Page 52: Alarme
Alarme Alarmanzeige LED 1 und LED 2 blinken gleichzeitig. Backup-Alarm LED 1 und LED 2 blinken abwechselnd. Speicheralarm... -
Page 53: Technische Daten
Technische Daten Stormversorgung Netzspannung 24 V AC (-10 %, +10 %) Netzfrequenz 50/60Hz Max. Leistungsaufnahme 5 VA Sicherungselektronik siehe Anschlussschaltbild Eingänge Analogeingang Spannung 0-10 V DC Temperaturfühler Typ S7 -9,9 bis +99,9 °C RDRM 4 Intervalle pro Umdrehung max. Frequenz: 200Hz Knopf Belüftung von 0 bis 100 % einstellen Ausgänge... -
Page 54: Anschlussschaltbild
Anschlussschaltbild VL POWER BOARD Temperatur (Typ S7)/Analoge Regelung Drosselklappe regeln RDRM-Fühler RL1/RL2 Relais PWM2A iFan regeln... -
Page 55: Anhang: Eg-Konformitätserklärung
Anhang: EG-Konformitätserklärung Hersteller: Fancom B.V. Adresse: Industrieterrein 34 Ort: Panningen (The Netherlands) Erklärt hiermit, dass: ITM-iF Die Bestimmungen erfüllt von: EMV-Richtlinie 2004/108/EG Emissionen gemäß NEN-EN-IEC 61326-1: 2013 Immunität gemäß NEN-EN-IEC 61326-1: 2013 Ort: Panningen Datum: 01-04-2014 Paul Smits Managing Director...
Need help?
Do you have a question about the ITM-iF and is the answer not in the manual?
Questions and answers