Advertisement
Quick Links
CHAPTER 1. OUTLINE OF THE PRODUCT,
CHAPTER 2. CONNECTION, ADJUSTMENT,
CHAPTER 3. DISSASEMBLY AND REASSEMBLY ...................................... 11
CHAPTER 4. TROUBLE SHOOTING ............................................................ 14
CHAPTER 5. BLOCK DIAGRAM ................................................................... 16
CHAPTER 6. CIRCUIT DIAGRAM ................................................................. 18
CHAPTER 7. PARTS LAYOUT ...................................................................... 25
Parts marked with "
" are important for maintaining the safety of the set. Be sure to replace these parts with specified
ones for maintaining the safety and performance of the set.
SERVICE MANUAL
CONTENTS
NOMENCLATURE AND FUNCTION......................................... 1
OPERATION AND FUNCTIONS ............................................... 3
SHARP CORPORATION
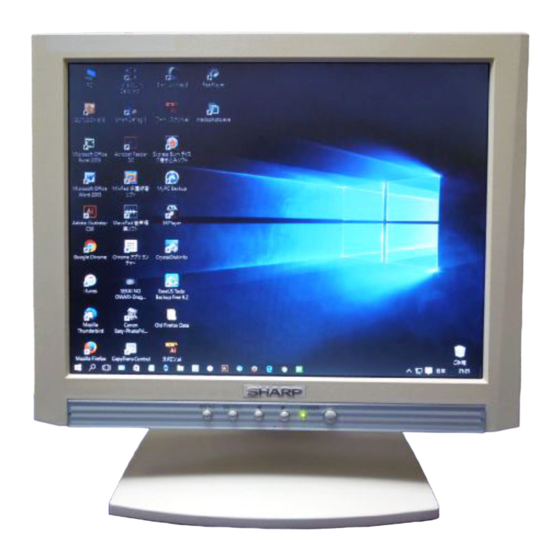
LCD COLOR MONITOR
LL-T1501A
LL-T1511A
MODEL
This document has been published to be used
for after sales service only.
The contents are subject to change without notice.
Advertisement

Related Manuals for Sharp LL-T1501A


Summary of Contents for Sharp LL-T1501A
-
Page 1: Table Of Contents
SERVICE MANUAL LCD COLOR MONITOR LL-T1501A LL-T1511A MODEL CONTENTS CHAPTER 1. OUTLINE OF THE PRODUCT, NOMENCLATURE AND FUNCTION......... 1 CHAPTER 2. CONNECTION, ADJUSTMENT, OPERATION AND FUNCTIONS ..........3 CHAPTER 3. DISSASEMBLY AND REASSEMBLY ........11 CHAPTER 4. TROUBLE SHOOTING ............14 CHAPTER 5. -
Page 2: Nomenclature And Function
Symbol/PartsCod) - - - - - - - - - - - - - - - - - - - - - - - - - - - - - - - - - - - - - - - - - - - - - - - - - - - - - - - CHAPTER 1. - Page 3 The connector pin 2. PRODUCT DESCRIPTION Front view (Mini D-sub connector with 15 pins) Number Function Red video signal input Green video signal input Blue video signal input N.C. N.C. For red video signal GND 1. Power button For green video signal GND Pressing this button turns the power on when the main power For blue video signal GND switch is on.
-
Page 4: Operation And Functions
Rear View Side view Note: Never block the ventilation Ventilation openings as this may lead to openings overheating inside the monitor and result in malfunction Power connector The power cord is connected here. RGB signal cable This is to be connected to the computer's analog RGB output terminal. - Page 5 3. Plug the USB device into the monitor’s USB downstream port. Installing set-up information Depending on the computer or OS, it may be necessary to use the computer to operate the installation of monitor set-up information etc. If so, follow the steps below to install the monitor set-up information. USB downstream port Notes: •...
- Page 6 you can select the driver you want.], then click [Next]. Click on [Settings], [Advanced] and [Monitor]. When [Models] is displayed, click on [Have Disk], confirm that In [Options], check [Automatically detect Plug & Play monitors] [Copy manufacturer’s files from:] is [A:], and click [OK]. and click on [Change].
- Page 7 [ADJUSTMENT LOCKED] will appear on the screen, and the Adjustment pattern lock will be set. When the menu is locked: [ADJUSTMENT UNLOCKED] will appear on the screen, and the lock will be removed. Note: When the lock is in place, all buttons other than the power button are disabled.
- Page 8 Easy steps to changing brightness 2. Press the MENU button. The brightness can be changed to any one of three settings. Carry out the commands without the On Screen Display (OSD) Menu displayed. If the OSD Menu is displayed, press the BRIGHT button and begin when it has disappeared.
- Page 9 H-POS (horizontal positioning) and V-POS (vertical positioning) [MENU 3: WHITE BALANCE] WHITE BALANCE (color tone) can be adjusted as necessary. (As To center the screen image within the boundaries of the screen, adjustments are made before shipment, there is no real necessity for adjust the left-right (H-POS) values and the up-down (V-POS) values.
- Page 10 400 LINES (degree of resolution) Remove the connector cover. Remove the screws and lift it upward. You can specify the horizontal resolution of a 400-line screen when using US text, etc. ( buttons) 640 x 400 dot mode 720 x 400 dot mode (US text etc.) Connector cover Note: As the resolution input for other than 400 lines is done auto- matically, there is no need to set it.
- Page 11 10. Remove the four screws and then remove the stand from the 12. Connect the AC adapter (purchased separately). monitor. Connect the AC adapter’s DC plug to the AC adapter’s connec- tion terminal , and place the cord inside the cord hook Coonect the power cord to the AC adapter , and connect the AC plug to the AC outlet...
-
Page 12: Chapter 3. Dissasembly And Reassembly
CHAPTER 3. DISASSEMBLY AND REASSEMBLY 5. Remove the screw and remove the clamp [1] SEPARATING LCD FROM STAND 1. Pull the cover rearward and remove. 2. Slide the rear arm upward to remove. 6. remove the connector and tie cable 3. - Page 13 4. Remove the two connectors and four screws . Lift the LCD [2] DISASSEMBLY AND REASSEMBLY OF unit in the direction indicated by the arrow. Remove the two screws and remove the connector 1. Remove the two screws . Lift the rear panel in the direction indicated by the arrow and remove the two connectors 5.
- Page 14 5. Remove the four screws and remove the USB board [3] Disassembly and reassembly 6. Remove the three screws . Lift the power supply board 1. Remove the seven screws securing the base metal the direction indicated by the arrow. Remove the two connectors 2.
-
Page 15: Chapter 4. Trouble Shooting
CHAPTER 4. TROUBLE SHOOTING 1. SYSTEM ARCHITECTURE COMPUTER LCD MODULE INTERFACE INVERTER POWER POWER BD OUTLET USB BD POWER SWITCH SENSOR BD KEY CTRL BD 2. NO POWER 3. PC NO DISPLY OR DISPLAY ABORMAL (AC power indicator is not lighted and no display) (AC power indicator is lighted) NO or BAD DISPLAY NO POWER... - Page 16 4. ADJUST CONTROL BUTTON NO 5. ADJUST BRIGHNESS NO FUNCTION FUNCTION PHSH HOT KEY NO KEY CONTROL BUTTON FUNCTION NO FUNCTION 1. CHECK THE OTHER FUNDION CHECK THAT CABLE FRON I/F BD TO KEY CTRL BD IS KEY AVAILABLE. CONNECTED PROPERLY 2.
-
Page 17: Chapter 5. Block Diagram
CHAPTER 5. BLOOK DIAGRAM DISPLAY UNIT LCD UNIT LANP LCD SIGNAL INPUT INVERTER 15 inch LCD LANP ONLY 1511A AUTO BRIGHTNESSS UNIT INTERFACE UNIT KEY-SWITCH UNIT RGB, H/V AC ADAPTER INPUT [FROM PC] [AC INPUT] POWER UNIT AC SW DOWNSTRAEM UPSTRAEM [TO USB DEVICE] USB HUB UNIT... - Page 18 Unit terminals LCD SIGNAL INPUT JP6 (To Inverter Terminal) Used connector : FX8-60P-SV (HIROSE) Used connector : PH_6 Pin No. Symbol Function Pin No. Symbol Function ON / OFF HIGH = ON, LOW = OFF +5V RED Even pixel data signal (LSB) BRIGHT Brightness control of inverter +5V...
-
Page 26: Chapter 7. Parts Layout
CHAPTER 7. PARTS LAYOUT 1. INTERFACE PWB LAYOUT (LL-T1511A/T1501A) - Page 27 2. INTERFACE PWB LAYOUT (LL-T1511A/T1501A)
- Page 28 3. USB PWB LAYOUT (LL-T1511A/T1501A)
- Page 29 4. USB PWB LAYOUT (LL-T1511A/T1501A)
- Page 32 © COPYRIGHT 2001 BY SHARP CORPORATION All rights reserved. Printed in Japan. No part of this publication may be reproduced, stored in a retrieval system, or transmitted. In any form or by any means, electronic, mechanical, photocopying, recording, or otherwise, without prior written permission of the publisher.
Need help?
Do you have a question about the LL-T1501A and is the answer not in the manual?
Questions and answers