Sharp LL-T15G1 Service Manual
Hide thumbs
Also See for LL-T15G1:
- Operation manual (148 pages) ,
- Specifications (2 pages) ,
- Operation manual (26 pages)
Advertisement
Quick Links
q
CHAPTER 3. DISASSEMBLY AND ASSEMBLY . . . . . . . . . . . . . . . . . . .3 - 1
CHAPTER 4. TROUBLESHOOTING . . . . . . . . . . . . . . . . . . . . . . . . . . . .4 - 1
Parts marked with "!" are important for maintaining the safety of the set. be sure to replace these parts with specified
ones for maintaining the safety and performance of the set.
SERVICE MANUAL
CONTENTS
NOMENCLATURE AND FUNCTION . . . . . . . . . . . . . . . . .1 - 1
OPERATION AND FUNCTIONS . . . . . . . . . . . . . . . . . . . .2 - 1
CIRCUIT DIAGRAM • PWB LAYOUT . . . . . . . . . . . . . . . . . . . .5 - 1
SHARP CORPORATION
CODE : 00Z
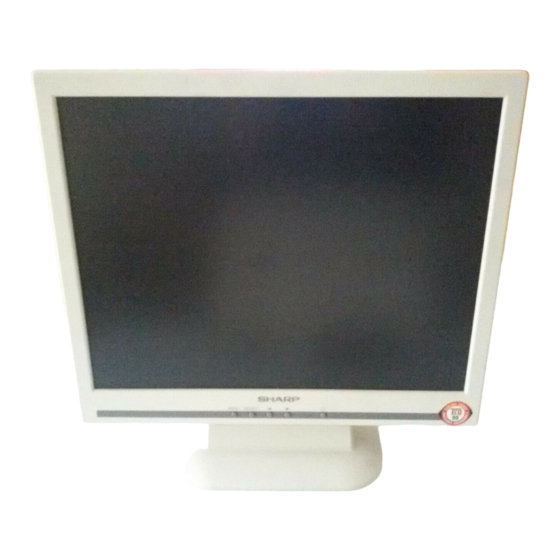
LCD MONITOR
LL-T15G1
LL-E15G1
MODEL
LLT15G1SME
This document has been published to be used
for after sales service only.
The contents are subject to change without once.
Advertisement

Related Manuals for Sharp LL-T15G1


Summary of Contents for Sharp LL-T15G1
-
Page 1: Table Of Contents
SERVICE MANUAL CODE : 00Z LLT15G1SME LCD MONITOR LL-T15G1 LL-E15G1 MODEL CONTENTS CHAPTER 1. OUTLINE OF THE PRODUCT, NOMENCLATURE AND FUNCTION ....1 - 1 CHAPTER 2. -
Page 2: Chapter 1. Outline Of The Product, Nomenclature And Function
• Power supply 60.0kHz 75Hz 78.75MHz AC100-240V, 50/60Hz 720 u 400 US text 31.5kHz 70Hz 28.3MHz (Use special AC adapter, type NL-A60J of Sharp Corporation.) 640 u 480 Power 35.0kHz 66.7Hz 30.2MHz • Temperature of operating environment Macintosh 832 u 624 49.7kHz 74.6Hz... - Page 3 Screen white chromaticity 0.273 0.303 0.333 0.283 0.313 0.343 White surface luminance cd/m Module model number *Specifications and a part of the appearance are subject to change without notice. LL-T15G1/E15G1 OUTLINE OF THE PRODUCT, NOMENCLATURE AND FUNCTION 1 – 2...
- Page 4 The security slot works in conjunction with Kensington Micro Saver Security Systems. 9 Ventilation openings Note: Never block the ventilation openings as this may lead to overheating inside the monitor and result in malfunction. LL-T15G1/E15G1 OUTLINE OF THE PRODUCT, NOMENCLATURE AND FUNCTION 1 – 3...
- Page 5 • Be careful not to pinch your fingers. • Do not use the monitor when tilted back beyond approximately 25°.The monitor may fall over leading to injury or malfunction. LL-T15G1/E15G1 OUTLINE OF THE PRODUCT, NOMENCLATURE AND FUNCTION 1 – 4...
-
Page 6: Chapter 2. Connection, Adjustment, Operation And Functions
ICC program only, please refer to Installing Power cord the ICC profile on page 15. • When using the ICC profile, please set the [WHITE BALANCE] to [STD]. LL-T15G1/E15G1 CONNECTION, ADJUSTMENT, OPERATION AND FUNCTIONS 2 – 1... - Page 7 11. Click [OK], and close the window. 11. Click [OK], and close the window. 12. Remove the Utility Disk from the A drive. 12. Remove the Utility Disk from the A drive. LL-T15G1/E15G1 CONNECTION, ADJUSTMENT, OPERATION AND FUNCTIONS 2 – 2...
- Page 8 If it is attempted to install the arm while the monitor is not com- pletely folded back, the monitor may suddenly fall, leading to mal- function. Be careful not to pinch your fingers. LL-T15G1/E15G1 CONNECTION, ADJUSTMENT, OPERATION AND FUNCTIONS 2 – 3...
- Page 9 Note: When the lock is in place, all buttons other than the power button scale may look colored. (This is due to the input signal specifica- are disabled. tion and is not a malfunction.) LL-T15G1/E15G1 CONNECTION, ADJUSTMENT, OPERATION AND FUNCTIONS 2 – 4...
- Page 10 MODE SELECT 3 OSD Menu disappears) Notes: • The OSD Menu automatically disappears approximately 30 seconds after the last command. • This explanation is based on using the Adjustment Pattern (for Windows) to make adjustments. LL-T15G1/E15G1 CONNECTION, ADJUSTMENT, OPERATION AND FUNCTIONS 2 – 5...
- Page 11 2. Use the SELECT button to choose a language. TRAST] and [B-CONTRAST]. 3. Press the MENU button or the d button. • To go to the next menu: MENU button The setting is complete. LL-T15G1/E15G1 CONNECTION, ADJUSTMENT, OPERATION AND FUNCTIONS 2 – 6...
- Page 12 ITALIANO, NETHER- Dutch, English, French, German, Spanish, Italian, LAND, SVENSKA Swedish. SELECT Select the item < > 0~31 Adjusting the backlight POWER OFF LL-T15G1/E15G1 CONNECTION, ADJUSTMENT, OPERATION AND FUNCTIONS 2 – 7...
- Page 13 Press the d button, Screen color is changed as following. Green 3 Light Blue 3 Red 3 Pink 3 Yellow 3 White 3 Blue When the test is terminate, Power off AGING TEST > : SET MENU : END LL-T15G1/E15G1 CONNECTION, ADJUSTMENT, OPERATION AND FUNCTIONS 2 – 8...
-
Page 14: Chapter 3. Disassembly And Assembly
6) Remove the three screws E, then, remove the front cover 4, LED filter 9, key button F and switch board 5. 7) Remove the four screws K and remove the LCD module 8. LL-T15G1/E15G1 DISASSEMBLY AND ASSEMBLY 3 – 1... -
Page 15: Chapter 4. Troubleshooting
* Check the path between J101 (Pin 3) and IC101 (Pin 16). Replace LCD module with a new one. Replace any defective unit. [ 1) Adapter, 2) A Main PWB, 3) Switch PWB ] with a new one. LL-T15G1/E15G1 TROUBLESHOOTING 4 – 1... - Page 16 CONT is changed after H-POS 1) Check if module control signal is output. or V-POS is set? 2) Check if VLCD voltage is output normally. Switch PWB defective Main PWB defective. LCD panel defective. LL-T15G1/E15G1 TROUBLESHOOTING 4 – 2...
-
Page 17: Chapter 5. Connector Signal Name • Block Diagram • Circuit Diagram • Pwb Layout
DCLK Blue Ground DE-O Ground VSYNC R-GND HSYNC G-GND B-GND Ground (SDA) H-sync V-sync (SCL) CONNECTOR W04 POW1 LED1 LED2 CONNECTOR W05 VLCD VLCD LL-T15G1/E15G1 CONNECTOR SIGNAL NAME • BLOCK DIAGRAM • CIRCUIT DIAGRAM • PWB LAYOUT 5 – 1... - Page 18 MTV230 Control Detection & VSOUT Center Scaling Calibration Dithering ISCL IC04 ISDA EEPROM EEPROM Interface IC07 OSD-R OSD-G OSD-B DC 12Vin POWER Control +3.3V LL-T15G1/E15G1 CONNECTOR SIGNAL NAME • BLOCK DIAGRAM • CIRCUIT DIAGRAM • PWB LAYOUT 5 – 2...
- Page 19 LL-T15G1/E15G1 CONNECTOR SIGNAL NAME • BLOCK DIAGRAM • CIRCUIT DIAGRAM • PWB LAYOUT 5 – 3...
- Page 20 LL-T15G1/E15G1 CONNECTOR SIGNAL NAME • BLOCK DIAGRAM • CIRCUIT DIAGRAM • PWB LAYOUT 5 – 4...
- Page 21 LL-T15G1/E15G1 CONNECTOR SIGNAL NAME • BLOCK DIAGRAM • CIRCUIT DIAGRAM • PWB LAYOUT 5 – 5...
- Page 22 © COPYRIGHT 2002 BY SHARP CORPORATION All rights reserved. Printed in Japan. No part of this publication may be reproduced, stored in a retrieval system, or transmitted. In any form or by any means, electronic, mechanical, photocopying, recording, or otherwise, without prior written permission of the publisher.
Need help?
Do you have a question about the LL-T15G1 and is the answer not in the manual?
Questions and answers