Table of Contents
Advertisement
Available languages
Available languages
Quick Links
VENTILATORE DA SOFFITTO CON LUCE
Il presente apparecchio può essere
utilizzato dai bambini a partire da 8 anni
in su e da persone dalle ridotte capacità
mancanza di esperienza e di conoscenza
se a loro è stata assicurata un'adeguata
sorveglianza, oppure se hanno ricevuto
istruzioni
dell'apparecchio e hanno compreso i
pericoli correlati.
I bambini non devono giocare con
l'apparecchio. Le operazioni di pulizia
e di manutenzione non devono essere
effettuate dai bambini senza sorveglianza.
L'installazione
essere effettuata da personale professio-
nalmente qualificato.
Essendo l'installazione dell'apparecchio
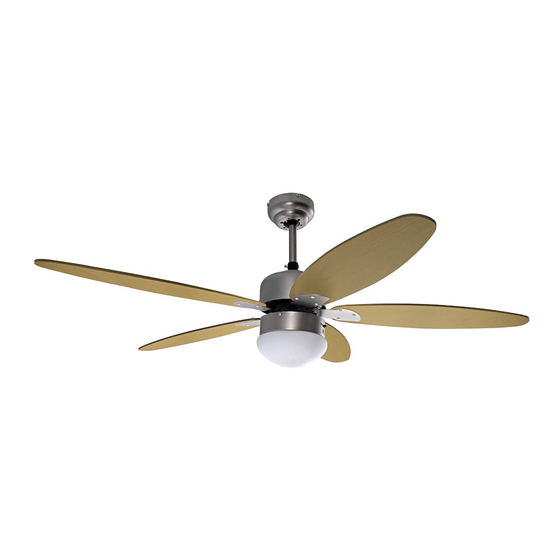
CEILING FAN WITH LIGHT
AR5A130WR
circa
dell'apparecchio
ISTRUZIONI PER L'USO
INSTRUCTIONS FOR USE
l'uso
in
sicurezza
deve
Advertisement
Table of Contents

Related Manuals for ARDES AR5A130WR


Summary of Contents for ARDES AR5A130WR
- Page 1 ISTRUZIONI PER L’USO INSTRUCTIONS FOR USE VENTILATORE DA SOFFITTO CON LUCE CEILING FAN WITH LIGHT AR5A130WR Il presente apparecchio può essere utilizzato dai bambini a partire da 8 anni in su e da persone dalle ridotte capacità mancanza di esperienza e di conoscenza se a loro è...
- Page 2 fissa, l’alimentazione della rete deve essere effettuata conformemente alle regole di installazione vigenti mediante un cavo flessibile con spina o mediante un interruttore onnipolare che assicuri la disconnessione completa nelle condizioni della categoria di sovratensione III. La distanza di apertura dei contatti non deve essere inferiore a 3 mm.
- Page 3 Avvertenze ATTENZIONE: leggere attentamente il presente libretto in quanto contiene importanti istruzioni per la sicurezza di installazione, uso e manutenzione. Istruzioni importanti da conservare per riferimenti futuri. Dopo aver tolto l’imballaggio assicuratevi dell’integrità dell’apparecchio. In caso di dubbio non utilizzate l’apparecchio e rivolgetevi solo a personale qualificato.
- Page 4 In caso di guasto e/o cattivo funzionamento dell’apparecchio, spegnetelo e non manomettetelo. Per l’eventuale riparazione rivolgetevi solo a personale qualificato e richiedete l’utilizzo di ricambi originali. Il mancato rispetto di quanto sopra può compromettere la sicurezza dell’apparec- chio. L’uso di qualsiasi apparecchio elettrico comporta l’osservanza di alcune regole fonamentali, in particolare: -non toccare l’apparecchio con mani o piedi bagnati o umidi -non lasciare l’apparecchio esposto agli agenti atmosferici...
- Page 5 14.Non mettere a contatto con l’acqua o l’umidità, in particolare nel caso in cui il contenitore della batteria dovesse essere danneggiato. 15.Non incapsulare e non modificare le batterie. 16.Conservare le batterie non utilizzate nel loro imballaggio originale lontano da oggetti metallici. Se già rimosse dall’imballaggio, non mischiare o mescolare le batterie.
-
Page 6: Informazioni Tecniche
Informazioni tecniche 1. Morsettiera 2. Piastra di supporto 3. Gancio di sostegno 4. Asta di sostegno 5. Viti per fissare la calotta alla piastra di supporto (4 pcs.) 6. Calotta 7. Perno di sicurezza 8. Fermo di sicurezza e rondella 9. - Page 7 Assemblaggio perno di sicurezza rondella fermo di sicurezza...
- Page 8 sede della semisfera in plastica Accertatevi di avere a disposizione tutti i componenti prima di procedere all’installazione. Per evitare danni assemblare il motore all’asta di sostegno su di una superficie morbida oppure servitevi del polistirolo contenuto nell’imballo. - Aprire la confezione ed estrarre tutti i pezzi del ventilatore (fig. 1) - Montare la piastra di sostegno al soffitto servendovi di due o più...
- Page 9 inserire la calotta sull’asta di sostegno. -Svitare la vite posizionata sulla parte inferiore dell’asta di sostegno e far scorrere i cavi elettrici fuoriuscenti dal corpo motore all’interno dell’asta di sostegno (fig. 5). -Fissare l’asta di sostegno al corpo motore utilizzando il perno di sicurez- za e la rondella precedentemente rimossi.
-
Page 10: Schema Di Collegamento
SCHEMA DI COLLEGAMENTO: NERO 220-240V BIANCO 50Hz GIALLO-VERDE VENTILATORE Per fissare il porta telecomando a parete praticare due fori nel muro tenendo conto che la distanza corrisponda a quella dei due fori sul porta telecomando. Utilizzare le viti in dotazione per fissare il porta telecoman- do alla parete. -
Page 11: Manutenzione
LIGHT: tasto luce. Permette di accendere / spegnere la luce del ventilatore. FAN: tasto ventialatore. Premere questo tasto per accendere il ventilatore; il ventilatore inizierà a funzionare alla velocità massima. Premere questo tasto a ventilatore acceso per spegnerlo. 1H-2H-4H: tasti timer. Permettono di impostare lo spegnimento differito del ventilatore a scelta tra 1H (un ora), 2H (due ore) o 4H (4 ore). - Page 12 Smaltimento BATTERIE - Rimuovere le batterie dall’apparecchio prima dello smaltimento. Non gettare le batterie nei sull’ambiente e sulla salute. Per rimuovere le batterie, seguire le indicazioni delle Istruzioni d’uso. SMALTIMENTO Informazione agli utenti: ai sensi dell’art. 26 del Decreto Legislativo 14 marzo 2014, n. 49 “Attuazione elettriche ed elettroniche (RAEE)”...
-
Page 13: Garanzia
GARANZIA Condizioni La garanzia ha validità 24 mesi dalla data d’acquisto. La presente garanzia è valida solo se viene correttamente compilata ed uisto. L’apparecchio deve essere consegnato esclusivamente presso un nostro Centro Assistenza autorizzato. Per garanzia si intende la sostituzione o la riparazione dei componenti dell’apparecchio che risultano difettosi all’origine per vizi di fabbricazione. - Page 14 This appliance may be used by children 8 years of age and older and people with reduced physical, sensory or mental capacities or with a lack of experience and knowledge if they are adequately supervised or have been instructed on the safe use of the appliance and are aware of the related dangers.
- Page 15 Remove the packing and make sure that the appliance is intact. In case of doubt do not use it and address to an after-sales service recommen- ded by the manufacturer. Do not allow packaging materials like bags and staples can be reached by children. Before connecting the appliance, check if the electrical voltage and frequency of the circuit correspond to those indicated on the appliance.
- Page 16 WARNINGS ABOUT BATTERIES 1.KEEP BATTERIES REACH CHILDREN. Swallowing can lead to chemical burns, perforation of soft tissue, and death. Severe burns can occur within 2 hours of ingestion. Seek medical attention immediately. 2.Do not allow children to replace batteries. 3.Always insert batteries correctly with regard to polarity (+ and -) marked on the battery and the equipment.
-
Page 17: Technical Informations
Technical informations 1. Screw terminal 2. Support plate 3. Support hook 4. Support rod 5. Screws for fixing the cap (4 pcs.) 6. Cap 7. Pin for fix the support rod 8. Safety stopper and washer 9. Motor 10. Switch for reversible function 11. - Page 18 Assembling safety pin washer safety stopper...
- Page 19 groove of the plastic ball Make sure you have all the components before beginning installation. To prevent damage, attach the motor to the support rod on a soft surface or use the polystyrene contained in the package. -Open the carton box and take out the fan (fig. 1) -Assemble the support plate on the ceiling using two or more screw anchors and appropriate washers.
- Page 20 -Unscrew the screw placed on the bottom part of the support rod and insert the electric cables coming out from the motor through the support rod (fig. 5). -Fix the support rod to the motor housing using the safety pin and lock it using the washer and the safety stopper (fig.
- Page 21 SCHEMA DI COLLEGAMENTO: BLUE BLACK 220-240V WHITE 50Hz YELLOW/GREEN To fix the remote control holder to the wall, make 2 holes on the wall taking into consideration that the distance between them must correspond to that between the 2 holes on the remote control holder. Secure it to the wall by using the screws provided.
-
Page 22: Maintenance
LIGHT: it turn on / off the light of the fan. FAN: push this button to turn on the fan. The fan will start at maximum speed. Push this button when the fan is on to turn it off. 1H-2H-4H: timer buttons. Push these button to set the automatic off of the fan: 1H (one hour), 2H (two hours) or 4H (4 hours). -
Page 23: User Information
User Information BATTERIES - Remove the batteries from the appliance before its disposal. Do not dispose the batteries with domestic waste. The batteries must be disposed of in centre. Suitable segregated collection helps prevent damage to the environment and to human health. To remove batteries, refer to Instructions for use. - Page 24 GUARANTEE Terms and Conditions The guarantee is valid for 24 months. with the receipt showing the date of purchase. The guarantee covers the replacement or repair of parts making up the appliance which were faulty at source due to manufacturing faults. After the guarantee has expired, the appliance will be repaired against payment.
- Page 28 Poly Pool S.p.A. Via Sottocorna, 21/B 24020 Parre (Bergamo) - Italy Tel. +39 035 4104000 r.a. - Fax +39 035 702716 http://www.ardes.it - e-mail:polypool@polypool.it MADE IN CHINA...
Need help?
Do you have a question about the AR5A130WR and is the answer not in the manual?
Questions and answers