Harman JBL Professional VTX Series Rigging Manual
Hide thumbs
Also See for JBL Professional VTX Series:
- Quick start manual (20 pages) ,
- User manual (33 pages) ,
- Rigging manual (48 pages)
Table of Contents
Advertisement
Quick Links
Advertisement
Table of Contents

Related Manuals for Harman JBL Professional VTX Series


Summary of Contents for Harman JBL Professional VTX Series
- Page 1 VTX SERIES : A6 | Rigging Manual...
- Page 2 VTX A6 | Rigging Manual GENERAL INFORMATION VTX A6 - Rigging Manual Document Number: 1000364845 Version: A-EN Distribution Date: July 25, 2022 Copyright © 2022 by HARMAN International; all rights reserved JBL PROFESSIONAL 8500 Balboa Blvd Northridge, CA 91329...
-
Page 3: Line Array Calculator
VTX products draw on multiple JBL patents in driver, waveguide, and suspension technology, as well as custom amplification, DSP, control, and system management designs created in collaboration with HARMAN Professional sister companies. VTX loudspeakers marry custom transducer design and in-house manufacture, breakthrough technologies, and a compre- hensive system approach to deliver a premium experience for all who come into contact with them, from the FOH mixing engineer to the systems engineer, rigger, road crew, warehouse manager, and, of course, the audience. -
Page 4: Table Of Contents
VTX A6 | Rigging Manual T ABLE OF CONTENTS 1 - SAFETY . . . . . . . . . . . . . . . . . . . . . . . . . . . . . . . . . . . . . . . . . . . . . . . . . . . . . . . . . . . . . . . . . . . . . . . . . . . . . . . . . . . . . . . . . . . . . . . . . 7 1.1 Safety Instructions . - Page 5 VTX A6 | Rigging Manual 8 - DEPLOYING STANDALONE A6 ARRAYS . . . . . . . . . . . . . . . . . . . . . . . . . . . . . . . . . . . . . . . . . . . . . . . . . . . . . . . . . . . . . . . . . . . . . 32 8.1 Preselect the Angles .
- Page 6 VTX A6 | Rigging Manual 14.1 - VTX A6 MF ..................69 14.2 - VTX A6 SB .
-
Page 7: Safety
VTX A6 | Rigging Manual 1 - SAFETY 1.1 SAFETY INSTRUCTIONS Read these instructions. Keep these instructions. Heed all warnings. Follow all instructions. Do not expose the product to direct rain or sea spray. Clean only with a dry cloth. Do not install near any heat sources such as radiators, heat registers, stoves, or other apparatus that produce heat. -
Page 8: Are You New To Rigging
VTX A6 | Rigging Manual None of the information in this section should be used without first obtaining competent advice with respect to applicability to a given circumstance. None of the information presented herein is intended as a representation or warranty on the part of JBL. Anyone making use of this information assumes all liability arising from such use. -
Page 9: Symbols
VTX A6 | Rigging Manual 1.7 SYMBOLS The following symbols are used in this document: CAUTION: This symbol gives notice of a potential risk of harm to the individual or the equipment. Instructions marked with this symbol must be strictly followed. TIP: This symbol gives notice of helpful, relevant information about the topic. -
Page 10: Mechanical Limits
VTX A6 | Rigging Manual 2 - MECHANICAL LIMITS The VTX A6 suspension system and accessories comply with the 2006/42/EC Machinery Directive and have been designed following the guidelines of DGUV regulation 17 (BGV-C1) for a minimum safety factor of 4:1. Minimum safety factor requirements for suspended arrays are often set by local regulations. -
Page 11: System Components
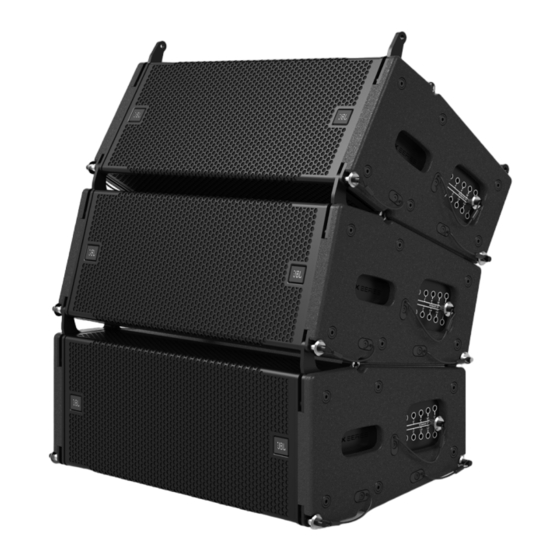
VTX A6 | Rigging Manual 3 - SYSTEM COMPONENTS VTX A6 VTX B15 VTX B15G VTX B28 VTX B18 VTX A6 SB | Suspension Bar VTX A6 MF | Mini Frame VTX A6 CM | Ceiling Mount VTX A6 Road Case... - Page 12 VTX A6 | Rigging Manual VTX RC500 | Rotating Clamp VTX DELTA | Delta Plate VTX B15 ACC | Caster Board & Cover VTX PM | Pole Mount VTX A6 BP | Base Plate VTX B1 GND 229-00009-01 | M10 Eyebolt Set CAUTION: Always use components and accessories specified and approved by JBL Professional.
-
Page 13: Software
VTX A6 | Rigging Manual 4 - SOFTW ARE 4.1 LINE ARRA Y CALCULA TOR 3 Line Array Calculator 3 acoustical prediction software is used for the design and mechanical validation of VTX Series line array systems. Using LAC-3 is a three-step process. First, venue dimensions are defined using either X/Y/Z coordinates or the fast distance/angle meth- od. -
Page 14: Suspended Arrays
VTX A6 | Rigging Manual 4.2 SUSPENDED ARRA YS Line Array Calculator 3 checks the mechanical safety of suspended arrays and takes into consideration all variables that can affect the mechanical safety and safety factors. The software validates the mechanical stresses on the enclosures, speaker rigging components, and all accessories used as part of an array. -
Page 15: Ground-Stacked Arrays
VTX A6 | Rigging Manual 4.3 GROUND-ST ACKED ARRA YS Line Array Calculator 3 checks for the mechanical safety of ground-stacked arrays. The software takes into consideration several vari- ables that can affect the stability of an array, including outside factors such as someone pushing on an array. Based on this data, LAC-3 generates a safety assessment factor and notifies the user of potential mechanical or stability problems. -
Page 16: Rigging System Overview
VTX A6 | Rigging Manual 5 - RIGGING SYSTEM OVERVIEW VTX A6 cabinets include a next-generation rigging system that is easy to use, simple to understand, and highly accurate. The VTX A6 Case contains and transports a vertical stack of up to four A6 enclosures, collapsed and set to the 15-degree position. Cabinet-to-cab- inet splay angle selection is done while the system is still on the ground, simply by moving the angle selection quick release pins (QRP) to the desired positions. -
Page 17: Angle Lock Mechanism
VTX A6 | Rigging Manual 5.2 ANGLE LOCK MECHANISM VTX A-Series cabinets include an innovative Angle Lock mechanism that automatically engages to fix their angles at the selected po- sitions when the system is suspended. Angles can be preselected while the system is still on the ground, eliminating extra steps. The Angle Lock mechanism consists of two main parts: the red LOCKING LEVER and the black RELEASE BUTTON. -
Page 18: Angle Selection
VTX A6 | Rigging Manual 5.5 ANGLE SELECTION The Angle Selection panels on either side of each VTX A6 cabinet, are used to select the cabinet-to-cabinet splay angle. The panels offer eleven unique positions, labeled in degrees. The positions range from 0.5 to 15 degrees. VTX A6 ANGLE OPTIONS: 0.5°, 1.0°, 1.5°, 2°, 3°, 4°, 6°, 8°, 10°,12°, 15°... -
Page 19: Transportation
VTX A6 | Rigging Manual 6 - TRANSPORT A TION The VTX A6 Road Case carries four VTX A6 cabinets and all four cabinets should be set to the STORAGE position (15º) to secure the rigging for transportation. 6.1 INST ALLING VTX A6 CABINETS ON THE ROAD CASE STEPS: •... - Page 20 VTX A6 | Rigging Manual STEPS: • Attach the next cabinet and install the pins on each side to secure the cabinets together. • Set the cabinet angle to the STORAGE position (15º) and make sure the red locking lever is in the locked position. •...
-
Page 21: Closing The Case
VTX A6 | Rigging Manual 6.2 CLOSING THE CASE STEPS: • Lower the Road Case Top over the stack of A6 cabinets, aligning it with the footprint of the Road Case Bottom. • Secure the two parts of the A6 Road Case with the four cam latches. -
Page 22: Storing Accessories
VTX A6 | Rigging Manual 6.3 STORING ACCESSORIES The VTX A6 CASE includes mounting brackets for storing one A6 Mini Frame, one Base Plate and one Suspension Bar. STEPS | MINI FRAME: • Pin the side arms to one another using the attached pins. •... - Page 23 VTX A6 | Rigging Manual STEPS | SUSPENSION BAR: • With the pins removed, drop the Suspension Bar into the two brackets in the front of the road case bottom. • Using the pins attached, pin the Suspension Bar through the brackets on either end to secure it. STEPS | BASE PLATE: •...
-
Page 24: Truck Packing
VTX A6 | Rigging Manual 6.4 TRUCK PACKING 2,434 mm (96 in) 2,286 mm (90 in) -
Page 25: Storing And Stacking Cases
VTX A6 | Rigging Manual 6.5 STORING AND ST ACKING CASES The VTX A6 CASE includes four caster cups that can be used to double stack cases. The cups are rated to handle the load of a fully loaded VTX A6 CASE but are intended for storage, not transportation. TIPPING HAZARD: Pushing stacked cases, is unsafe . -
Page 26: Vtx A6 Mf Mini Frame
VTX A6 | Rigging Manual 7 - VTX A6 MF MINI FRAME The VTX A6 MF Mini Frame is a lightweight, compact, and inexpensive array frame used for suspending VTX A6 and VTX B15 arrays. The three-piece design is comprised of two side arms and one Spreader Bar. The side arms connect to the cabinets, while the Spreader Bar can be pinned to one of 30 pick-point positions, providing excellent tilt resolution. -
Page 27: Mini Frame Storage Configuration
VTX A6 | Rigging Manual 7.2 MINI FRAME STORAGE CONFIGURA TION The Mini Frame can be disassembled and pinned together for storage and transportation. Follow the instructions below to prepare the Mini Frame for storage. STEPS: • Pin the two side arms together using the four quick release pins connected to the side arms. It is not important which storage holes are used for the pins, as this is just for storage. -
Page 28: Attaching The Mini Frame To An A6 Cabinet
VTX A6 | Rigging Manual 7.3 A TT ACHING THE MINI FRAME TO AN A6 CABINET STEPS: • Set the top cabinet to 6º. • Attach the two side arms to the top A6 cabinet. The pins should be installed from the outside of the Mini Frame. •... -
Page 29: Mini Frame Suspension Options
VTX A6 | Rigging Manual 7.4 MINI FRAME SUSPENSION OPTIONS The VTX A6 MF Mini Frame can be used in single-point configurations using the center shackle position of the Spreader Bar. Alterna- tively, the two side shackle positions can be used to facilitate dual-point configurations. When a single point is used, the side shackle positions can be used for safety attachment and vice versa. -
Page 30: Selecting Spreader Bar Positions
VTX A6 | Rigging Manual 7.5 SELECTING SPREADER BAR POSITIONS Each of the Mini Frame side arms includes 30 hole positions for attaching the Spreader Bar. The position of the Spreader Bar determines the overall site angle of the array. The further back the Spreader Bar is attached, the more down angle is generated and vice versa. The exact position of the Spreader Bar for a given angle is determined using Line Array Calculator 3 software. -
Page 31: Mini Frame And Rc500
VTX A6 | Rigging Manual 7.6 MINI FRAME AND RC500 The Mini Frame can be used in combination with the VTX RC500 Rotating Clamp. The VTX RC500 is a universal truss/pipe adapter designed for vertically suspending speaker arrays from standard truss structures or pipes. The RC500 supports arrays of up to 500 kg (1,100 lbs) and is compatible with array frames that support ½-inch shackles, such as the VTX A6 MF. -
Page 32: Deploying Standalone A6 Arrays
VTX A6 | Rigging Manual 8 - DEPLOYING ST ANDALONE A6 ARRA YS Follow the steps below to suspend an A6 array. Instructions on suspending mixed A6/B15 arrays can be found in chapter 10 - Mixed Arrays With A6 and B15. 8.1 PRESELECT THE ANGLES STEPS: •... -
Page 33: Pre-Extending The Rigging
VTX A6 | Rigging Manual 8.2 PRE-EXTENDING THE RIGGING This step is not required, but provides a convenient shortcut. After selecting all the angles, the rigging of the top A6 cabinet can be extended and locked while still on the ground. This can make it much easier to connect flown cabinets to cabinets on the ground, since the rear rigging connection points will generally sit at a much higher elevation. -
Page 34: Suspend The First Stack
VTX A6 | Rigging Manual 8.3 SUSPEND THE FIRST ST ACK STEPS: • Check that all red Locking Levers are in the locked position, then engage the hoist to lift the array off the ground. As the hoist lifts, each cabinet will expand to the selected angle. As each cabinet reaches the correct angle, it stops expanding. •... -
Page 35: Attach The Next Stack
VTX A6 | Rigging Manual 8.4 A TT ACH THE NEXT ST ACK STEPS: • Raise the suspended cluster of VTX A6 cabinets and align the next cart of cabinets below the suspended cluster. • Once the clusters are aligned, carefully lower the suspended cluster until the front attachment points are nearly touching. Check that the attachment points are aligned, then lower the suspended cluster until the front attachment points join together. - Page 36 VTX A6 | Rigging Manual STEPS: • After the two front QRPs have been secured, lower the flown array until the two rear connection points join together. Once touching, insert the two rear QRPs to secure the clusters together. If the angle of the flown cluster is too steep (too much down- tilt) and the rear connection points are too far apart, follow the steps shown below to safely connect the clusters.
- Page 37 VTX A6 | Rigging Manual In some cases, the angle of the flown array may be too steep to fully connect to the cluster on the ground. This can happen when as- sembling large arrays or when the frame pick-point is too far back as shown in the example below. In this situation, a two-step process is used to engage all four connection points for the array.
-
Page 38: Repeat Until Completed
VTX A6 | Rigging Manual 8.5 REPEA T UNTIL COMPLETED Repeat the previous steps until the entire array has been assembled. -
Page 39: Disassembling Arrays
VTX A6 | Rigging Manual 9 - DISASSEMBLING ARRA YS 9.1 OPEN THE ANGLE LOCKS AND A TT ACH THE CASE BOTTOM STEPS: • Safely lower the entire array to a workable height. • Press the Release Buttons on all four lower cabinets to unlock the rigging mechanisms. This enables the bottom four cabinets to collapse back to 15 degree angles once the array is lowered to the ground. -
Page 40: Close The Angle Locks And Move Pins To Storage
VTX A6 | Rigging Manual 9.2 CLOSE THE ANGLE LOCKS AND MOVE PINS TO STORAGE STEPS: • With the Case Bottom installed, lower the array until the front wheels touch the ground. The array should start to roll backwards slightly and, as the array is lowered, the cabinet-to-cabinet angles of the bottom four boxes will close to 15 degrees. •... -
Page 41: Repeat Steps To Disconnect The Next Four Cabinets
VTX A6 | Rigging Manual 9.3 REPEA T STEPS TO DISCONNECT THE NEXT FOUR CABINETS Repeat the previous steps to disconnect and store the next four cabinets of the array. -
Page 42: Repeat Steps To Disassemble The Array
VTX A6 | Rigging Manual 9.4 REPEA T STEPS TO DISASSEMBLE THE ARRA Y... -
Page 43: Mixed Arrays With A6 And B15
VTX A6 | Rigging Manual 10 - MIXED ARRA YS WITH A6 AND B15 VTX A6 cabinets are mechanically and acoustically compatible with VTX B15 single 15-inch subwoofers. All A6 suspension accessories are compatible with the VTX B15, enabling mixed arrays with VTX A6s suspended under B15 subwoofers to be created. This section of the manual covers creating mixed arrays. - Page 44 VTX A6 | Rigging Manual With the frame properly connected, lift the B15 off the ground. STEPS: • Use the electric hoists to raise the B15 off the ground. Continue to add B15s until the desired quantity are suspended. For more information on this process refer to the VTX B15 •...
-
Page 45: Attaching A6 To B15
VTX A6 | Rigging Manual 10.2 A TT ACHING A6 TO B15 Once the B15s have been safely flown, the first cluster of A6 cabinets can be added to the array. Note that the first VTX A6 connected to a B15 subwoofer is always pinned to the 6° position. This allows the top A6 cabinet to sit parallel with the Array Frame. STEPS: •... - Page 46 VTX A6 | Rigging Manual STEPS (CONTINUED): • Raise the suspended cluster of VTX B15 cabinets and align the A6 cabinets below the suspended cluster. • Once the clusters are aligned, carefully lower the suspended cluster until the front or rear attachment points are nearly touching. Check that the attachment points are aligned, then lower the suspended cluster until the front or rear attachment points join.
-
Page 47: Rigging The Array
VTX A6 | Rigging Manual STEPS (TIGHTLY WRAPPED BOTTOM SECTIONS): • Raise the suspended cluster of A6 and B15 cabinets, then align the cart of A6s on the ground underneath the suspended cluster. • Carefully lower the suspended cluster until the front attachment points are nearly touching. Check that the attachment points are aligned, then lower the suspended cluster until the front attachment points join. - Page 48 VTX A6 | Rigging Manual CAUTION: To create a rigid and secure structure when building mixed arrays with A6 and B15 cabinets, each cabinet should always use all four of the connection points corresponding to the points connecting the array to the array frame .
-
Page 49: Vtx A6 Sb Suspension Bar
VTX A6 | Rigging Manual 11 - VTX A6 SB SUSPENSION BAR The VTX A6 SB is a lightweight suspension bar that can be used as an array frame or to implement pull-back for VTX A6 or B15 arrays. When used for pull-back, the VTX A6 SB enables more downtilt than is possible using the VTX A6 MF alone, by attaching it to the bottom cabinet of an array and then connecting to the suspension point for the rear of the array. -
Page 50: Suspension Bar Attachment Tabs
VTX A6 | Rigging Manual 11.2 SUSPENSION BAR A TT ACHMENT T ABS The Suspension Bar can be connected to either the bottom or the top of a suspended mixed array of VTX A6s and B15s. To attach a Suspension Bar to the VTX A6 or B15 cabinet at the bottom of an array, the array attachment tabs will be used in conjuction with the pins from the cabinet. -
Page 51: Pull-Back
VTX A6 | Rigging Manual 11.3 PULL-BACK The primary role of the VTX A6 SB Suspension Bar is as a pull-back attachment at the bottom of an array for configurations requiring a significant amount of downtilt. In this case, the VTX A6 MF connects to the primary suspension point at the top of the array, with the VTX A6 SB mounted to the bottom of the array and lifted by a second motor point at the rear of the array. -
Page 52: Using Two A6 Suspension Bars
VTX A6 | Rigging Manual 11.4 USING TWO A6 SUSPENSION BARS Two VTX A6 Suspension Bars can be mounted to the top and bottom of a VTX A6 array at the same time. This configuration can reduce cost and overall array weight when the flexibility of a VTX A6 MF Mini Frame is not needed. Fixed installations often benefit from this arrangement. -
Page 53: Multi-Point Configuration Examples
VTX A6 | Rigging Manual 11.5 MUL TI-POINT CONFIGURA TION EXAMPLES... -
Page 54: When To Use A Pull-Back
VTX A6 | Rigging Manual 11.6 WHEN TO USE A PULL-BACK The use of a pull-back is common when the center of gravity (CoG) of an array falls outside the footprint of the Array Frame. Typically, long curved arrays with a large downtilt qualify for this condition. When this occurs, LAC-3 displays an error to indicate that the Mini Frame alone cannot achieve the down angle needed for the design (Example 1 - No pull-back). -
Page 55: Using A Single Vtx A6 Sb
VTX A6 | Rigging Manual 11.7 USING A SINGLE VTX A6 SB The Suspension Bar can also be used as the main suspension frame, but this configuration is not recommended for regular use. While the SB is simpler, lighter, and more cost-effective than using a VTX A6 MF, it requires the center of gravity (CoG) of the array to perfectly line up with the shackle position. -
Page 56: Suspension Bar And Mixed Arrays
VTX A6 | Rigging Manual 11.8 SUSPENSION BAR AND MIXED ARRA YS The Suspension Bar can be used as a pull-back in mixed arrays, but not as the main frame at the top. In these situations, a Mini Frame is required to provide the structural rigidity needed for mechanical safety. However, the Suspension Bar can be used at the top of a B15-only array. -
Page 57: The Vtx A6 Ceiling Mount
VTX A6 | Rigging Manual 12 - THE VTX A6 CEILING MOUNT The VTX A6 CM Ceiling Mount accessory allows for a cost-effective way to suspend individual or small A6/B15 arrays from a capable structure in a permanent installation scenario. The ceiling mount creates the lowest profile mounting solution making it a great choice in situations where ceiling height is limited, such as underbalcony fill applications. -
Page 58: Vtx A6 Bp Base Plate
VTX A6 | Rigging Manual 13 - VTX A6 BP BASE PLA TE The VTX A6 BP Base Plate is a universal adapter frame that enables VTX A6 arrays to be ground stacked on top of compatible subwoof- ers or support structures such as stages, scaffolding, or carts. Using the included M20 screw the VTX A6 BP connects to any supported subwoofer equipped with a standard M20 pole mount adapter, such as the VTX B28, VTX B18, or VTX B15. -
Page 59: Storage Position
VTX A6 | Rigging Manual 13.2 STORAGE POSITION 13.3 ANGLE SELECTION PLA TES The Base Plate angle selection plates include eight pin positions, allowing for a range of angles from +5 to -15 degrees in 2.5-degree steps. This facilitates selection of the most appropriate position for establishing the required array down angle. +5°... -
Page 60: M20 Mounting Positions
VTX A6 | Rigging Manual 13.4 M20 MOUNTING POSITIONS The Base Plate includes three M20 positions for attaching to compatible subwoofers. The hole positions are designed to align the A6 cabinets at the ideal point on different sized subwoofers to provide stability while allowing for the full range of angle selection. LAC-3 calculates the correct mounting hole based on the system selected and displays this information to the user for proper installation. -
Page 61: Vtx B1 Gnd
VTX A6 | Rigging Manual 13.5 VTX B1 GND To increase the footprint of the B15, the B1 GND accessory can be purchased separately and installed. The B1 GND feet attach to the B15 using the four corner quick release pins, and provide additional stability for taller arrays. The feet are only needed when the Base Plate is used in conjunction with the VTX B15 or B18 . -
Page 62: Assembling Ground-Stacked Arrays
VTX A6 | Rigging Manual 13.6 ASSEMBLING GROUND-ST ACKED ARRA YS The A6 Base Plate attaches to any JBL VTX subwoofer with an M20 pole mount adapter/plate. Before attaching the Base Plate, as- semble the subwoofer array/stack and place it in the desired location and position. The Base Plate connects to the subwoofers using the included M20 knob. - Page 63 VTX A6 | Rigging Manual STEPS (CONTINUED): • Place the first A6 onto the Base Plate and pin the front two corners. • Lift the back of the A6 and position the angle selection plate at the desired location. Pin the rear two corners. CAUTION: Safe limits for ground-stacked arrays always assume that the stacking surface (floor or stage) is flat .
- Page 64 VTX A6 | Rigging Manual STEPS (CONTINUED): • Set the cabinet-to-cabinet angle for the first A6 and extend the rigging arms. • Stack the next A6 on top, pin the cabinets together, and set the angle for the next cabinet. •...
-
Page 65: Ground Stack Examples
VTX A6 | Rigging Manual 13.7 GROUND ST ACK EXAMPLES VTX A6 VTX A6 BP VTX B28 VTX B28 GND... -
Page 66: Attaching The Base Plate Onto A Structure
VTX A6 | Rigging Manual 13.8 A TT ACHING THE BASE PLA TE ONTO A STRUCTURE The Base Plate can be permanently attached to a structure like a stage or platform using its four M10 through-holes. This is especially useful for permanent installations or other fixed applications where a ground-stacked A6 system is needed but not often moved. In such situations, the base plate is permanently attached to the structure and subwoofers are not used beneath the array. -
Page 67: Pole Mounting A6 Arrays
VTX A6 | Rigging Manual 13.9 POLE MOUNTING A6 ARRA YS The VTX A6 BP Base Plate can be mounted on top of a standard 35 mm pole when used in conjunction with the VTX PM. This pole mount accessory attaches directly to the bottom of the Base Plate using two included M10 thumb screws. For optimum performance the bottom speaker should be placed above ear height (1.9 m or 75 in), and the angles provide below are a good starting point for a flat 20 m (60 ft) deep venue. - Page 68 VTX A6 | Rigging Manual CAUTION: Do not deploy ground-stacked arrays on non-flat surfaces to avoid tipping hazards . Safe limits for ground-stacked arrays always assume that the stacking surface (floor and stage) is flat . CAUTION: Lifting or pushing the extension rod, or sliding the subwoofer with a loaded extension rod, is unsafe . This can result in permanent damage or reduce the capacity of the M20 plate, potentially leading to a falling loud- speaker and personal injury .
-
Page 69: Specifications
VTX A6 | Rigging Manual 14 - SPECIFICA TIONS 14.1 - VTX A6 MF 87 mm 509 mm (20.0 in) (3.4 in) 518 mm (20.4 in) TECHNICAL SPECIFICA TIONS PHYSICAL Construction : High-grade steel with anti-corrosion coating Finish : Black powder coat Compatible Shackle Size : 1/2-inch Mechanical Limits... - Page 70 VTX A6 | Rigging Manual 14.2 - VTX A6 SB FRONT LEFT/RIGHT 66 mm BACK (2.6 in) 60 mm (2.4 in) 518 mm (20.4 in) TECHNICAL SPECIFICA TIONS PHYSICAL Construction : High-grade steel with anti-corrosion coating Finish : Black powder coat Compatible Shackle Size : 1/2-inch Mechanical Limits...
- Page 71 VTX A6 | Rigging Manual 14.3 - VTX A6 CM LEFT/RIGHT 301 mm Ø 10 mm (0.4 in) (11.9 in) 518 mm (20.4 in) FRONT/BACK 31 mm (1.2 in) TECHNICAL SPECIFICA TIONS PHYSICAL Construction : High-grade steel with anti-corrosion coating Finish : Black powder coat Mechanical Limits...
- Page 72 VTX A6 | Rigging Manual 14.4 - VTX A6 BP LEFT/RIGHT 301 mm (11.9 in) 55 mm (2.2 in) 509 mm (20.0 in) FRONT/BACK TECHNICAL SPECIFICA TIONS PHYSICAL Construction : High-grade steel with anti-corrosion coating Finish : Black powder coat Mechanical Limits (2) VTX A6 Safe Limit :...
-
Page 73: Vtx A6 Case
VTX A6 | Rigging Manual 15.5 - VTX A6 CASE 615 mm 1,105 mm (24.2 in) (43.5 in) 564 mm (22.2 in) TECHNICAL SPECIFICA TIONS PHYSICAL Construction : 9 mm, 25 mm exterior grade birch plywood, aluminum, high-grade steel with anti-corrosion coating Finish : Black DuraFlex™... -
Page 74: Vtx Pm
VTX A6 | Rigging Manual 14.6 - VTX PM FRONT/BACK LEFT/RIGHT 105 mm (4.1 in) 40 mm (1.6 in) 115 mm (4.5 in) 146 mm (5.7 in) TECHNICAL SPECIFICA TIONS PHYSICAL Construction : Steel with anti-corrosion coating Finish : Black powder coat Compatible Pole Size : 35 mm Dimensions (H x W x D) -
Page 75: Vtx Rc500
VTX A6 | Rigging Manual 14.7 - VTX RC500 137 mm (5.4 in) 128 mm (5.0 in) 254 mm (10.0 in) TECHNICAL SPECIFICA TIONS PHYSICAL Construction : High-grade steel with anti-corrosion coating Finish : Black powder coat Working Load Limit 500 kg (1,100 lbs) Dimensions (H x W x D) 254 mm x 128 mm x 137 mm... -
Page 76: Contact Information
VTX A6 | Rigging Manual 15 - CONT ACT INFORMA TION UNITED ST A TES OF AMERICA HARMAN Professional Solutions U .S .A . Technical Support 8500 Balboa Blvd. +1 (844) 776-4899 Northridge, CA 91329 HProTechSupportUSA@Harman.com www.jblpro.com +1 (844) 776-4899 www.jblpro.com... - Page 77 VTX A6 | Rigging Manual...
Need help?
Do you have a question about the JBL Professional VTX Series and is the answer not in the manual?
Questions and answers