Table of Contents
Advertisement
Quick Links
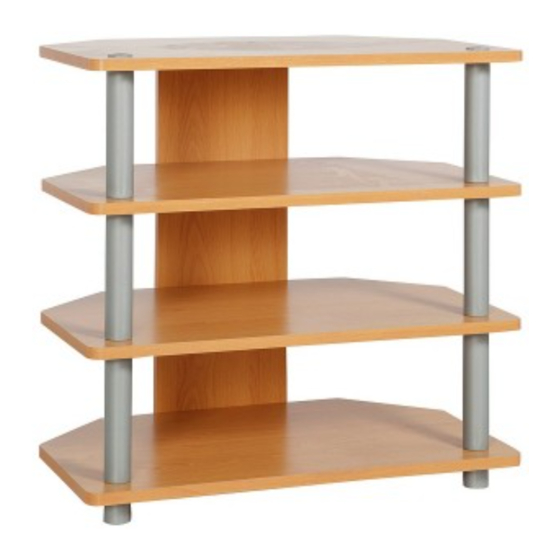
Components
A
1 x Table Top
C
1 x Back Panel
D
6 x Leg
A
2 x Cap Screw
B
2 x Locking Pin
1 x Tool
E
B
3 x Shelf
E
2 x Foot
D
6 x Screw
C
2 x Locking Nuts
Verona Corner TV Entertainment Unit
Simple Assembly Instructions
IMPORTANT
1. Read these instructions carefully and
familiarise yourself with the procedure
before assembling the unit.
2. Check that you have all the component
parts following the list on the back
cover and familiarise yourself with
each part before proceeding.
-
Please keep for future reference
3. Take all the fittings out of the plastic bag
and separate them into their groups.
4. Ensure you have enough space to lay out
all the parts before assembly.
5. To avoid scratching it is recommended
that you assemble the unit on a soft
level surface.
Advertisement
Table of Contents

Related Manuals for Argos Verona 6103475


Summary of Contents for Argos Verona 6103475
- Page 1 Components Verona Corner TV Entertainment Unit 1 x Table Top 3 x Shelf Simple Assembly Instructions Please keep for future reference 1 x Back Panel 2 x Foot 6 x Leg IMPORTANT 3. Take all the fittings out of the plastic bag 1.
- Page 2 Assembly Instructions Assembly Instructions Stage 1 – Stage 2 – Fitting the Back Panel Fitting the Shelves NOTE: It would be useful to ask NOTE: It would be useful to ask someone to help you at this someone to help you at this stage.
- Page 3 Assembly Instructions Assembly Instructions Stage 2 – Stage 3 – Fitting the Shelves Fitting the Table Top NOTE: It would be useful to ask someone to help you at this stage. 4. Carefully locate the third Shelf B onto the unit. See fig.
- Page 4 Assembly Instructions Assembly Instructions Stage 3 – Stage 4 – Fitting the Table Top Finishing the Unit NOTE: It would be useful to ask someone to help you at this stage. 3. Screw in Cap Screws to fix the Table Top A onto the unit. See fig.
Need help?
Do you have a question about the Verona 6103475 and is the answer not in the manual?
Questions and answers