Advertisement
Quick Links
Assembly Instructions
Instructions de montage
CONTACT US FIRST
WEBSITE
www.prepacmfg.com/content/replacement-part-order
Complete our easy to use order form
BY EMAIL
parts@prepacmfg.com
BY PHONE
1-877-PREPAC1 (1-877-773-7221)
Mon - Fri: 7am - 4pm PST / 10am - 7pm EST
•
If you have received a damaged or defective part
•
If you are missing hardware or parts
•
For help with assembly
Replacement parts will leave our facility within two business days via UPS
ground or mail. Please note: shipping times will vary depending on location.
Before you call please:
1)
Record the following information from the shipping label on the outside
of the box. You will need it for warranty purposes:
•
Ship To Name
•
Sales Order Number
2)
Note the product model number.
3)
Review the contents of your shipment to determine
what you are missing.
Option de service en ligne
Complétez le formulaire Commande de Pièces de Rechange disponible dans la
section Soutien à la clientèle de notre site web : www.prepacmfg.com
•
Si vous avez reçu une pièce endommagée ou défectueuse
•
Si vous manquez la quincaillerie ou les pièces
Les pièces de rechange quitteront notre installation dans deux jours ouvrables via
UPS par terre ou le courrier. Notez s'il vous plaît que les temps d'expédition varieront
selon l'emplacement.
Pour parler avec quelqu'un en français, s'il vous plaît contacter votre détaillant.
Required Tools / Outils requis
Prepac Manufacturing Ltd.
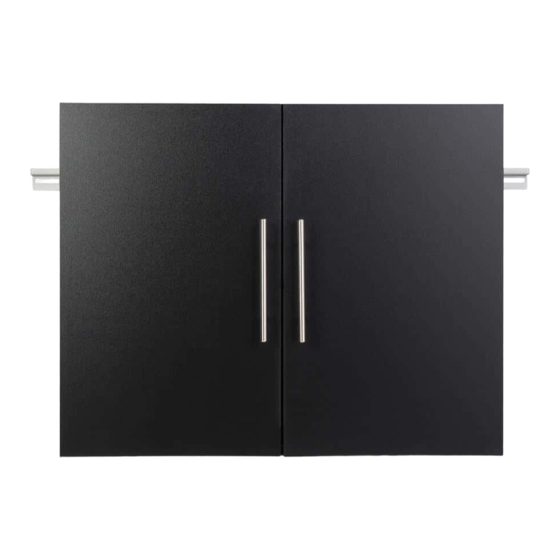
30" Wide Upper Wall Cabinet
Armoire supérieure accrochable de 30 po
Model #
7/32" inch diameter
7/32 de pouce de diamètre
BSUW-0707-1
GSUW-0707-1
WSUW-0707-1
(3/16th size can also be used)
(3/16
taille peut également être utilisé)
ième
Installation requires 2 people
L'installation exige 2 personnes
Stud Finder
Détecteur de montant
Detector de travesaños
LB-0739 2021-03-25
Advertisement

Related Manuals for Prepac BSUW-0707-1


Summary of Contents for Prepac BSUW-0707-1
- Page 1 Pour parler avec quelqu’un en français, s’il vous plaît contacter votre détaillant. Required Tools / Outils requis Stud Finder 7/32” inch diameter (3/16th size can also be used) Détecteur de montant 7/32 de pouce de diamètre (3/16 taille peut également être utilisé) ième Detector de travesaños Prepac Manufacturing Ltd. LB-0739 2021-03-25...
- Page 2 Cabinet Parts / Pièces du cabinet Top / Bottom (2) * Left Side (1) Right Side (1) Adjustable Shelves (1) Doors (2) Dessus / Bas Côté gauche Côté droit étagère ajustable porte TP-10053-B SL-10055-B SR-10055-B SF-10041-B DR-10037-B black / noir black / noir black / noir black / noir...
- Page 3 Hardware / Quincaillerie Metal Rail (1) Rail métallique RM-0924 Metal Connecting Brace (1) Raccordement métallique renfort RM-0905 3’’ Wood Screw (3) Vis à bois 3 pouces RM-0835 Metal Pull & Screw Set (2) Poignée métallique & Jeu de vis RM-0306 Allen Key (1) Allen Key Bit (1) Clef “Allen”...
- Page 4 Attach Rail Hooks to the Left (C2) & Right (C3) Sides. Use wrench to tighten nuts Fixez les crochets de suspension aux côtés gauche (C2) et droite (C3) Nylon Lock Nut Écrous de blocage en nylon Rail Hook Crochet de suspension Bolt Boulon...
- Page 5 Attach hinge plates to Left (C2) and Right (C3) Sides Fixez les plaques de charnière aux côtés gauche (C2) et droite (C3) Page 5 of 20...
- Page 6 Attach Top (C1) to Left (C2) and Right (C3) Sides with Confirmat Screws Fixez le dessus (C1) aux côtés gauche (C2) et droite (C3) avec les Vis Confirmat Confirmat Screw Vis Confirmat Page 6 of 20...
- Page 7 Attach Bottom (C1) to Left (C2) and Right (C3) Sides with Confirmat Screws Fixez le bas (C1) aux côtés gauche (C2) et droite (C3) avec les Vis Confirmat Confirmat Screw Vis Confirmat Page 7 of 20...
- Page 8 Attach hinges to doors (C5) with the #6 - 5/8” Wood Screws Fixez les charnières de portes (C5) avec vis de bois no. 6 5/8 po. #6 - 5/8” Wood Screws Vis de bois no. 6 5/8 po. Attach handles to doors (C5) with screws provided. Do not attach doors to cabinets yet.
-
Page 9: Online Help
L’AIDE EN LIGNE To see a how-to installation video, click on Pour visionner le vidéo décrivant l’installation “How to Install Prepac’s Garage Storage rangement de garage de suspension, consultez Collection” on the Assembly page in the la page de Soutien Produits sur notre site web : Support section of our website: www.prepacmfg.com/content/assembly... - Page 10 Hanging a Single Accrocher une seule 30” Cabinet armoire 30 po. If you are installing one cabinet only, make sure the Si vous installez un seul cabinet uniquement, metal rail covers 3 studs and center the cabinet assurez-vous que le rail métallique couvre 3 across the studs.
- Page 11 Hanging Multiple Cabinets Pour suspendre plusieurs armoires We will illustrate how hang multiple cabinets using the Nous allons illustrer comment accrocher plusieurs armoires à sample configuration below. partir de l’exemple de configuration ci-dessous. 1. On your wall, mark where the cabinets will be 1.
- Page 12 The illustration below shows where the Metal Rails & L’illustration ci-dessous montre où les rails métalliques & Connecting Braces should be attached to the wood la connexion les accolades ne doivent être connectés au studs for this configuration bois goujons pour cette configuration NOTE: Rails and Braces are shown ABOVE cabinets REMARQUE : Les rails et les accolades sont indiqués for clarity...
- Page 13 Installing Hang Ups Garage Cabinets Installation “Hang Ups” Garage armoires Measure 79½ inches from the floor and make multiple marks along the wall Mesurer 79½ pouces du sol et faire plusieurs repères le long du mur 79½” With a level, connect the marks Avec un niveau, connectez les marques Page 13 of 20...
- Page 14 Find the center of the wall studs and mark the Pre-drill holes 3 inches deep at the locations location of each stud along the line. Studs are you had marked. Use a 7 / 32 nd inch drill bit typically 16 inches apart center to center. Faites trois performations de 3 pouces de Trouver le centre du mur et marquer profondeur aux points que vous avez marqué...
- Page 15 Hang the First Rail Attach the Connecting Brace Accrocher la première position de Rail Fixez le renfort reliant Position the Metal Rail over the pre-drilled holes and Position the Connecting Brace so that it overlaps the insert wood screws into the first & second holes. last hole on the First Metal Rail.
- Page 16 Hanging the Second Rail Accrocher le deuxième position de Rail Slide the second Metal Rail BEHIND the Faites glisser le Rail Métallique deuxième derrière le Connecting Brace connectant le renfort Secure the Connecting Brace to the Sécuriser la connexion renfort pour le deuxième rail Second Rail Page 16 of 20...
- Page 17 Carefully hang the cabinet onto the Metal Rail until it locks into place. Laisser pendre soigneusement le cabinet sur la rail métallique jusqu’à ce qu’elle se verrouille en place. Make sure the Rail Hook slides fully into the notch on the Metail Rail Track. Assurez-vous que le crochet de Rail de diapositives pleinement dans l’encoche du Metail voies de chemin de fer.
- Page 18 Insert Shelf Pins and add adjustable shelves Insérer les goupilles étagère et ajouter étagères réglables Attach doors Fixez les portes Optional Cover visible screw heads with caps Optionnel Couvrir les têtes de vis visibles avec des capuchons Page 18 of 20...
- Page 19 Hinge Adjustments Ajustements de charnière Hinges are 6-way adjustable, Les charnières sont 6-voies réglables, vous allowing you to make precise adjustments. permettant d’effectuer des réglages précis. Vertical Door Alignment: Loosen the top & bottom Hinge Plate Screws (on both hinge sets) and move the door up or down.
- Page 20 Give Us Your Feedback Faites-nous part de vos commentaires CALL US 1-877-PREPAC1 (1-877-773-7221) Écrivez-nous à : Mon - Fri 7am - 4pm PST assembly@prepacmfg.com 10am - 7pm EST Email Us: assembly@prepacmfg.com Thanks! Merci! Page 20 of 20...
Need help?
Do you have a question about the BSUW-0707-1 and is the answer not in the manual?
Questions and answers